Request Management
Get quick answers to common request management questions in ServiceOps, so you can log, track, and resolve IT requests without friction.
Common questions about request management in ServiceOps, for Technicians and IT Admins.
Can I expand or collapse the form fields?
A: Yes, you can easily collapse ![]() and expand
and expand ![]() the form fields on any module's form page by clicking the corresponding icons.
the form fields on any module's form page by clicking the corresponding icons.
What are the bulk actions available for tickets?
A: The following bulk actions are available for tickets:
- Update: Add or change the value of common fields in multiple requests.
- Merge: Merge multiple duplicate or similar requests with one request in one go.
- Claim: Claim multiple requests at once.
- Assign: Assign multiple requests to the desired technician at once.
- Resolve: Change the status of multiple requests to resolved at once.
- Close: Close multiple requests in one go.
- Mark as Spam: Mark the unwanted requests as spam in one go.
- Archive: Archive the old and obsolete requests in one go.
- Solution: Add solution to multiple requests.
- Diagnosis: Add or update the diagnosis for multiple requests. The Insert from Template and Insert Knowledge options are also available when performing bulk Diagnosis updates.
- Restore: Once archived, restore the required multiple requests in one go.
- Delete: Once archived, delete the required requests in one go.
What are the fields that I can update in bulk?
A: The following fields can be updated in bulk:
- Status: Update the status of multiple tickets at once, you can change to Open, Inprogress, Pending, Resolved, and Closed, and any custom status.
- Assignee: Change the assignee of multiple tickets at once.
- Technician Group: Assign or update technician group to multiple tickets.
- Urgency: Set or change the urgency of multiple tickets in one go.
- Priority: Set or change the priority of multiple tickets.
- Impact: Set or change the impact of multiple tickets.
- Category: Set or change the category of multiple tickets.
- Location: Set or change the location of multiple tickets.
- Source: Set or change the source of multiple tickets.
- Department: Set or change the department of multiple tickets.
- Attach Files: Attach a single file to multiple tickets.
- Add Tags: Add tags to multiple tickets.
Why I am not able to create Viber chatbot for integration?
A: The chatbot is created by Rakuten Viber's partners or team only. Hence, they will provide the complete steps.
Why should I add a watcher to a ticket?
A: The Add Watcher feature is used to monitor tickets when a request is assigned to another technician so that necessary actions can be taken when required. With this, the watcher will receive a notification whenever any activity takes place on the ticket.
Can I know the reason for failed imported users?
A: Yes. Once the import process is completed, a batch file is generated which contains the reason for failed users. You can open that batch file and view the details in the Message column.
Can I merge similar requests into one?
A: Yes.
Can I remove the Quick Create option for the Requesters?
A: Yes, you can remove the Quick Create option by disabling the fields for Incident and Service Request creation from the Admin > Support Channels > Support Portal Settings.
Can I create custom filters to view the list of requests according to my choice?
A: Yes, you can create custom filters on the list page by searching for the required data and then saving it using the blue Star ![]() icon.
icon.
Can the system automatically assign priority for requests?
A: Yes, using Priority Matrix feature, the system can automatically assign priority to requests.
From where can I add multiple currency options in the application?
A: You can add multiple currencies from the Admin > Organization > Account Details tab.
How do I convert an Email into an Incident Request?
A: You can convert an email into a request using the Email-to-ticket feature. To convert,
- Configure an Incoming Email Server.
- Enable the following fields from the Admin > Support Channels > Email > Email Preference tab:
- Enable Email to Ticket
- Allow Guest User to generate request from Email to Ticket
- Next, send an email on the email address configured in the Incoming Email Server.
- The email will be converted into a Request and listed on the Request list page in the Technician Portal.
- Here, the email's subject line will be used as the Request Subject, and its content will become the Request Description.
Can I include an Attachment in the Chat when making a Request?
A Yes. To do so,
- The Technician must add a System or Custom Attachment field in the Create Request Chat Flow using the 'Reference Choice' question type. This functionality applies to all chat applications.
- In the SAAS version, files up to 5 MB can be attached. Additionally, files blocked from the Admin System Preferences cannot be uploaded.
- In the Service Catalog, only the Custom Attachment Field is supported, whereas in Incident Request, both System and Custom Attachment Fields are supported.
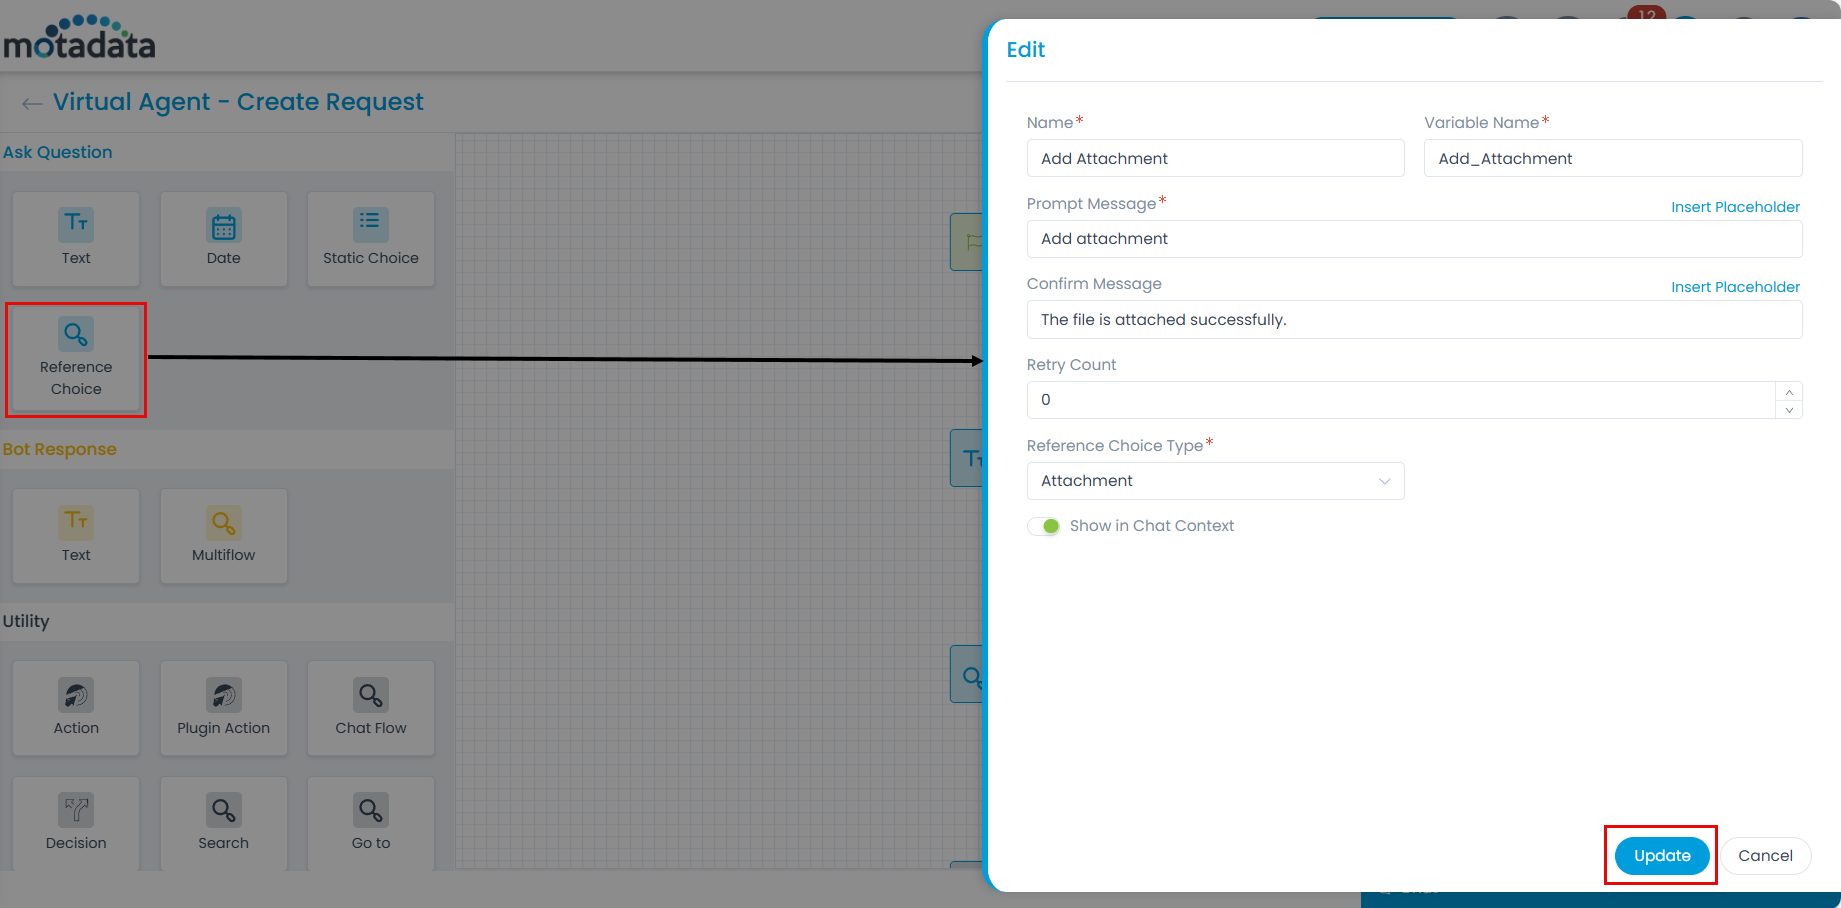
- Once the attachment field is added, map and set its output field for the user to view, as shown below.
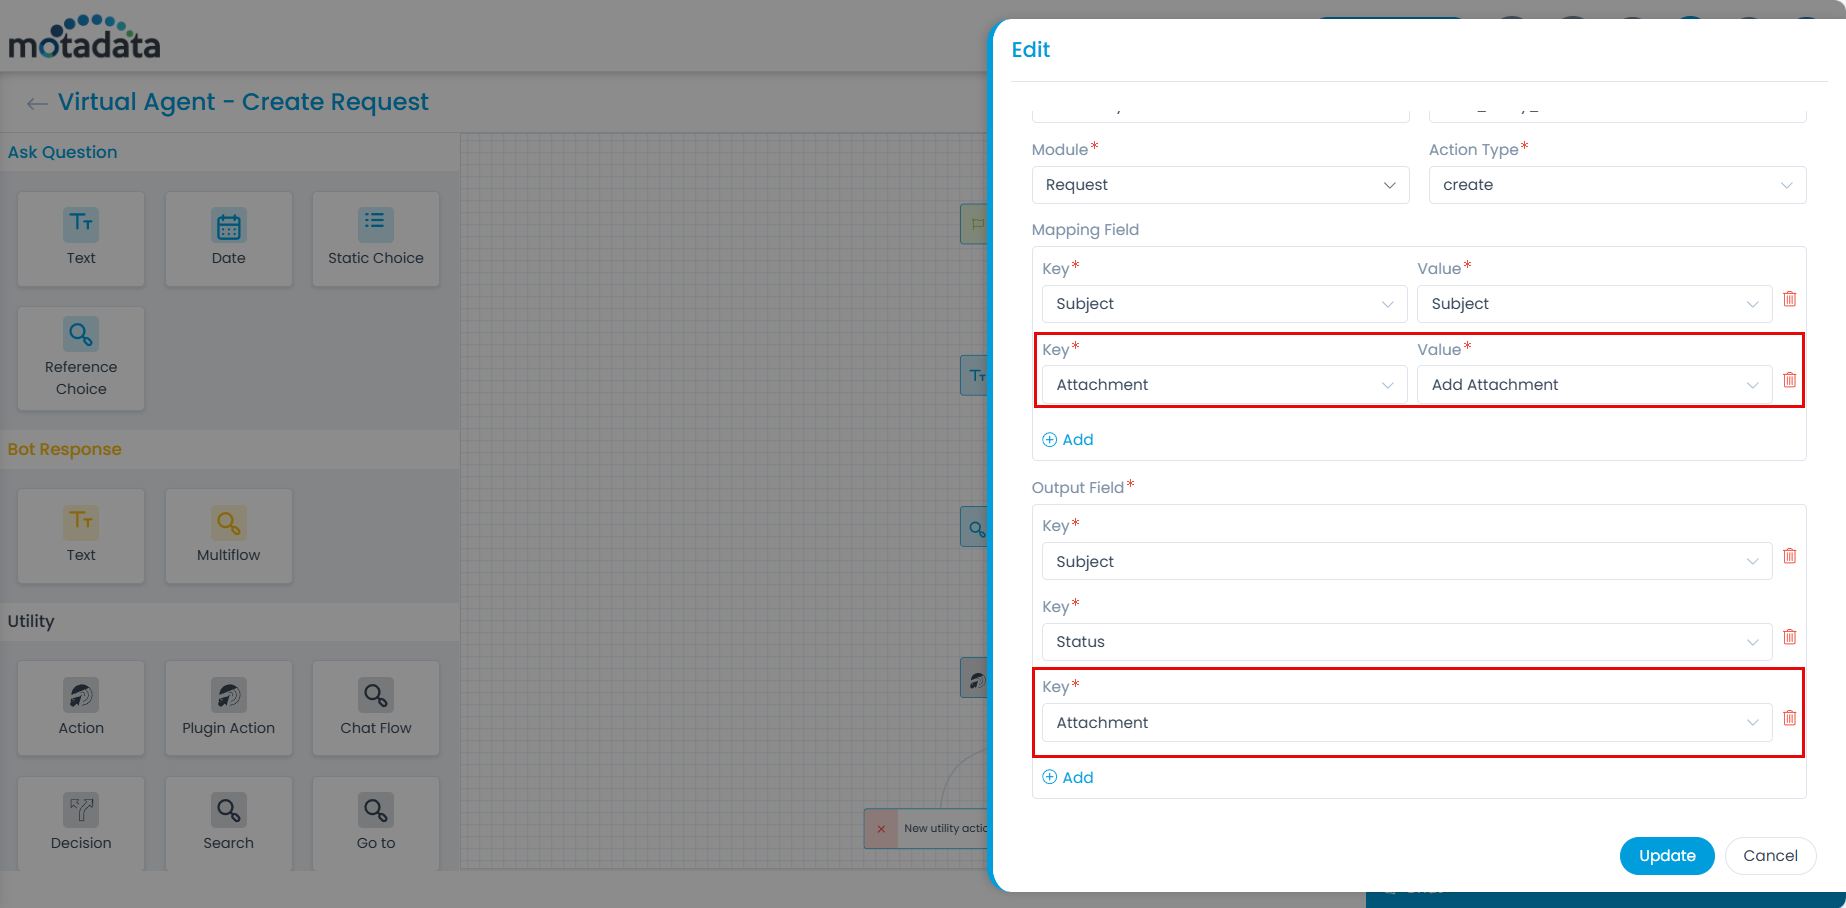
- Update the Chat Flow and Train the model.
- Once the model is trained, the users can initiate the chat and add attachments when creating a request in the chat.
