Create Automatic Patch Deployment
You can create a new Automatic Patch Deployment directly into the system when you are logged in from the list page.
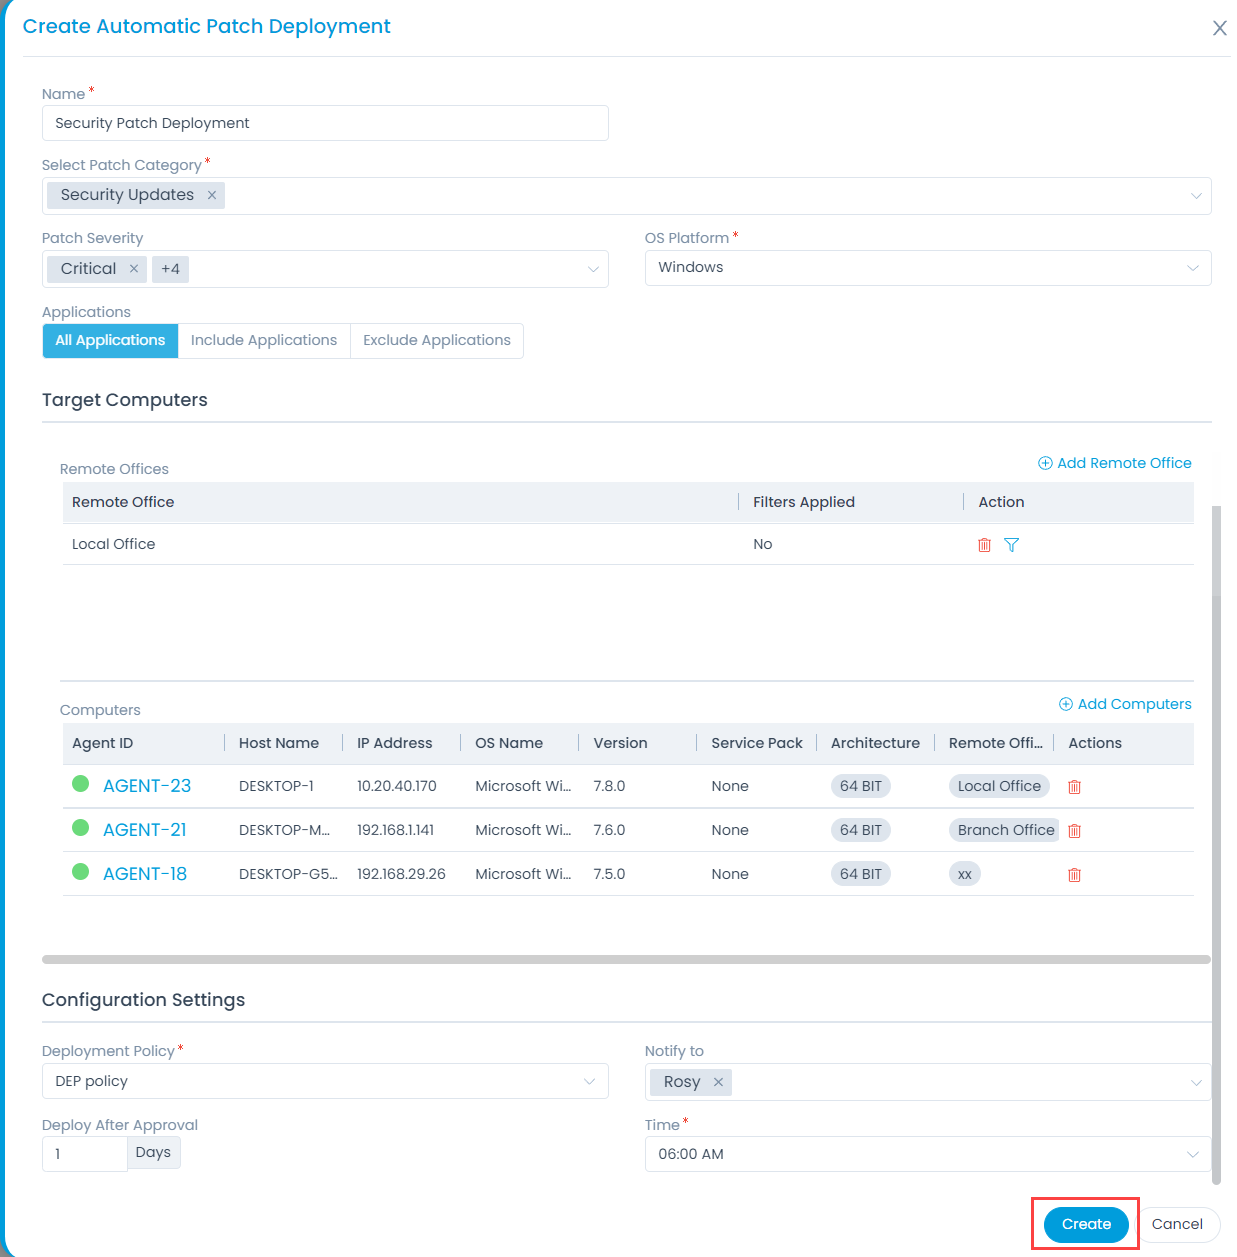
To do so, Click the Create Automatic Patch Deployment button on the top-right corner of the list page. A popup appears as shown below:


Enter the following details:
- Name: Enter the name of the patch deployment.
- Select Patch Category: Select the category from the dropdown.
- Patch Severity: Select the severity of the patch deployment from the dropdown.
- OS Platform: Select the desired OS from the dropdown.
- Applications: Select the applications on which the Automatic Patch Deployment is to be performed.
The options are:
- All Applications: It will include all the applications in the system.
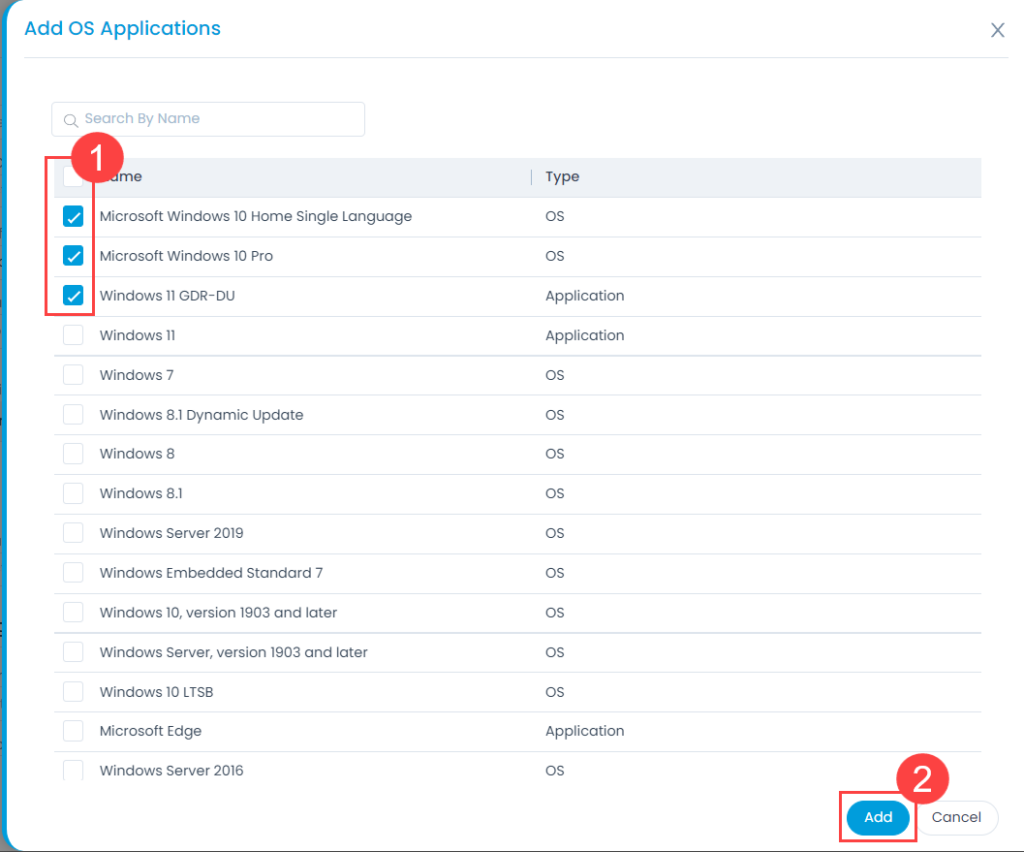
- Include Applications: It will include all the applications selected using the Add Applications link on the right corner as shown below.


- Exclude Applications: It will exclude the applications selected using the Add Applications link on the right corner as shown below.


Target Computers
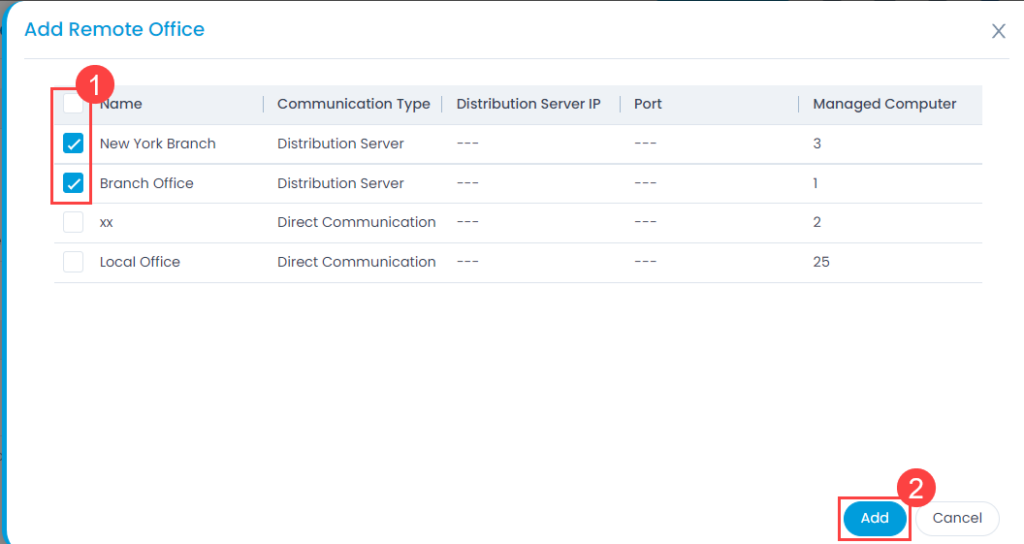
- Remote Offices: Add the Remote Offices using the Add Remote Office link on the right corner as shown below. For more details, click Remote Offices.


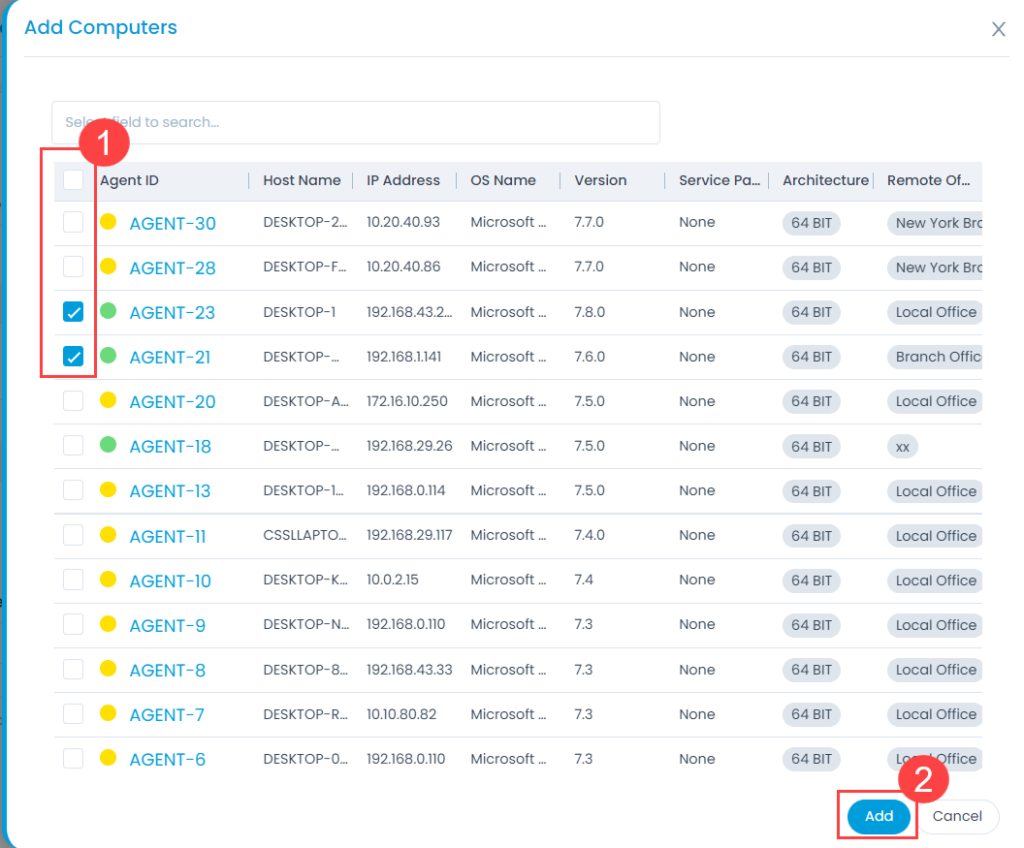
- Computer: Add the Computers using the Add Computers link on the right corner as shown below. For more details, click End Points Scope.


Configuration Settings
- Deployment Policy: Select the deployment policy from the dropdown. You can also create a new policy. For more details, click the link Deployment Policies page.
- Notify to: Select the users from the dropdown to whom you wish to notify about the Automatic Patch Deployment.
- Deploy After Approval: Enter the number of days after which the patch is to be deployed, once approved.
- Time: Select the time at which the deployment should start.
Once you are done, click Create, and the Automatic Patch Deployment gets created.