Schedule Report
The Schedulers in the reports are tasks that do specific operations periodically. For reporting, the schedulers are used to generate and send the report to different people.
To create a schedule,
- Click the calendar icon available on the reports list page as shown in the below-left figure. The Schedule Report popup appears.
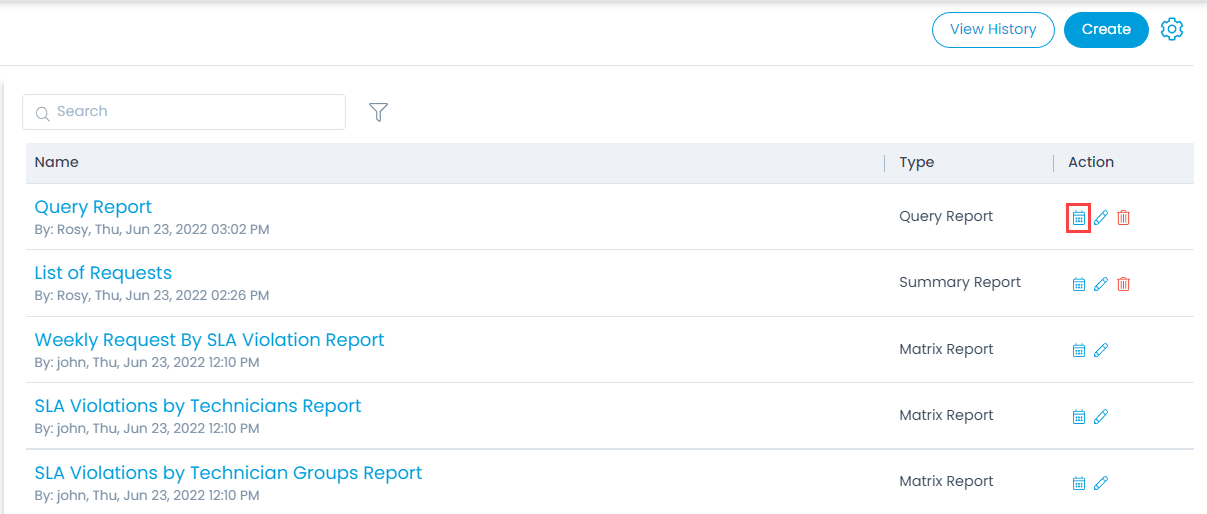

The page displays the schedulers configured only for that particular report. In the popup you can perform the following tasks:
- View the schedules
- Create schedule
- Edit schedule
- Delete schedule
- Search schedule
- Enable or disable the schedule
- Click the Create Schedule button and the page appears.

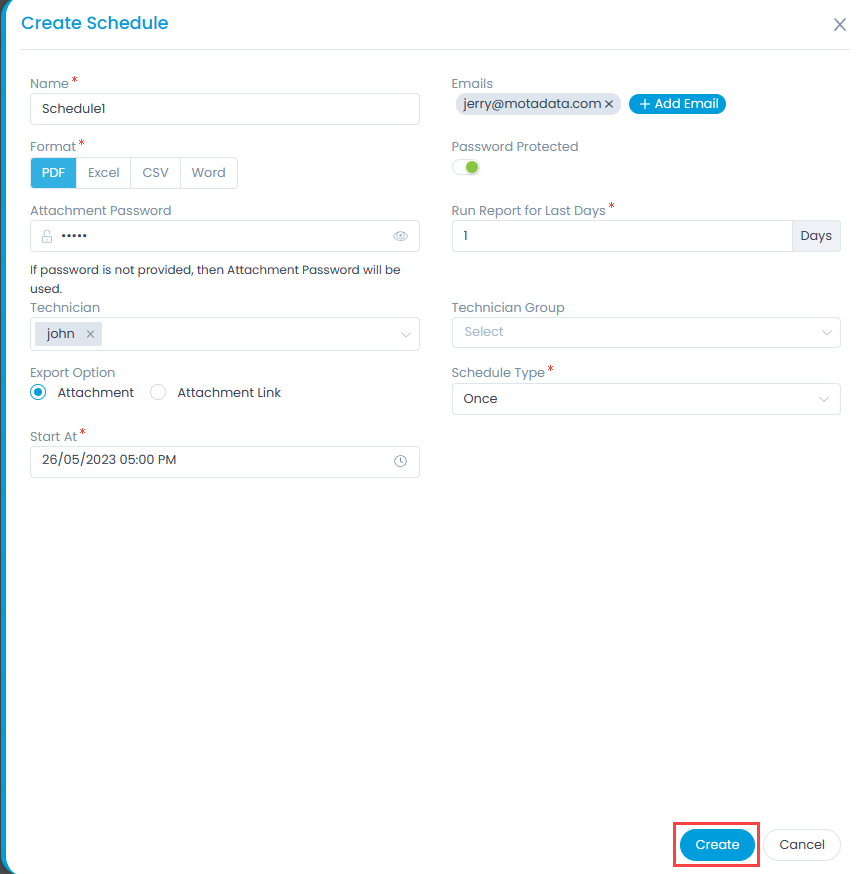
- Enter the following details:
| Parameter | Description |
|---|---|
| Name | Enter the name of the schedule. |
| Emails | Enter the email address of the people to whom you want to send the report. |
| Format | Select the format of the report. The options are: PDF, Excel, CSV, and Word. |
| Password Protected | Enable to secure the report with a password. You can password protect the reports of PDF, Excel, and Word formats only. |
| Attachment Password | If Password Protect option is enabled, enter the password here. If not provided, and a common password is already set from Edit User Profile page, then that will be used. |
| Run Report for Last Days | Select the number of days for which you want to generate the report data. For example: If 2 is set, the report will be generated for the last 2 days of the set schedule. |
| Technician | Select the technicians to whom you want to send the report. |
| Technician Group | Select the Technician Groups to whom you want to send the report. |
| Export Option | Select whether you want to export the report as an attachment or attachment link. |
| Schedule Type | Select the type of schedule. The options are: - Once: The schedule will run only once on the selected start date. - Daily: The schedule will run daily starting from the selected start date and time. - Weekly: The schedule will run once a week as per the selected day and time. - Monthly: The schedule will run once a month as per the selected date, time, and month. |
| Start At | Select the date from which the schedule should start running. |
| Time | Select the time at which the schedule should run. |
| Day (Available for Weekly schedule) | Select the day on which the schedule should run. |
| Date | Select the date based on which the schedule should run. |
| Month (Available for Monthly schedule) | Select the month till which the schedule should run. |
- Once done, click Create and the schedule gets created.