On-Premise File Server Installation for SaaS
The File Server works as a File Storage for Patch and Package Management. You can install it on the same machine where the main server is installed or on another that is reachable by the main server. The File Server is mandatory for Patch/Package Management, thus is mandatory if the Patch Management license is enabled. If the Main Server is on the SaaS platform, you need to install it on-premise to connect the File Server with it. To do so, follow the steps in the Installation section.
Prerequisites
- .NET Framework 3.5
- The file-server machine must have a Live IP address accessible from anywhere.
- Live File Server
- Ensure bidirectional connectivity between the File Server and ServiceOps SaaS application.
Architecture
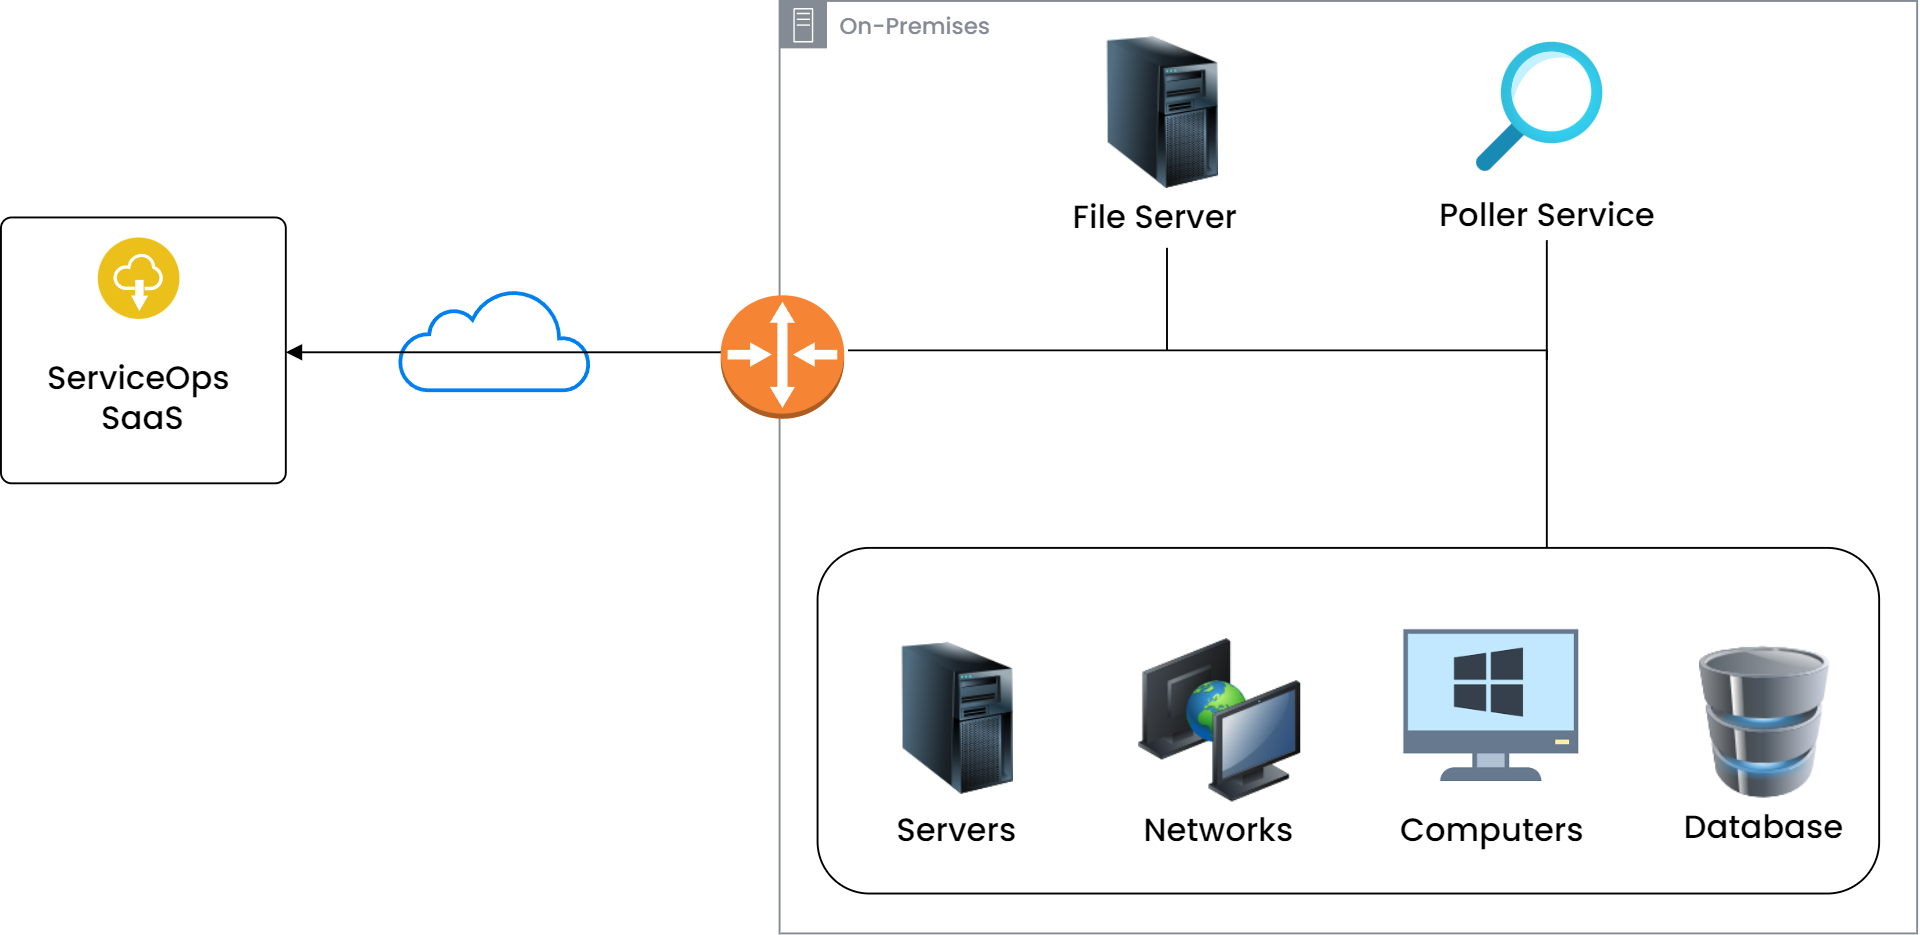
As shown above, when Patch Management is available in the ServiceOps SaaS application, you need to install the File Server on-premise.
File Server Installation
To install the File Server on Windows machine for the first time, follow the below steps:
- Download the Windows Motadata File Server from here.
- Run the .exe file using the Run as Administrator rights. Click Next.

- Add Motadata ServiceOps Server URL. The wizard prompts to select if the file server is to be installed locally or remotely.
- If the File server and ServiceOps are on the same machine, check the "Is local file server?" checkbox. Click Next and you will be directly redirected to the Select Installation folder step.

- If the File Server and ServiceOps are on different machines (remote)", leave the Is local file server?" checkbox as unchecked and simply click Next.

The wizard will ask you to fill in the details as shown in the next step.
- Replace the Localhost in Server URL with the IP address as shown below. Also, provide the Protocol, Port, Storage path, and Secure Auth code details as shown below.

The Secure Auth code will be available from the File Server Credential Profile as shown below.

Once done, click Next.
- Select the Installation folder where you want to install your file server. Click Next once done.

- The installation steps are completed, thus click Install. And, then click on Finish to end the process.


Once installed, the File Server will appear in the ServiceOps portal under Admin > Patch Management > Patch Settings > File Server > Server List tab as shown below.
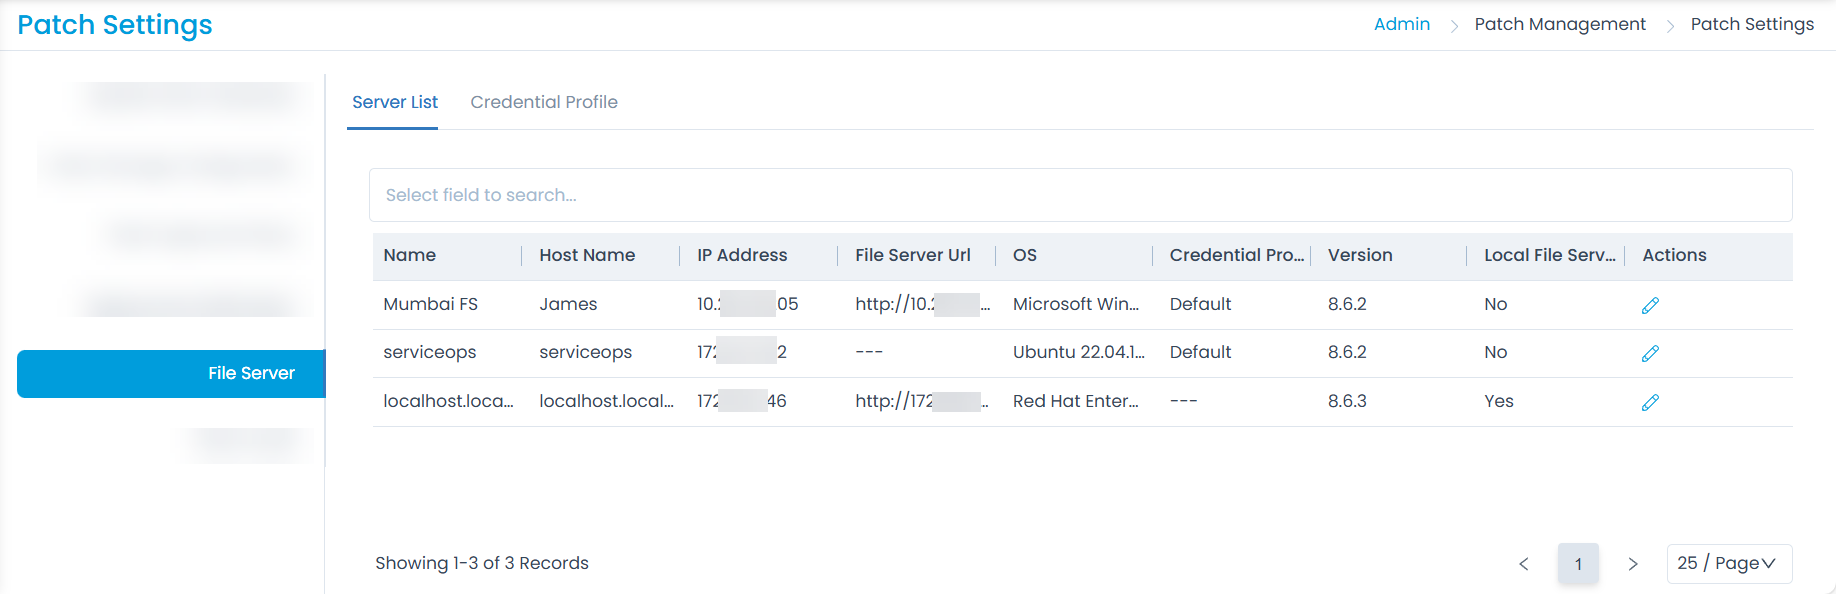
In case of Local installation, The File Server URL field will be updated automatically.
In File case of Remote installation, The File Server URL field will be blank and must be updated manually. If not updated the Agent will be unable to download patches from the File Server.
- The File Server URL should be the public URL that allows communication with the Main Server. In environments with multiple file servers, provide the public URL specific to each individual server.
- If the File Server is installed on the same system (locally installed) as ServiceOps, it will be marked as the Primary Server. If multiple local file servers are installed, the one configured in the Patch Settings > File server and Remote Office > Local Office will be considered as the Primary Server.
- If it is a remote Distribution Server, it will be marked as No under the Primary Server column.
Once the File Server is installed, log into the ServiceOps Portal and navigate to the Admin > Patch Management > Patch Settings > Patch Storage Configuration tab.
In the URL field, enter the live IP Address of the File Server that is reachable from the ServiceOps SaaS application.
Once done, click Update, and Test Connection to check the connectivity.
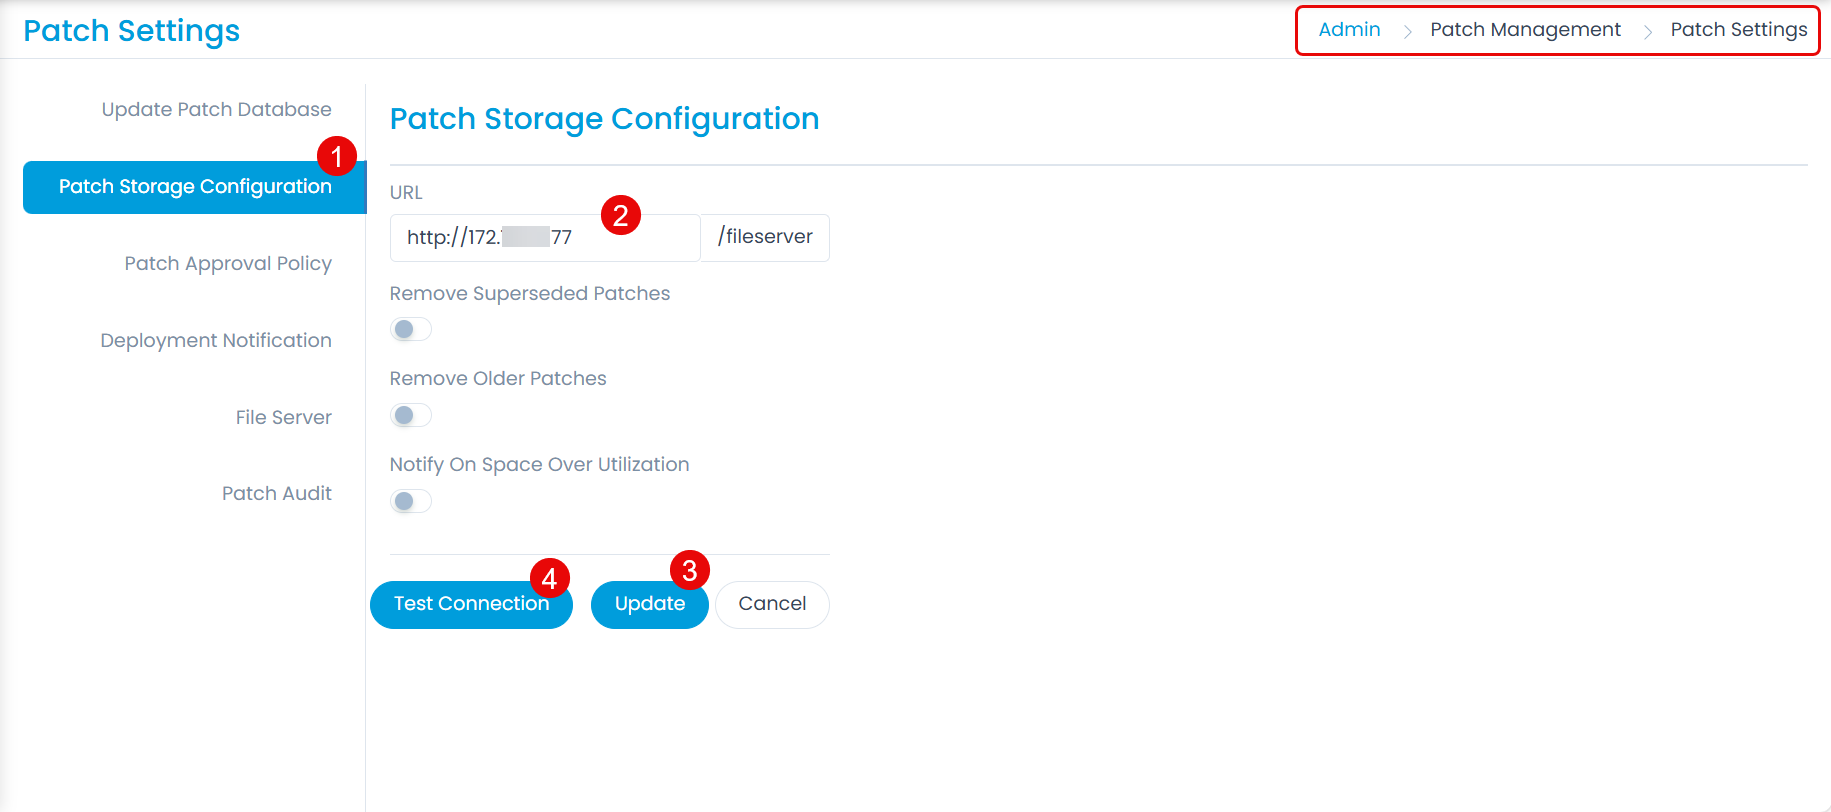
Once the confirmation message appears, the file server is connected to the SaaS application.
You can now perform tasks related to patch management.