7.3. Creating/Updating Contracts Using CSV
The Contract module supports bulk creation/update of Contracts using a CSV file. A Technician has to create a CSV file with the details of all the Contracts to use this feature.
Some of the Benefits of using a CSV file:
A large number of Contracts can be created easily.
A large number of existing Contracts can be modified easily.
Saves time when working with large number of Contracts.
The CSV file acts as a local copy in which a Technician can work and periodically upload the file in the system.
7.3.1. Using the CSV Import feature
7.3.1.1. Creating a CSV file
You can download a blank CSV file with all the column headers from the Contract List View. A Technician can populate the downloaded file with Contract details without changing the headers values.
To Download Blank CSV:
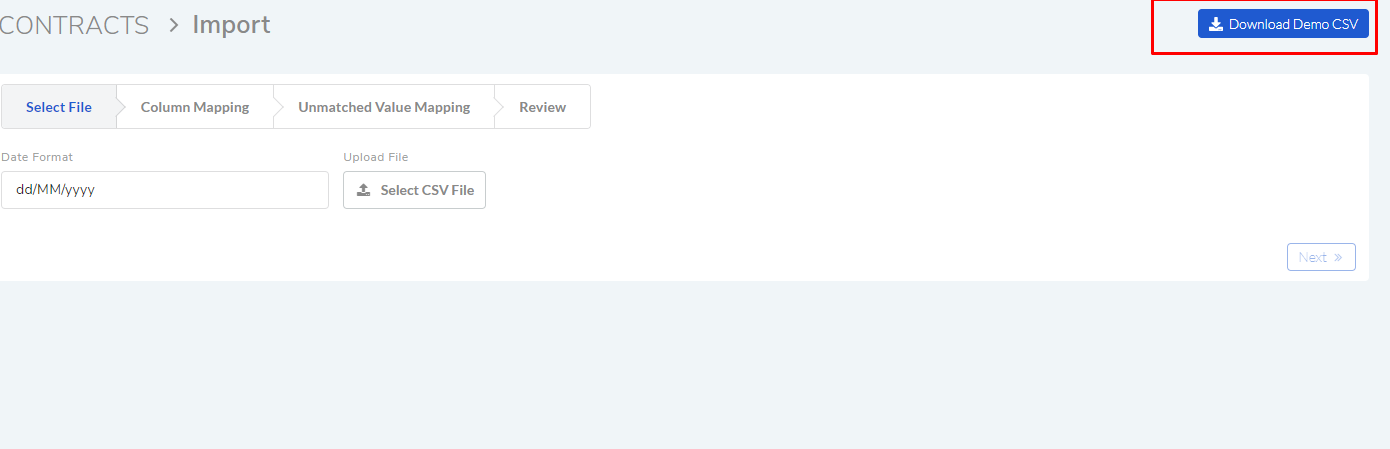
Go to the Contract List View and click on Import Contracts.

The Import page opens. Click on Download Demo CSV to download the blank file.
Now open the file and input details according to the column values.
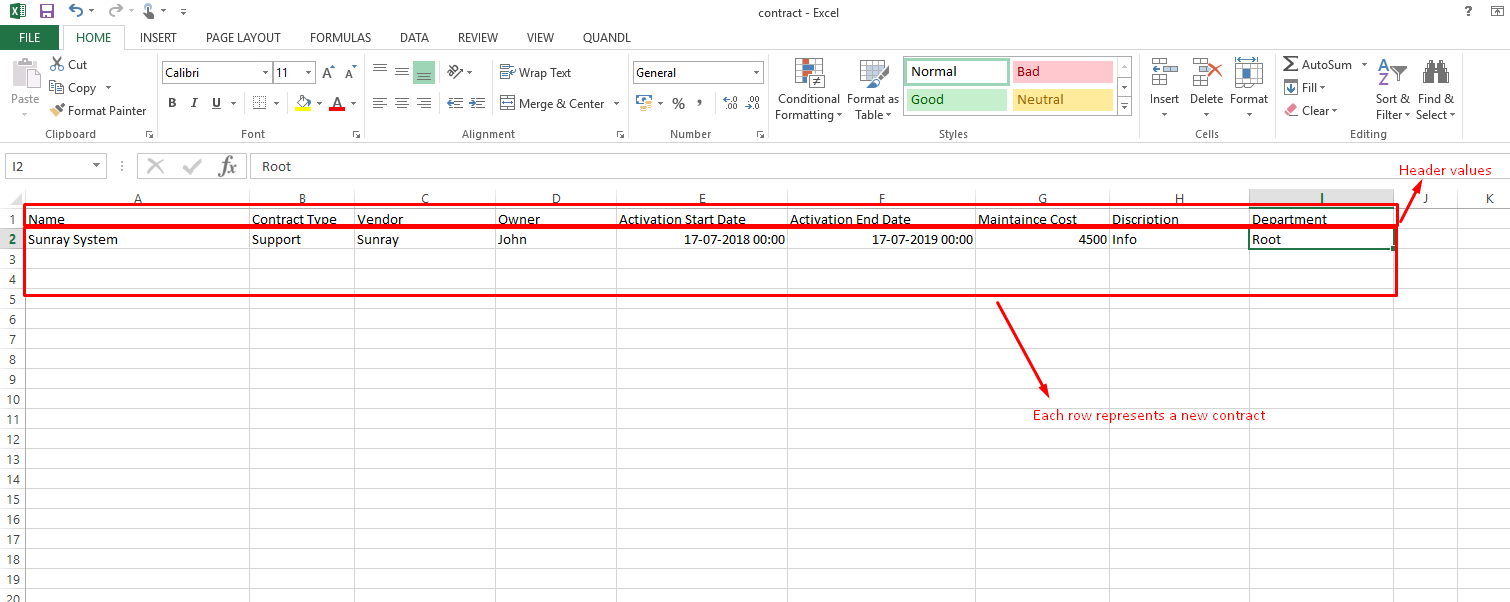
Things to Remember when using the file:
The first row is the header which should not be changed.
Each subsequent rows will represent a single Contract.
When entering date and time check all available date formats.
Uploading a CSV File:
Go to the Contract List View and click on Import Contract (ref:
con-47) option.The Import page opens. Here you go through four stages before Contracts are created/updated.
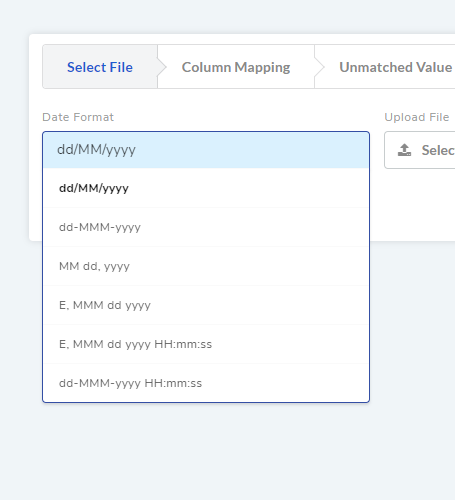
The first stage is the Select File stage: Here you do the following things:
Select a Date format: Select the date format that you have used in the CSV file. Following the available date&time formats:
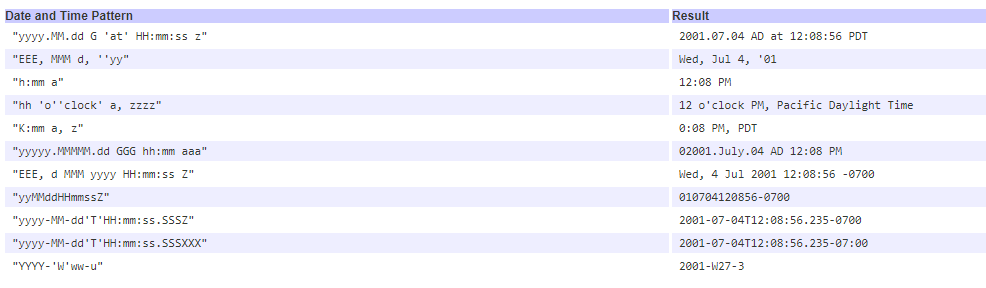
Few examples of date&time formats.
Upload the CSV file: Select the CSV file for upload.
When done click on Next.
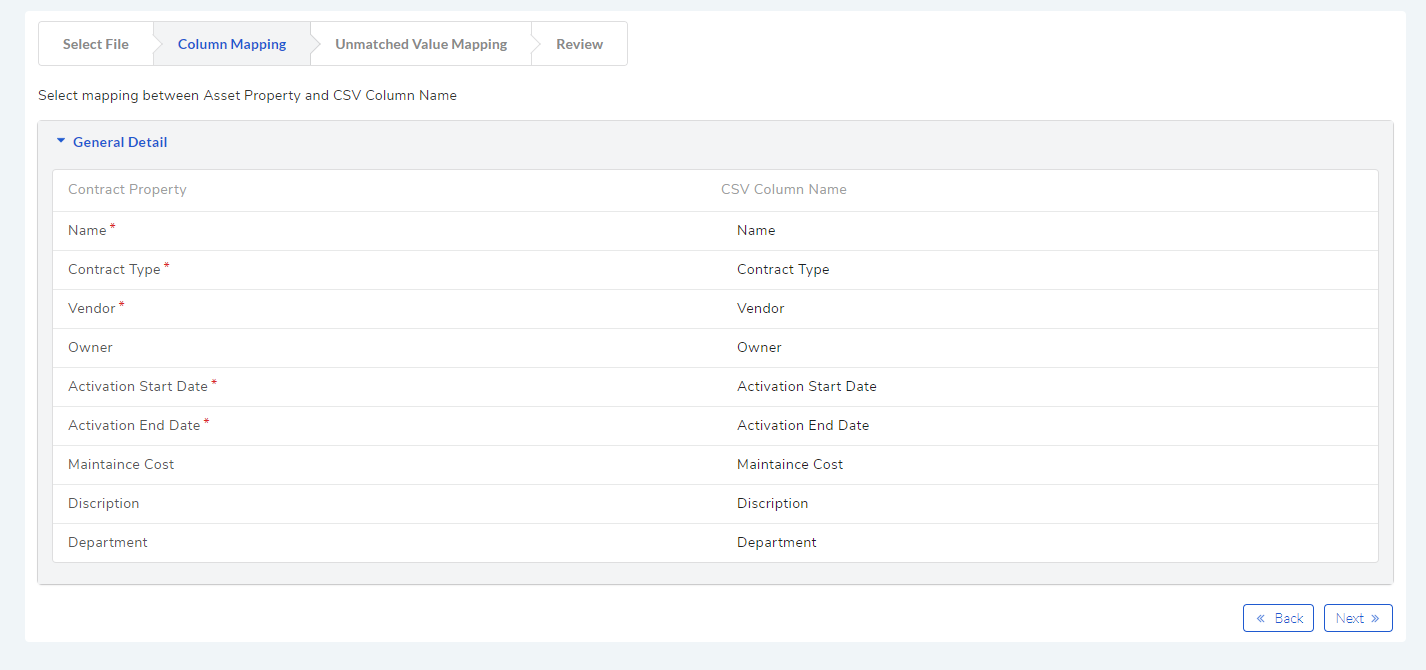
The next stage is called Column Mapping (refer:
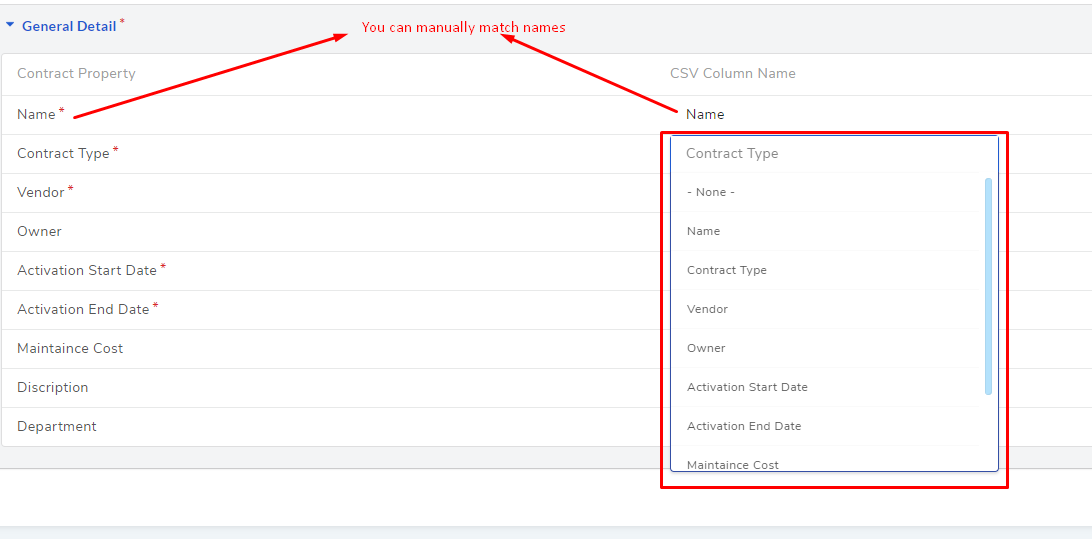
con-51). Every item in the first row (heading) is a name of a property. The system automatically matches the names in the file heading with the property names in the system.In
con-51, the left side column has the system Contract property names and right side column has the property names in the CSV file.In case a property name does not have a match, the right-hand side field of the name remains empty. Here you have to manually select the matching name from a drop-down list by clicking on the field.
It is not necessary that all the property names have to have a match; you can still upload your Requestors as long as required fields are taken care off. Click Next to continue to the next stage.
You can create custom property names using Custom Fields. You can create n number of such fields, and they appear along side the default ones. Learn more (head to Custom Fields).
The next stage is called Unmatched Value Mapping. The given property names in the header have values (rows). The system checks for property values that aren’t in the system.
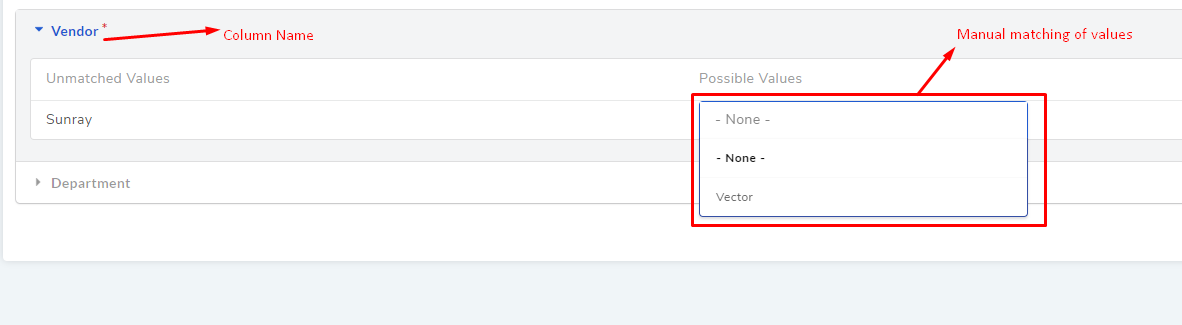
You can manually assign a value from the Possible Values (system values) to an Unmatched Value (value in the file). Click Next to continue to the next step.
Now you are in the Review stage. Here you see the number of Contracts being imported (Contracts are updated in case existing Contracts are imported). Click Import to finish the import process.
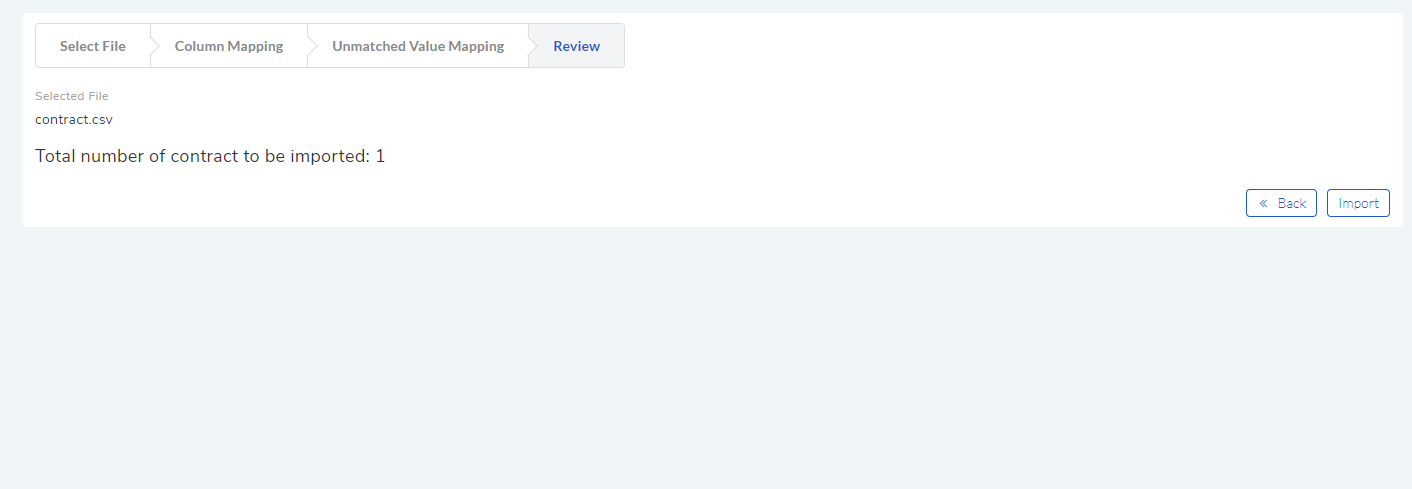
On clicking Import, new Contracts are created or existing Contracts are updated, or it could be both.