Project List
The Project List page allows Technicians and Requesters to track and manage all projects. You can view all available projects and act upon them.

This page provides the following features:
Search: You can search for projects using the keyword search bar or refine your results using the Advanced Filter icon. The Advanced Filter allows you to search by specific criteria such as ID, Subject, Status, Priority, and more. For long lists of available fields, a search bar within the Advanced Filter helps you quickly locate the desired criteria.
Create Project: Create a project by tapping the plus (+) icon.
Filter: You can filter the project list by selecting the desired option (e.g., 'All Open Projects' displays projects with open status).
Create Project
To create a project, follow the steps below:
- Tap the plus (+) icon on the top-right corner and the following screen appears.
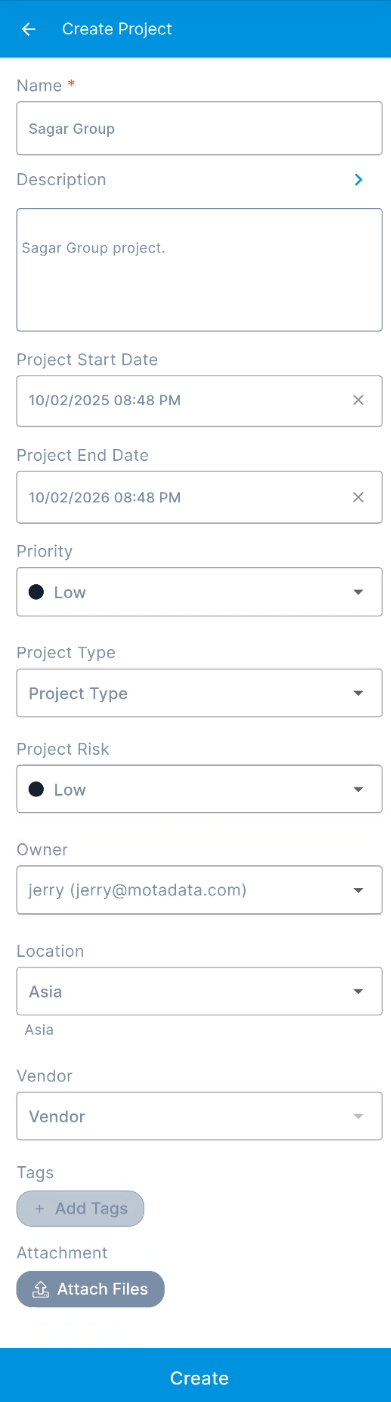
- Enter the below details:
| Parameter | Description |
|---|---|
| Name | Enter the name of the project. |
| Description | Enter the description of the project. |
| Project Start Date | Select the start date of the project. |
| Project End Date | Select the end date of the project. |
| Priority | Select the priority. |
| Project Type | Select the type of project. |
| Project Risk | Select the risk associated with the project. The default value is Low. |
| Owner | Select the owner of the project. |
| Location | Select the location of the project. |
| Vendor | Select the vendor from the dropdown list. |
| Tags | You can add tags if required. These help in identifying the similar projects. |
| Attachment | Attach the relevant files that help the technician in resolving the ticket. Once attached, you can preview or even delete it using the respective icons. |
Once done, click Create and the project gets created successfully. Also, an email is sent to you acknowledging the project. A project starts with a suffix "PRJ". For example: PRJ-1.