17.1. Security

Security Menu
17.1.1. Users
User menu contains the information of the people who can access Motadata. Every user needs a combination of username and password to access the Motadata. The profile of the user along with credentials is managed in user section. This section allows you to create and manage all the users i.e. local user, LDAP users and RADIUS users.
How Motadata communicates with LDAP and RADIUS for authentication?
Motadata syncs with LDAP server and imports the list of new users. You’ll need to manually assign a password, department and a role group to them.
The RADIUS users should be present in Motadata. Motadata uses the username for RADIUS authentication.
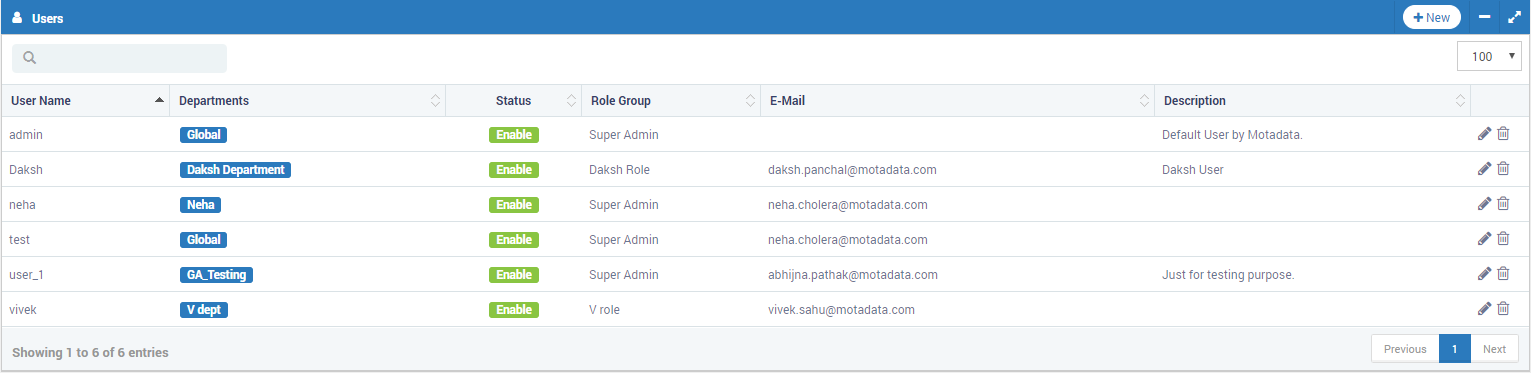
Users List in Motadata
Username |
The unique username is used to identify the user when he/she logs in. |
Departments |
A department has a set of monitors. Assigning to a department means giving permission to access monitors of that department. |
Status |
The status ‘Enable’ means user is active. The status ‘Disable’ means user is inactive and cannot login. |
Role Group |
A role group is a set of permissions for different menus and actions in Motadata. |
The email address is used for communication by Motadata (e.g. password reset, notifications etc.) |
|
Description |
The description helps people to understand the important details about the user. |
Options |
You can edit the user or delete the users. Click on to edit and to delete the users respectively. |
17.1.2. Create and Edit Users
The screen to create and edit the users is exactly same. Click on the +New button to create a new user. To edit an existing user, click on the button.
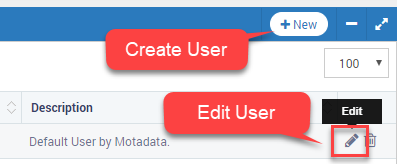
Create and Edit User Buttons
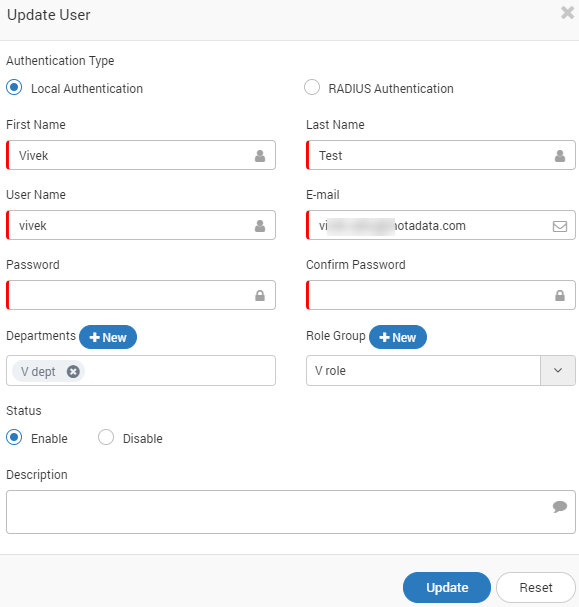
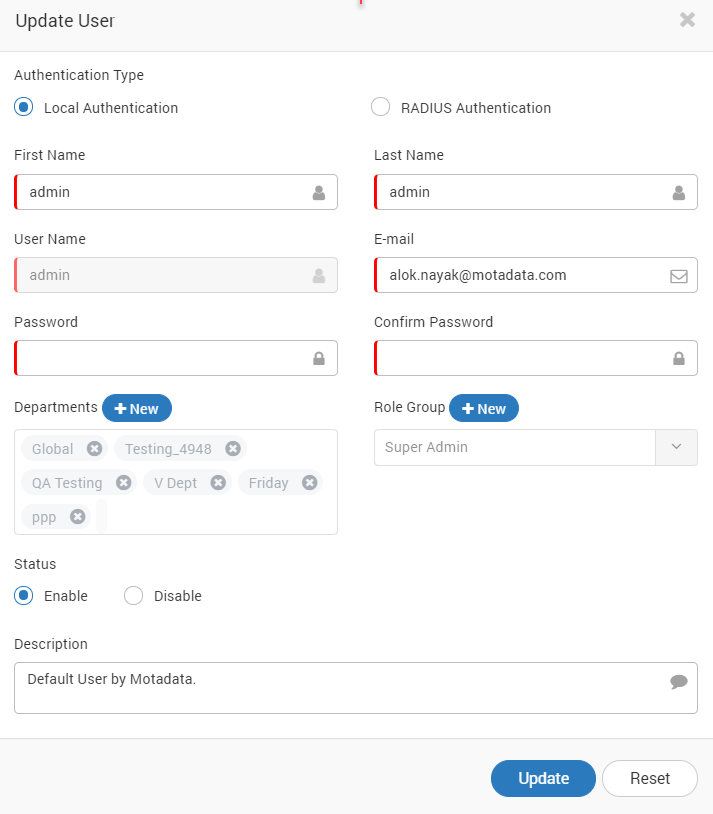
Create/Update User
Authentication Type |
|
First Name |
Type the first name of the user |
Last Name |
Type the last name or the family name of the user |
Username |
The unique username is used to identify the user when he/she logs in. |
The email address is used for communication by Motadata (e.g. password reset, notifications etc.) |
|
Password |
Type a secure password. The password field hides for RADIUS authentication. |
Confirm Password |
Type your password again. The field hides for RADIUS authentication. |
Departments |
A department has a set of monitors. Assigning to a department means giving permission to access monitors of that department. |
Role Group |
A role group is a set of permissions for different menus and actions in Motadata. |
Status |
The status ‘Enable’ means user is active. The status ‘Disable’ means user is inactive and cannot login. |
Description |
The description helps people to understand the important details about the user. |
17.1.3. Delete Users
Click on the icon from users list page to delete the user. Deleting the users will also also delete all the content and settings related with the user. Motadata gives a warning message while deleting the user.
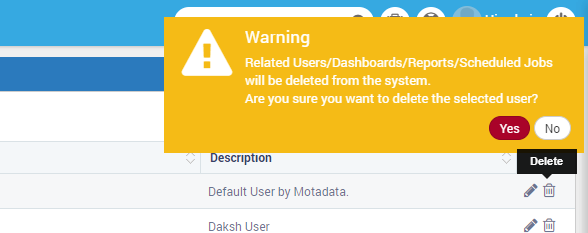
Motadata’s Warning Message on Deleting a User
17.1.4. LDAP Servers
LDAP server is a common place that contains user information of all people in the network. LDAP configuration in Motadata allows users of LDAP server to access and manage Motadata GUI portal. Motadata reads from the “motadata users” group in LDAP server. Motadata syncs wiht the server in every 24 hours to get an updated copy of users.
Prerequisites
The LDAP server should be up and running.
The server should have a user group called “motadata users”.
Motadata will fetch all the users from the defined group.

LDAP Servers in Motadata
Configure/Update LDAP Server: The screen to create and edit the LDAP servers is exactly same. Click on the +New button to configure a new LDAP server. To edit an existing server, click on the button.
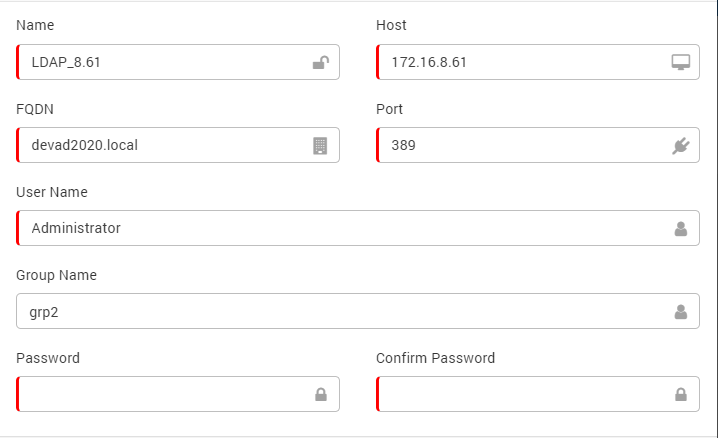
Create/Update LDAP Server
Sync Now: Click on the icon to sync the LDAP server and fetch the subscribers. By default Motadata fetches the information in every 24 hours. Motadata locks the ‘first name’, ‘last name’, ‘username’ and ‘email address’ of the users. This means you cannot change these information.

User Created from LDAP
Edit LDAP User
Note
When Motadata system will sync to LDAP, LDAP will only provide Username and password as it doesn’t have the department. Based on the User’s Role, person will have to manually assign the department.
Delete: Click on the icon to delete the LDAP server. Deleting the LDAP server will also delete all the content and settings related with the server. Motadata gives a warning message while deleting the server. When you delete the LDAP server configuration, Motadata also deletes the users of the LDAP server.

Delete Button and Warning
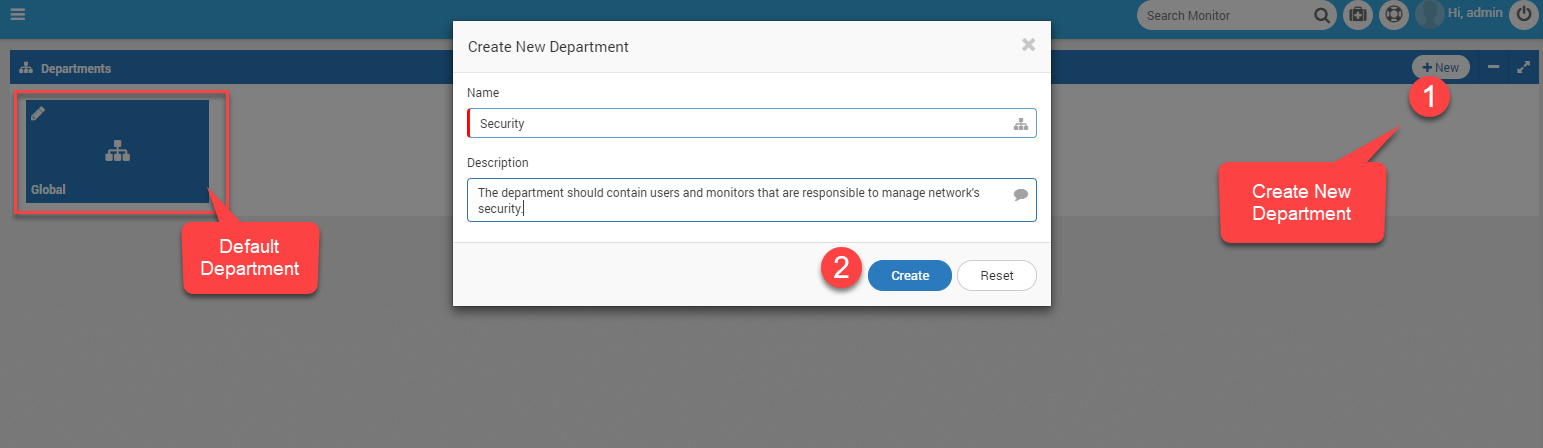
17.1.5. Departments
Department (like in the offices) is a tag/group that helps in classification of monitors and users. It is also a security measure in Motadata. For example: the monitors under the department ‘Security’ are visible only to the same department users. In admin section, we only need to define the name and description of the departments. By default ‘Global’ department is available in Motadata. If you don’t assign a user or a monitor to any department, Motadata will assign a ‘Global’ department to it.
Departments List
To create a new department navigate to +New button. Mention the name of the department. Write a short description about the department.
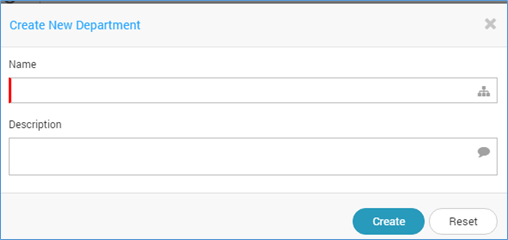
Create New Department
Edit the department to make changes in department name and description. Click on the icon to edit the department.
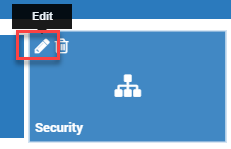
Edit icon in Department
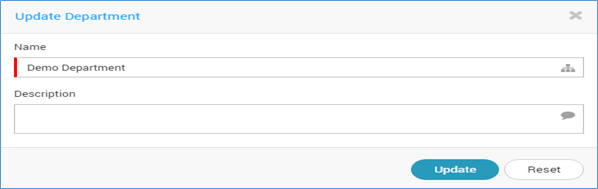
Edit Department
To delete a department, click on the icon. Note that “Global” is the default department and you cannot delete it. Motadata will also delete the users in this department if they are not assigned to any other department.

Delete Department and Warning
17.1.6. User Roles
User roles is another level of security in Motadata that manages the access rights of the users. In Motadata, a role is a set of permissions that defines access and manage permissions of the menus. All the users in Motadata requires a role to create, read, update, and delete (CRUD) operations. The role group has following benefits:
You can assign a role to many users at a time. This means you don’t need to manage permissions of each user individually.
You can change the permission in role group. The change will affect all the users in that group.
You can assign one role to one user.
You can choose to give Admin access to the users of a role. Note that users with Admin role will get complete access of Motadata.
You can edit the users and assign them the roles created in this section.
You can also give partial rights to an user for Admin Panel Access.

List of User Roles
Manage User Role
The screen to create and edit the User Roles is exactly same. Click on the +New button to create a new user role. To edit an existing user role, click on the button.
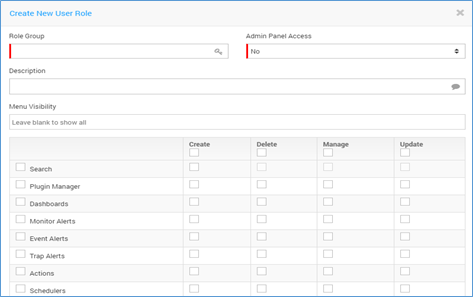
Create New User Role Screen
Role Group |
Type the name of the role group. It is used to identify the role group. |
Admin Panel Access |
Select ‘No’,’Full’ and ‘Partial’ from drop-down |
Description |
Type the description about the role group. It helps people to understand what this role group is about. |
Menu Visibility |
Select the menu(s) that should be visible to users of this role group. You can select/deselect the desired menu |
Permissions |
For each menu, select the permissions of ‘Create’ ‘Delete’ ‘Manage’ and ‘Update’.
|
Delete User Role: Click on the icon to delete the user role. Motadata gives a warning message while deleting the role. Motadata will also delete the users in this role if they are not assigned to any other role.
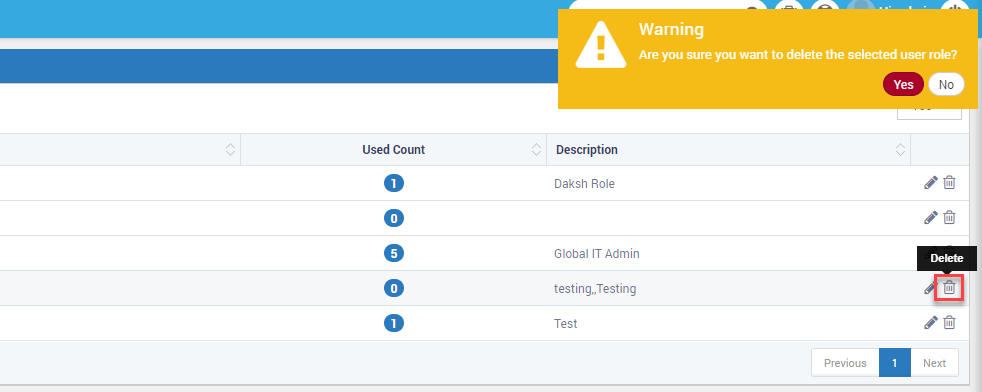
Delete User Role and Warning
17.1.7. Data Security
Data security is the third and final step to complete the security configurations in Motadata. Now you have departments and user roles created; you can map the monitors with the departments. This will do the following:
The monitors in a department will be visible only to the users of same department.
The user role will define what those users can do with assigned monitors.
A monitor can have more than 1 department and vice - versa.
Same flow is available for sources of Flow/Log/Trap. We have used another tab just for the sake of convinience.
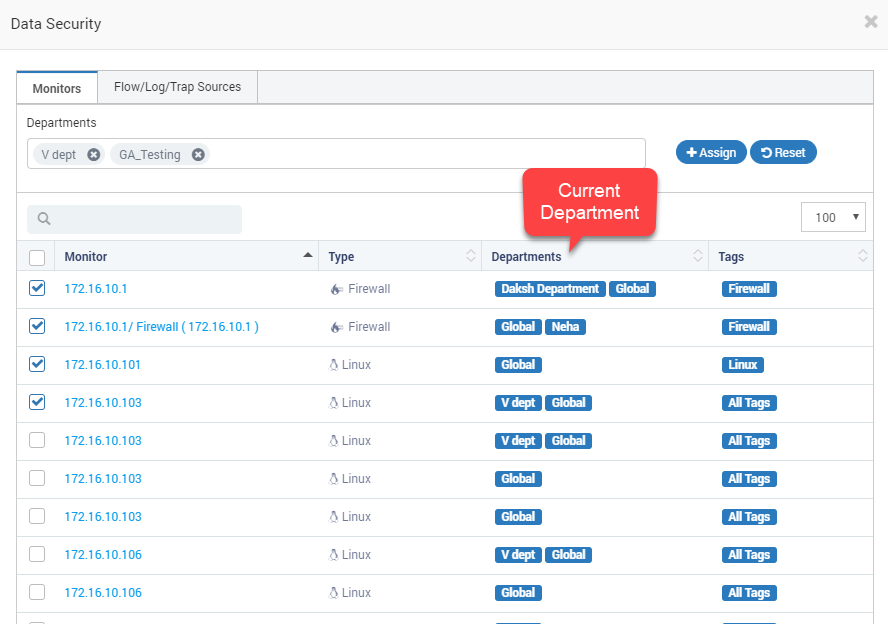
Data Security - Monitors in Departments
We have a specific method to assign and un-assign the department.
Select the monitors from the list.
Select the departments from the mult-selection list.
Click on the “Assign” button.
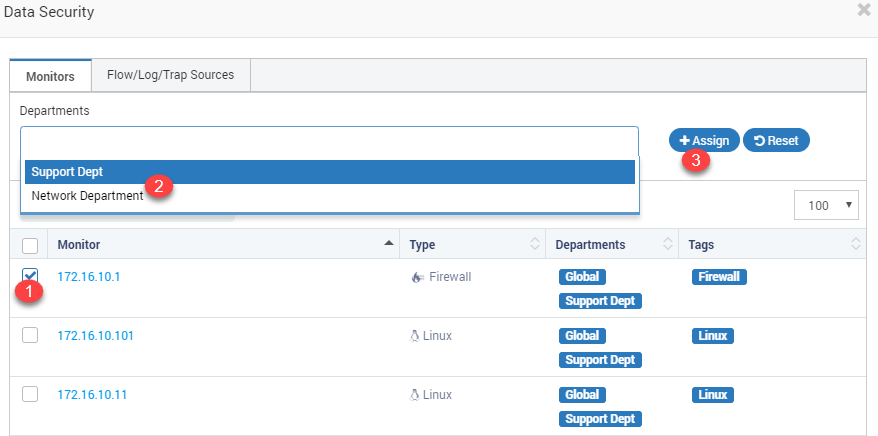
Manage Data Security
Points to Remember
You cannot un-assign an IP address from Global department. Global department is default department that has rights to everything in Motadata. Administrator account uses this department.
To assign department(s), check the IP address and type the names of departments. Click assign.
This process removes all existing departments associated with IP address and assigns new selected departments. To remove an IP address from all departments, select the IP address and click
Reset.
17.1.8. RADIUS Settings
Similar to LDAP server, RADIUS srever stores information of all the users in the network. RADIUS server is used for the real time authentication i.e. everytime Motadata will send the user credentials to RADIUS server for authentication. Motadata uses only authentication service of RADIUS (and not authorization service).
How to Use RADIUS Feature
Setup the RADIUS Settings.
Create a new user in ‘Users’ menu with RADIUS type authentication.
Create RADIUS Settings
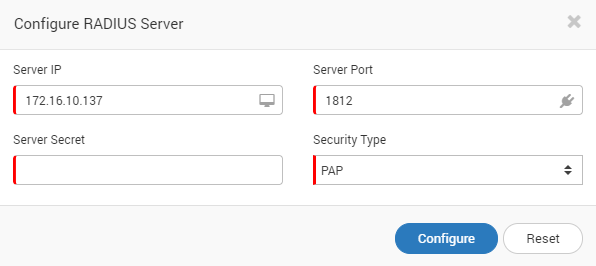
Configure RADIUS Server
Provide the RADIUS Server IP address.
Provide the RADIUS Server port address.
Provide the Server Secret (also known as password).
Choose security type. Currently only PAP is available.
Create RADIUS User
Go to Users menu.
Create new user.
Select authentication type as: RADIUS.
Fill the required details.
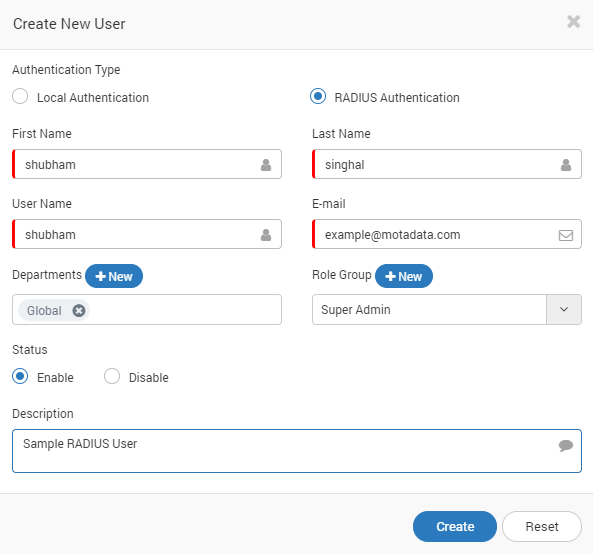
Create RADIUS Users
17.1.9. Audit
Audit contains all the logs of the activity in Motadata Server. Motadata retains up to 1 Lakh Audit logs. All the recent changes made in Motadata Server will show up in the initial pages, the logs will sort based on the age. You may also export the audit logs by clicking Export button on top right corner. The logs shall be exported in excel format.
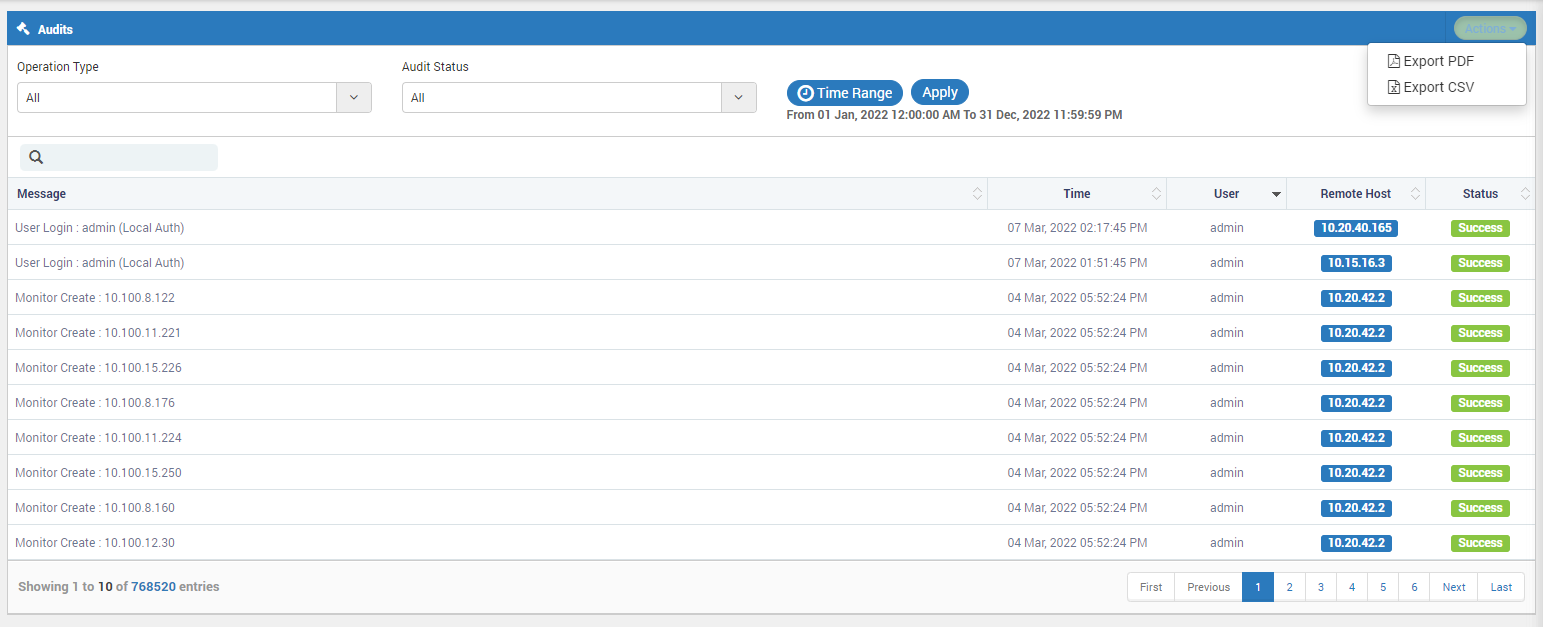
Audit Log
You can also export the audit logs in PDF or CSV using the actions tab.
When you click on ‘Export PDF’ the report appears as below:

Audit Log
Note
Search will work only for ‘Message Column’ i.e Any keyword present in the Message Column will only be searched and not any other.