4.7. Release List View
Motadata provides an intuitive interface to manage the processes associated with Release Management. The entire interface is divided into Release List View and Release Details View.
The Release List View is the central hub for Technicians to track and manage all releases in the tool.
To open Release List View, a technician will:
Log in to his Dashboard from the Technician Portal.
Click on Release in the navigation section. The Release List View opens with the default filter set as All Open Releases.
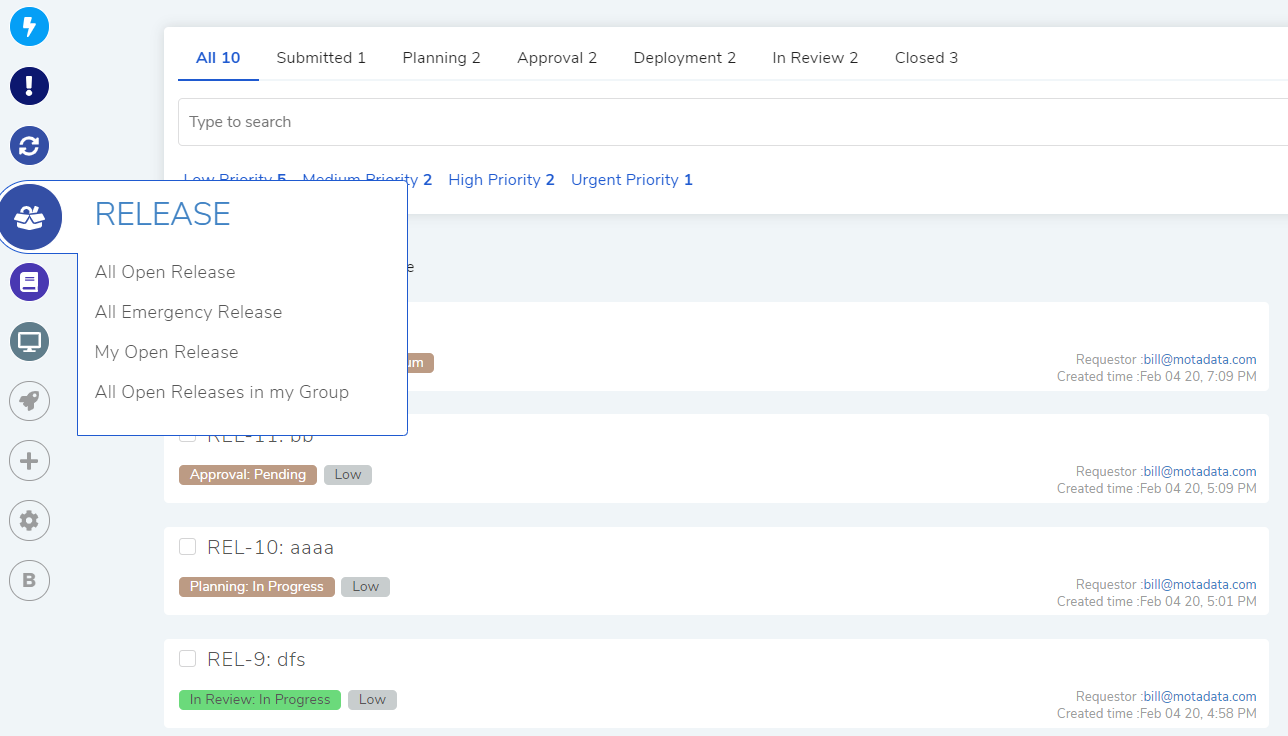
Release List View
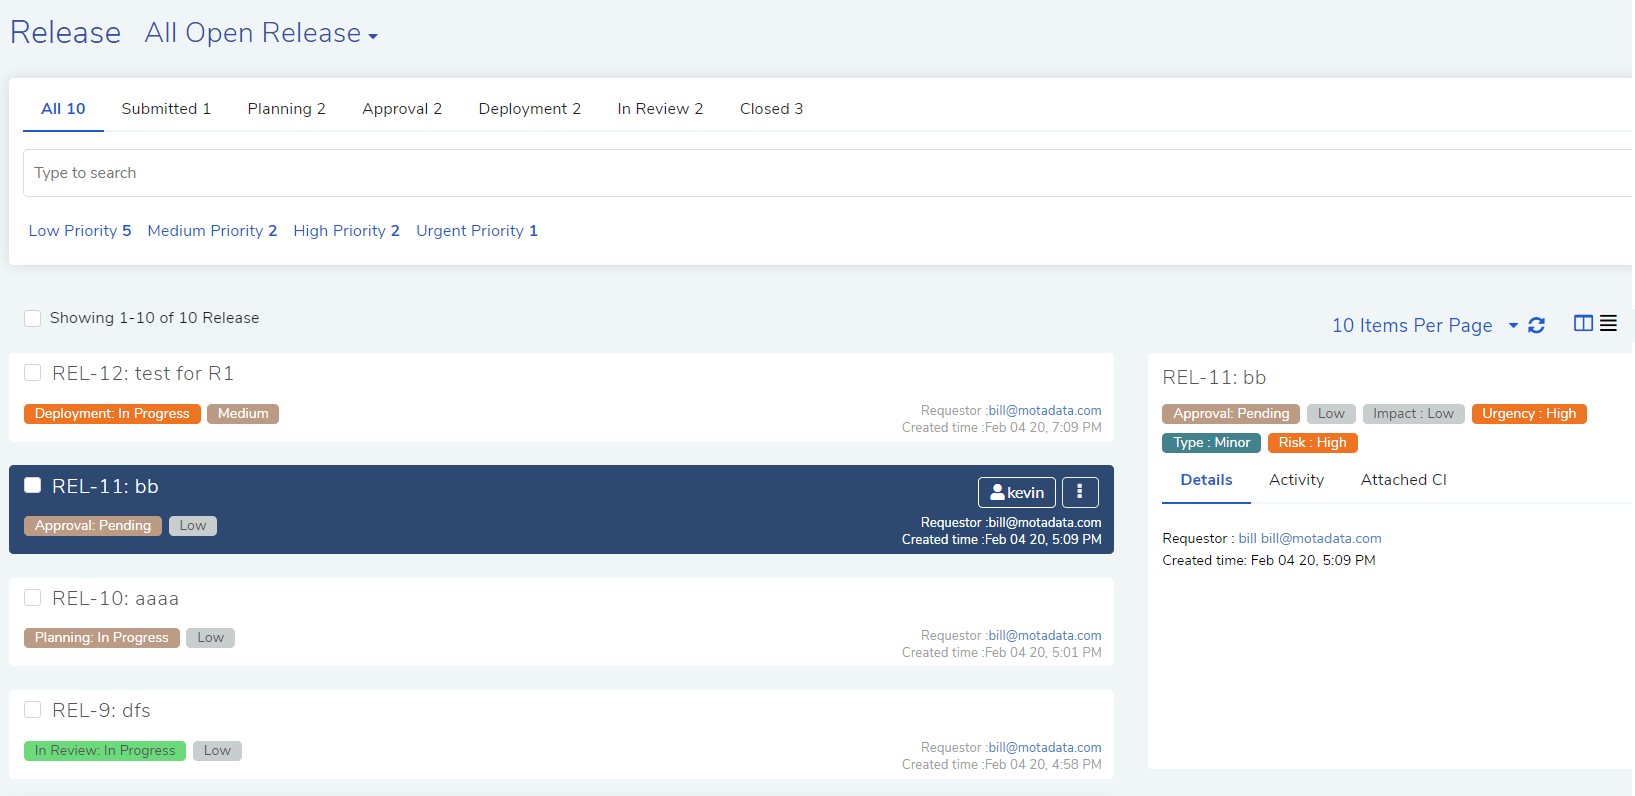
Grid View
Regardless of the view, the following information is visible about a Release:

Split view
Two classifiers which are:
The stage of the Release as Status.
The Priority of the Release which can be modified.
Name of the requester and create time of the Release.
The subject line of the Release along with its ID.
Assignee information or the Claim and Assign button. If the Release is closed, then the technician will see the Reopen button.
Action menu next to Assign or Reopen houses the View Audit Trail and Open in New Tab options.
The technician selects the maximum number of Releases visible per page, and the view, Table View or Grid View as shown below:.
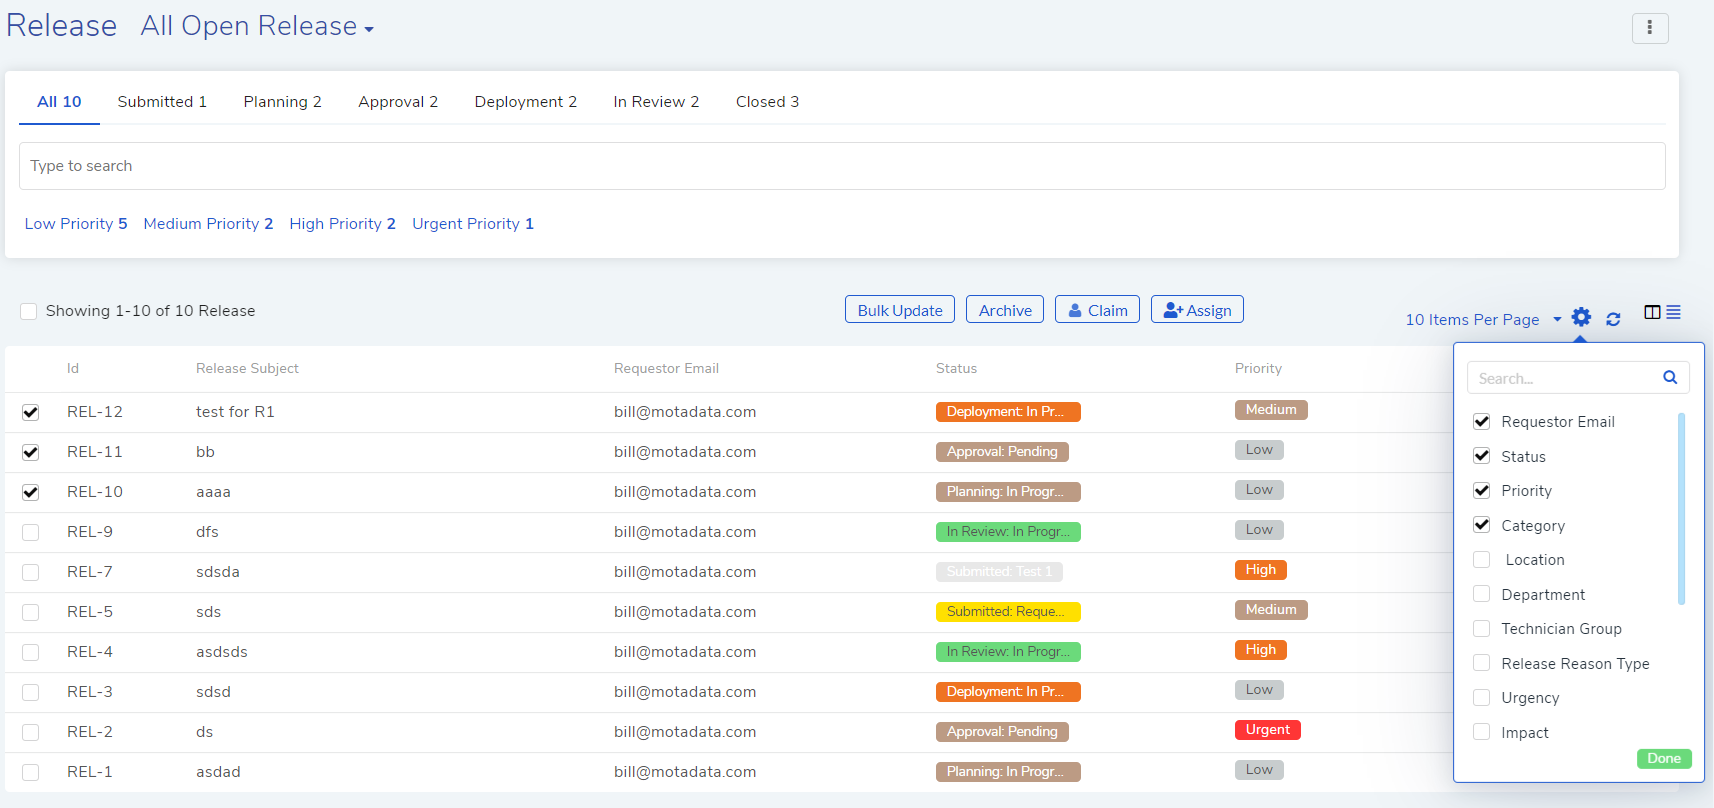
Select/Unselect Columns
You can select/unselect the columns you want to see using the icon.
In Grid View, the listings are more descriptive and explicit compared to Table View. Technician can view additional information in the Glance Panel of a Release.
Table View is minimalistic which shows minimum information without the Glance Pane. The focus is to give the technician the most critical information.
4.7.1. Managing Announcements from Release
A technician can manage announcements from the Release list view as well. For further information view: Announcements
4.7.2. Export
You can export the details of the Release page into a CSV/Excel file and send it as an attachment to yourself. The system uses the email address attached with logged in user and sends the release in email. Here, are the steps to export the release.
Select the releases you want to send.
Click on the three vertical dots on top right corner.
Click on Export button. A popup will open for you to select file type and change fields.

Select/Unselect Columns
Select the file type. You can choose either CSV or Excel.
Select the fields you want to export.
Click Export.

Select/Unselect Columns