4.10. Inside a Release
Once a Technician decides to work on a Release, he heads to the Details View. Every Release has a Details View that houses all related information and tools to make the release move through all the defined stages.
4.10.1. Release Details View
The Details View is the central hub for all process related activities. It organizes and manages all information and the processes related to a release.
Go to the Release List View.
Scroll down to the list area and click on the name of a Release. The Details View opens.
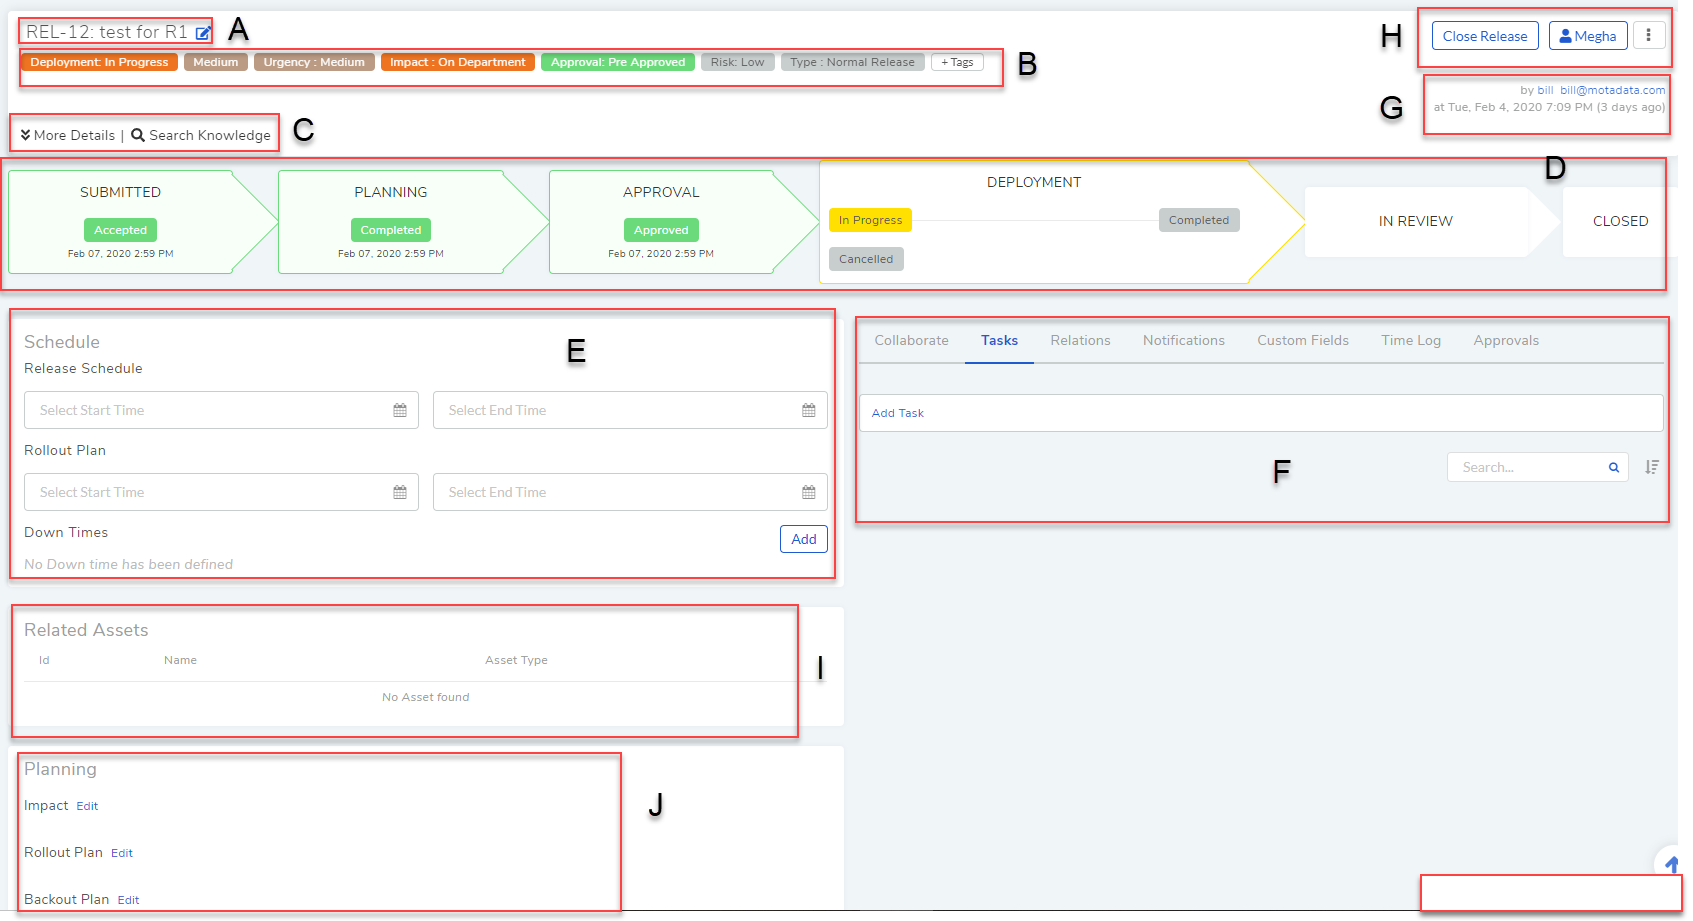
release
Section-A, B & C are the classifiers.
Section-C also houses the feature to link Knowledge Base with Release.
Section-D provides tools to manage the Release implementation workflow.
Section-E houses tools to schedule Release period.
Section-F houses the following functions:
Collaborate
Tasks
Relations
Notifications
Custom Fields
Time Log
Approvals
Section-G shows you information about the Requester and the time of creation of the Release.
Section-H houses the following functions:
Claim and Assign
View Audit Trail
Add and remove watchers
Send Notification
Scenario
Section-I is where all the related Assets (Configuration Items) are shown.
Section-J is where Planning details are stored which can be in form of Impact, Rollout Plan and Backout Plan. The details of the planning can be edited at a later stage in case of any change.
4.10.2. Modifying a Release’s Subject and Description
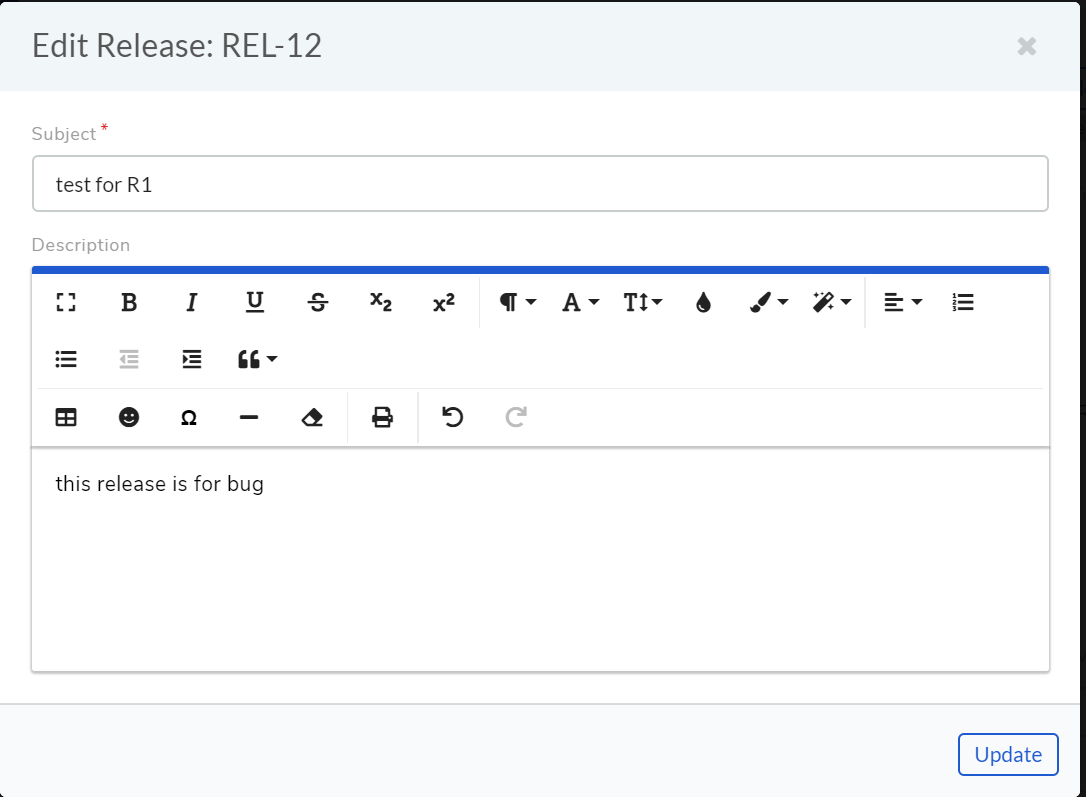
Below the header section of the Details View is the Release ID and subject line. Next to the subject line is an edit icon that a technician can use to modify the Subject and Description.

Modify subject and description
To edit Subject and Description:
Click on the edit icon. A new dialog box opens.
Modify the Subject and Description fields and hit Update.
Edit subject and description
4.10.3. Classify a Release
Motadata provides a lot of avenues to classify the information of a Release. Go to the Details View of a Release where a technician get the following ways to classify:

Classify Release
Status: The stage of the Release is shown as Status. There are five broad stages that a Release has to go through in order to become a Release. This label is automatically updated by the system as the Release moves through the stages.
Custom Tags: These are additional tags that the Requester and Technicians can provide. It is a way to categorize the Release when default options are not enough.
Due-Status: This label classifies the Release based on the number of hours/days before expiry of the scheduled Release. This classification happens after Release Schedule is set in the Planning stage.
Importance: The Release can be categorized based on its level of criticality in the following ways:
Priority: Setting this label classifies the Release based on its criticality to the business. The Priority labels are system-defined and immutable.
Urgency: Setting this label classifies the Release based on time bound urgency. The label has predefined values that are immutable, and they are Low, Medium, High, and Urgent.
Impact: Setting this label shows the aspect of a business on which a Release has its effect which is either on a User, Department or Business.
Risk: Setting this label classifies the Release based on the risk that it possesses to the IT infrastructure.
Release Type: Setting this field classifies the Release based on its magnitude.
Technician Group: The product allows grouping of Technicians into groups. Setting this field shows which group the Release belongs.
Place: An Release can be classified based on the associated physical locations which are:
Note
Below both fields have predefined values (as a drop-down list) set by the Administrator.
Department: If the Release is related to a particular department, then this field can be set to that specific department.
Location: If the Release is related to a particular location, then this field can be set to that location.
4.10.4. Adding People to Release
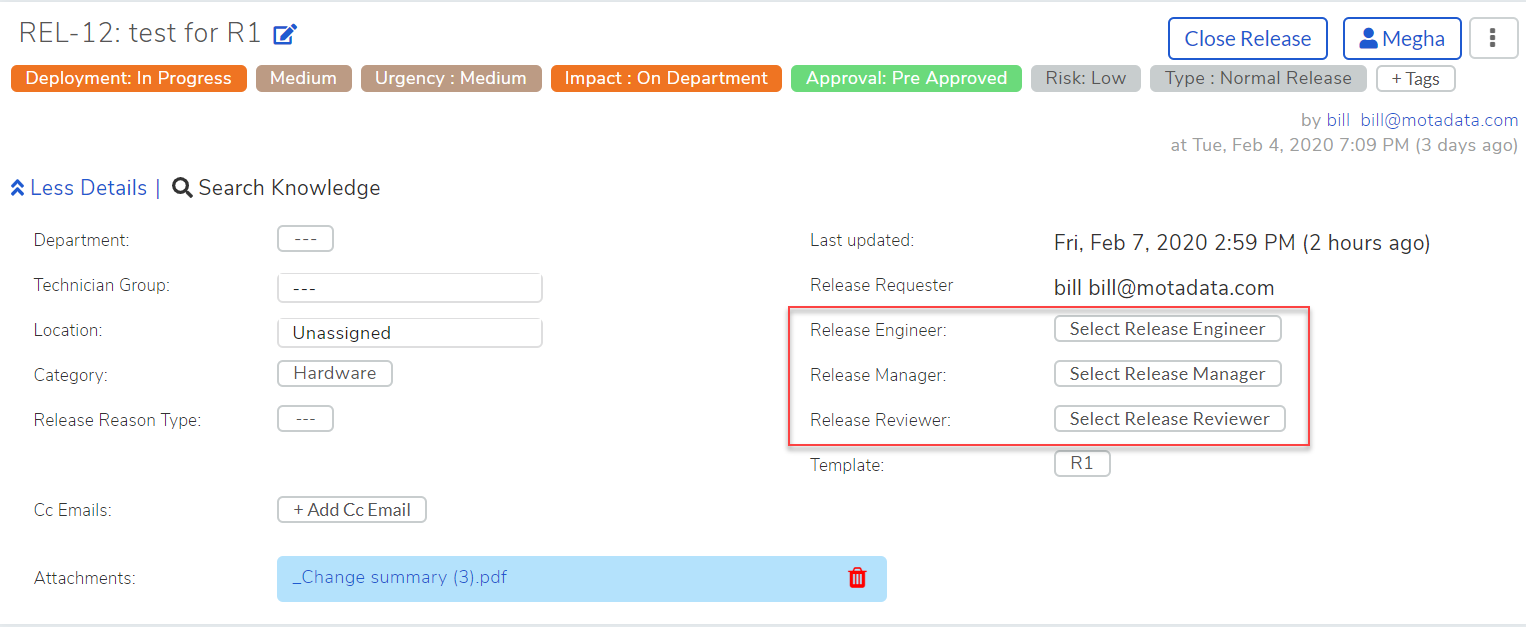
Apart from the assigned Technician, a Release requires three more people. All of them are added from the More Details section in a Release Details View.
Add people
Release Engineer: He is the Technician who is responsible for the implementation of that particular Release. He supervises actions that are derived from the Planning stage.
Release Manager: He is the Technician who is responsible for the entire Release cycle.
Release Reviewer: He is the Technician who audits the deployment of the Release. His job is to see whether the deployement is successful or not.
4.10.5. Linking Knowledge with Release
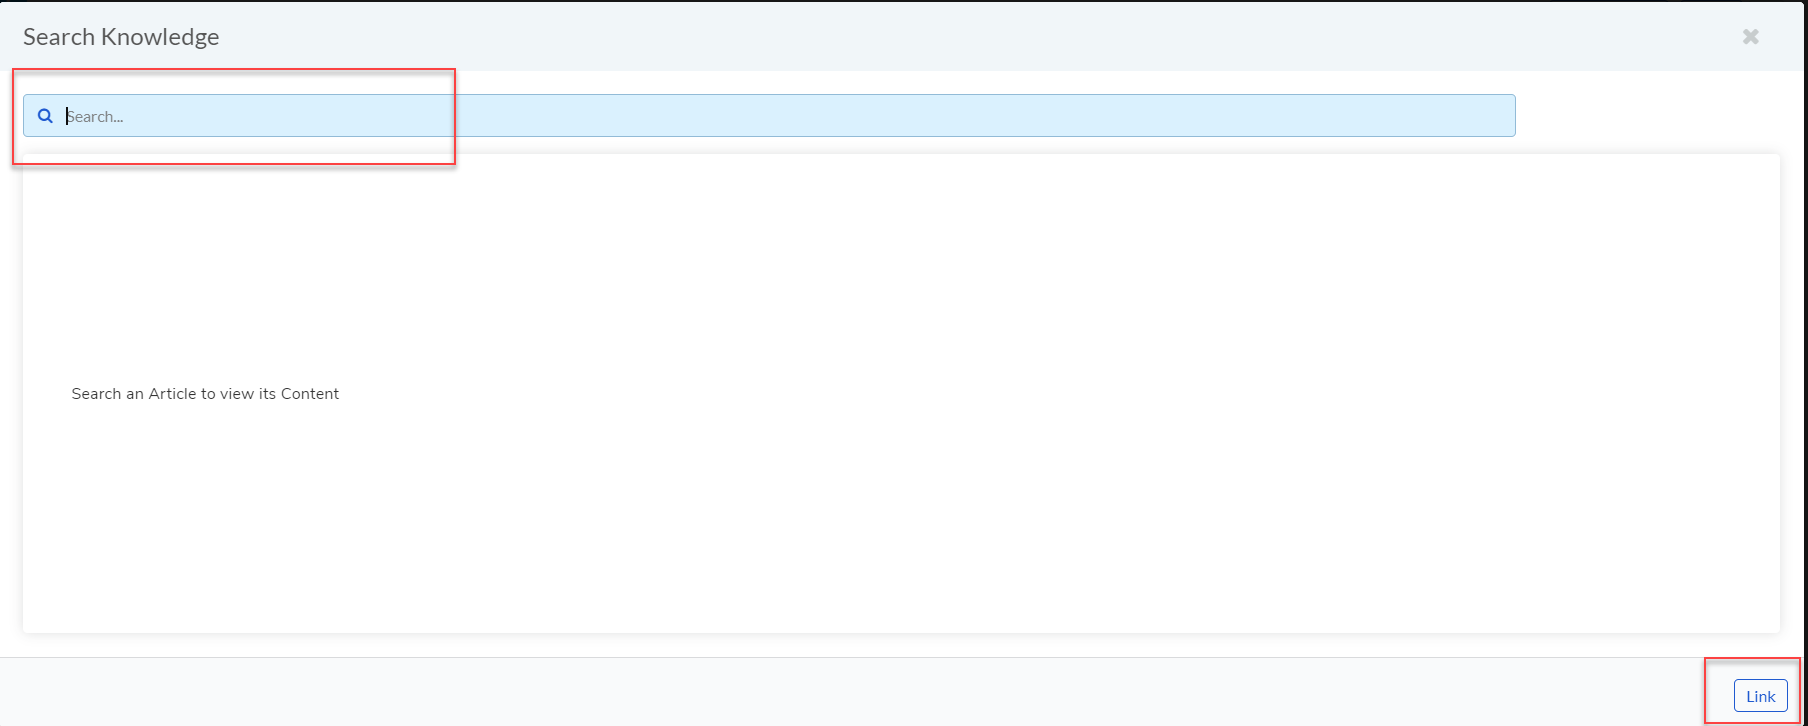
A technician can link a Knowledge Article/FAQ with a Release by following the below steps:
Go to the Details View of a Release.
Click on Search Knowledge on the Details View. A dialog box opens.

Search Knowledge
In the dialog box, the technician views a search bar and a list area. He will use the search bar to search for Knowledge Articles/FAQs. The list area shows the available Knowledge content. Technician can preview an Article/FAQ by clicking on it.
Technician selects an Article/FAQ that he wants to link. He clicks on the Link button below. The Knowledge content gets linked to the Release. The technician can view the relationship in the Relations tab of the Release. In the same way, the technician can link multiple Articles/FAQs.
Link Knowledge
4.10.6. Adding Relations
Motadata helps Technicians to build contextual information by building relationships between various events in the system. The Relations tab in the Details View of a Release serves this purpose.
The Relations tab gives the technician an option to create relationships between a Release and other Releases, Requests, Problems, Knowledge Articles/FAQs and Assets.
Technician can create a new Request, Problem, Release or Asset and link it to an existing Release using the Create and Relate button.
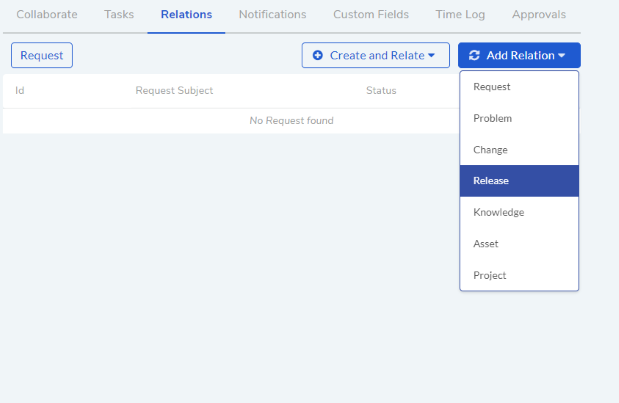
Add Relation
The Add Relation option lets the technician to add one or more relationships. Clicking Add Relation opens a pop-menu where he selects what he want to link (Request, Problem, Release (Release) or Asset). A dialog box opens with a list of items and a search dialog box; the search bar supports Advanced Search features where technician can search for items with predefined search options and keywords. Technician can link by selecting the items and clicking on Link.

Add people
4.10.7. Approval in Release
At the Approval stage, the technician might need an Approval from approver/approvers (multiple approvers can exist across multiple Approvals) to move the Release to the next stage.
4.10.7.1. Different States in an Approval Process
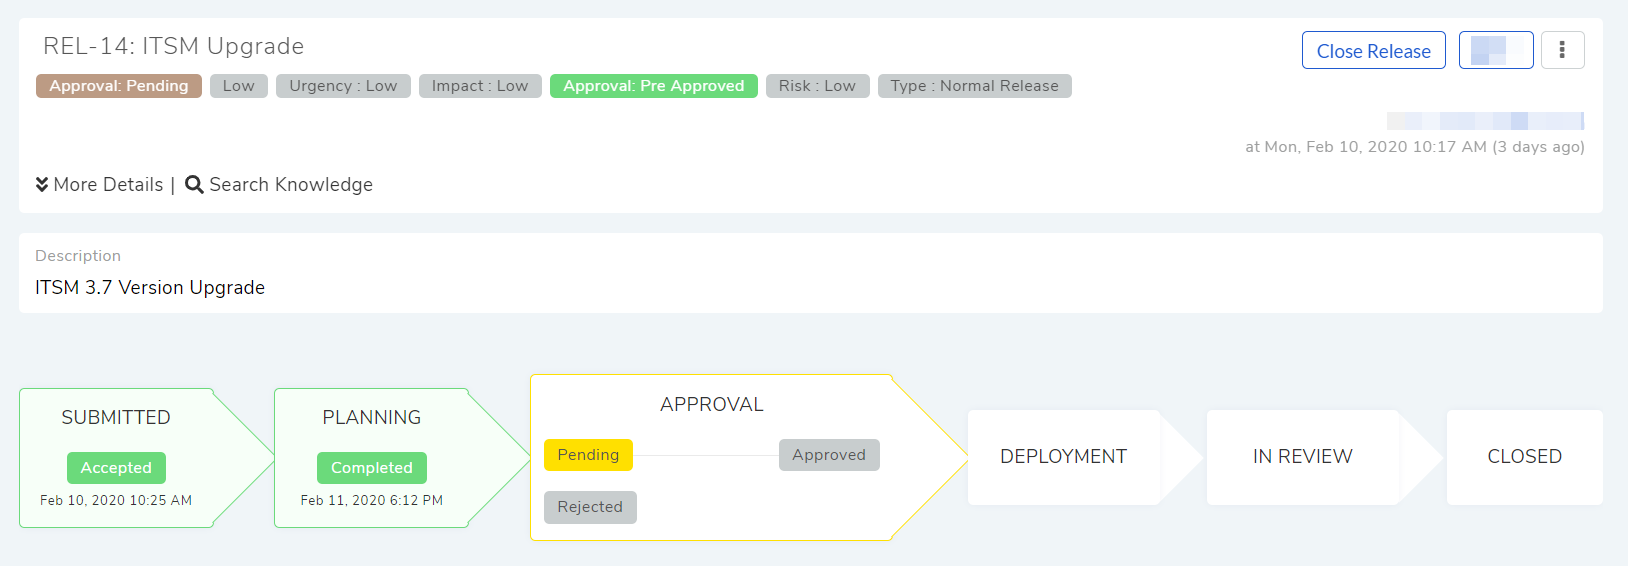
Approval:Pending
Approval:Rejected
Approval:Pre-Approved
Approval:Approved
4.10.7.2. Asking for Approval
The technician can check whether an Approval Workflow is set or not by clicking on Ask For Approval. An Approval Workflow has conditions based on that approvers are automatically set. If conditions of a workflow are not triggered or there is no workflow (and manual Approvals) then the Release is Pre-Approved and the Approval moves to next stage.
Note
Refer to Administration Manual to know more about Approval Workflows.
Note
A Release can have both manual and automatic Approvers.
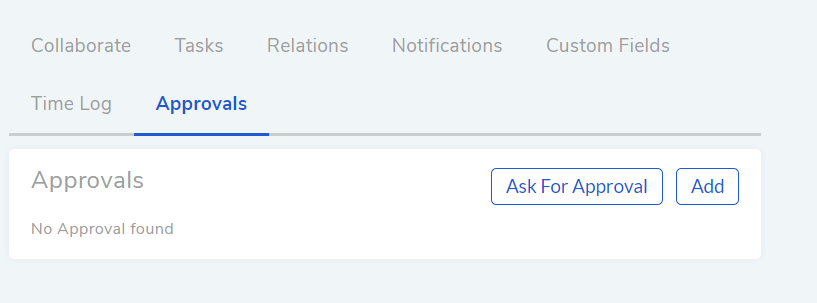
Ask for Approval
4.10.7.3. Manually Adding Approval
Clicking on Add Approval opens the Create an Approvel dialog box.
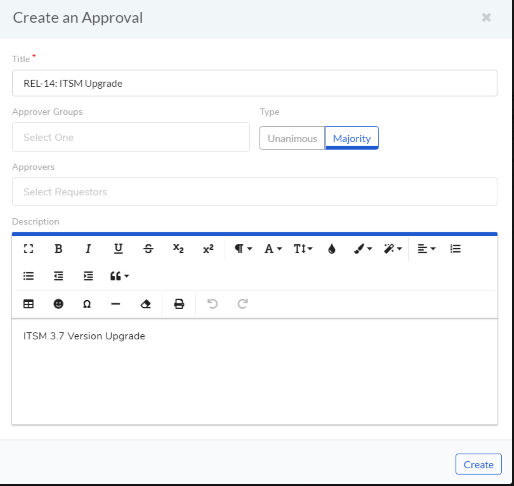
Create Approval
Using the dialog box, the technician can create an Approval with multiple approvers and technician groups. The assigned approvers get notified immediately. There are two types of Approval:
Unanimous: All of the approvers need to approve, otherwise the Approval request will get rejected.
Majority: If the majority of approvers agree, then Approval is successful.
4.10.7.4. Adding a Time Log:
Go to Release >> List View.
Select a Release and go to its Details View.
Scroll down to the Time Log tab and click on it.
In Time Log tab, technician can view all the logs, if any. He will click on Add to add a new log. A dialog box opens.
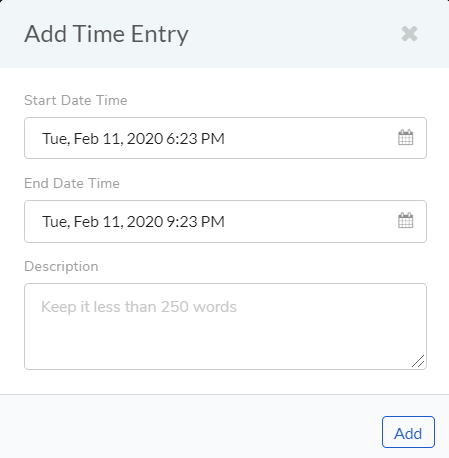
Add timelog
In the dialog box, technician enters a Start Date Time (e.g., Mon, Dec 11, 2017, 5:12 PM) and an End Date Time (e.g., Mon, Dec 11, 2017, 10:10 PM) and a description, and hits Add to save his time log.
4.10.7.5. Edit/Delete a Time Log:
A technician goes to the Details View of the Release.
Scrolls down to Time Log tab and clicks on it. Technician can view all his logs under the tab.
Technician edits using the Edit Icon adjacent to a log. He can delete them using the Delete Icon.
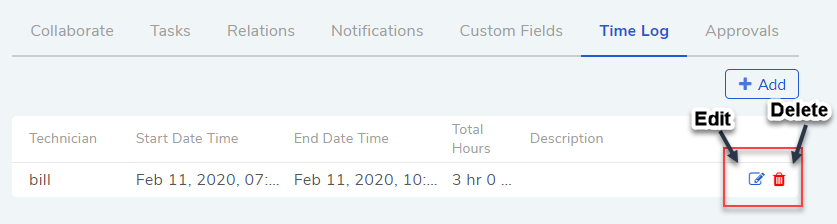
Edit/Delete timelog
4.10.8. Managing Tasks
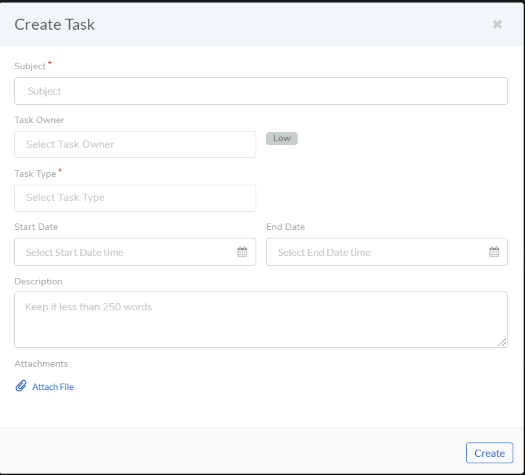
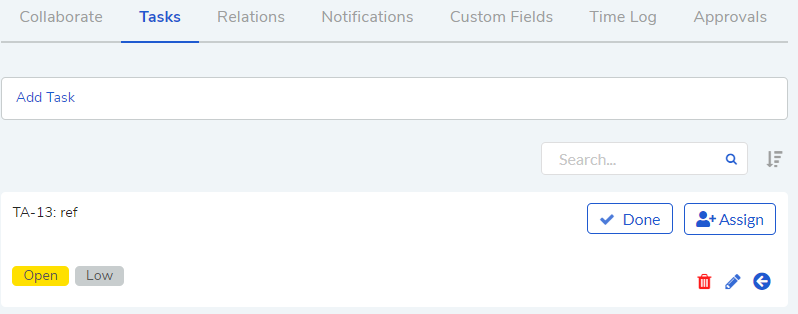
Sometimes implementing a Release becomes a collaboration between multiple Technicians; which is why the tool allows delegation of tasks from the Details View of a Release.
Once a Release reaches the Implementation stage, the assigned technician can create Tasks related to the Release and assign them to other Technicians. Assignees get notified immediately.
4.10.9. Add and Remove Watchers in a Release
With the Watch feature, one can subscribe to a specific Release and receive all notifications related to the Release request.
4.10.9.1. Adding People as Watchers
A technician can add a watcher from the details view of a Release by clicking on Add Watcher.
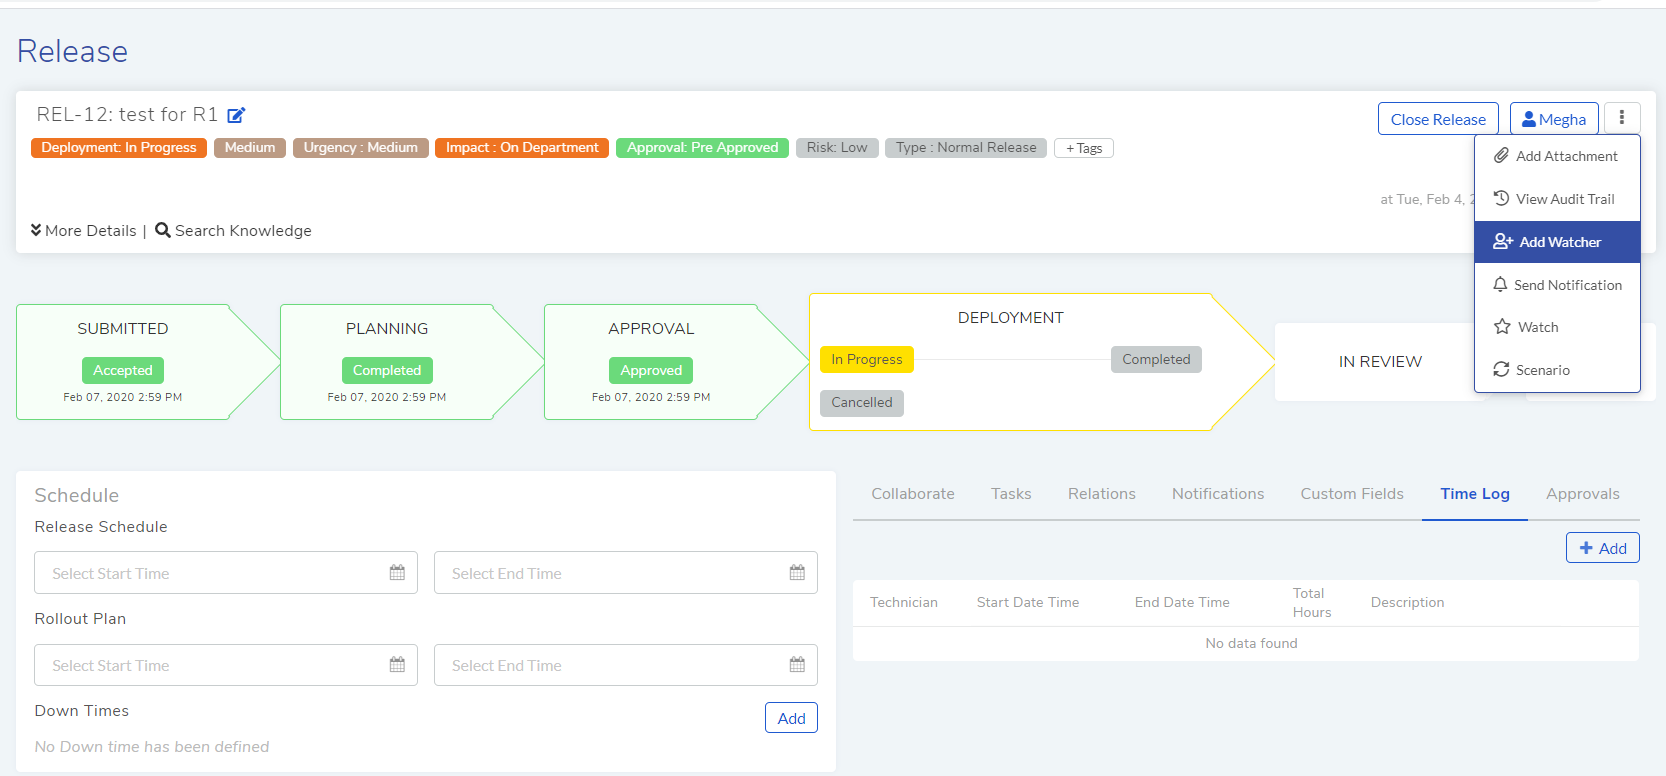
Add watcher
The technician can add people individually using their email addresses, or he can add groups available for Technicians and Requestors, or he can use both emails and groups.
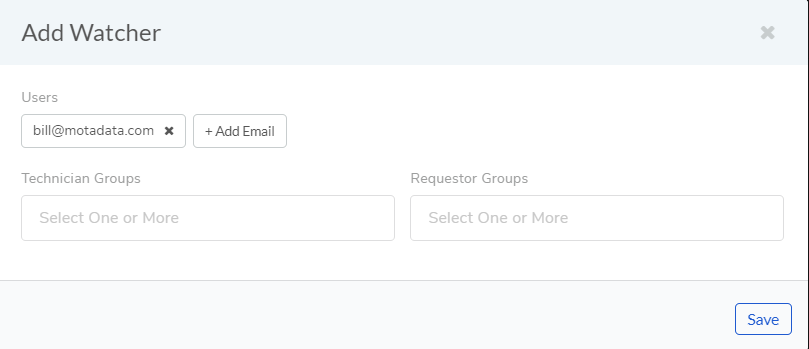
Add watcher fields
A technician can add himself as a watcher by clicking the option Watch.
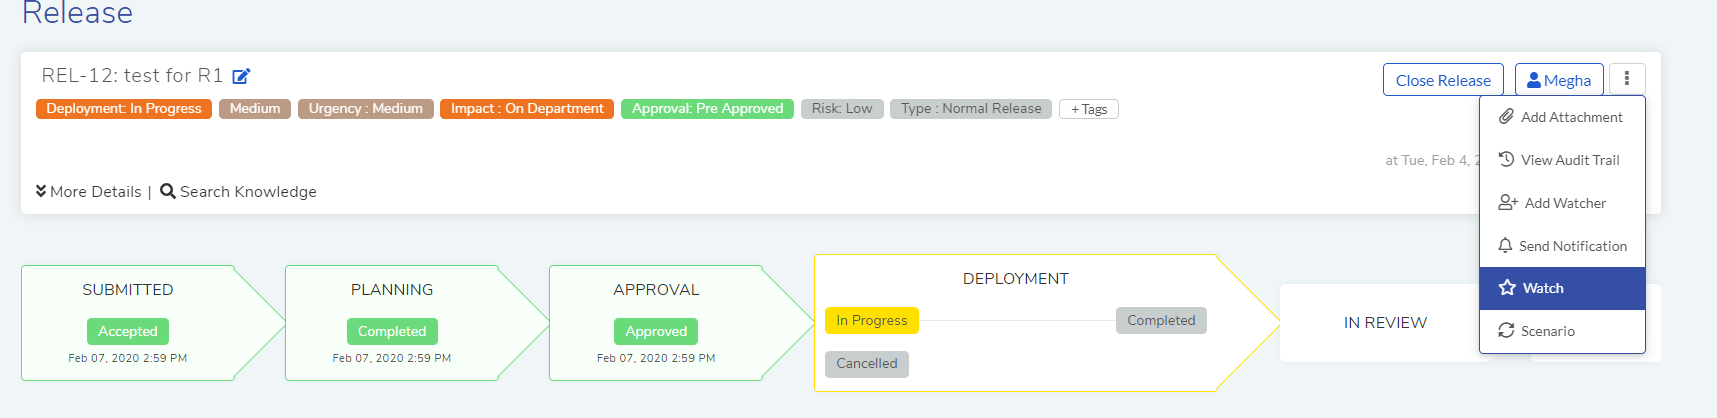
Configure watcher
4.10.10. Send Notifications from a Release
Technician can send a notification from the details view tab of a Release by clicking on Send Notification.
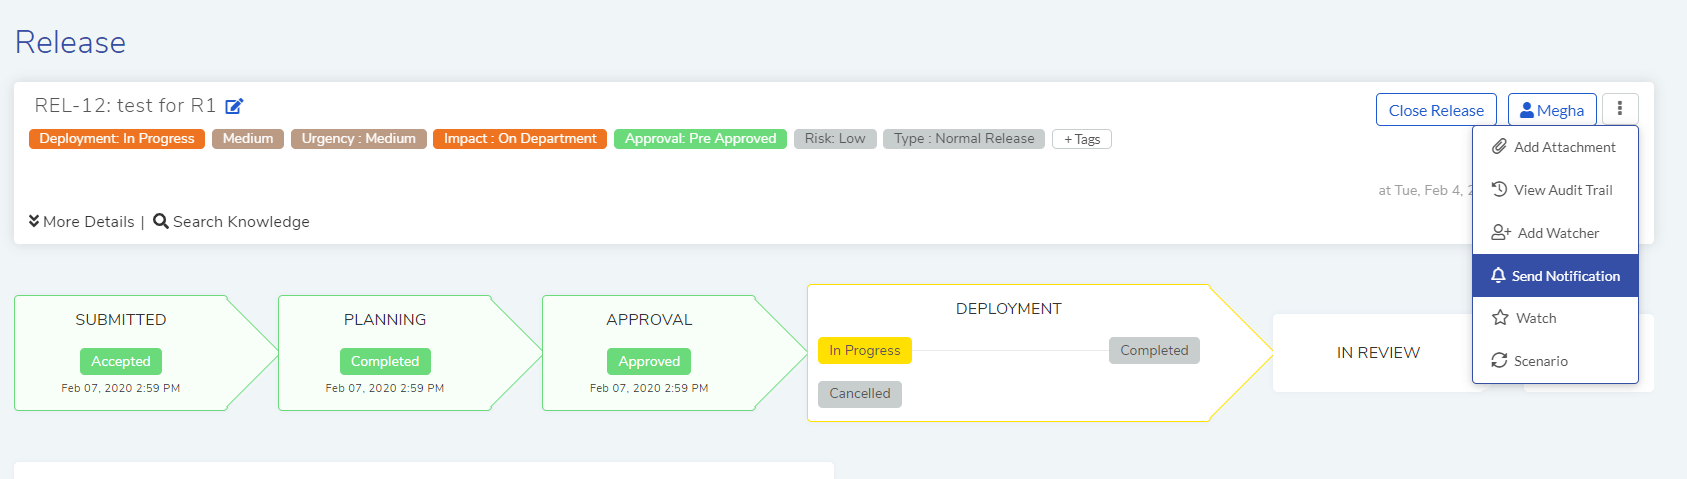
Add Notification
A pop-up would open a form where filling the fields would send the notification to the any of the Requester or technician groups.
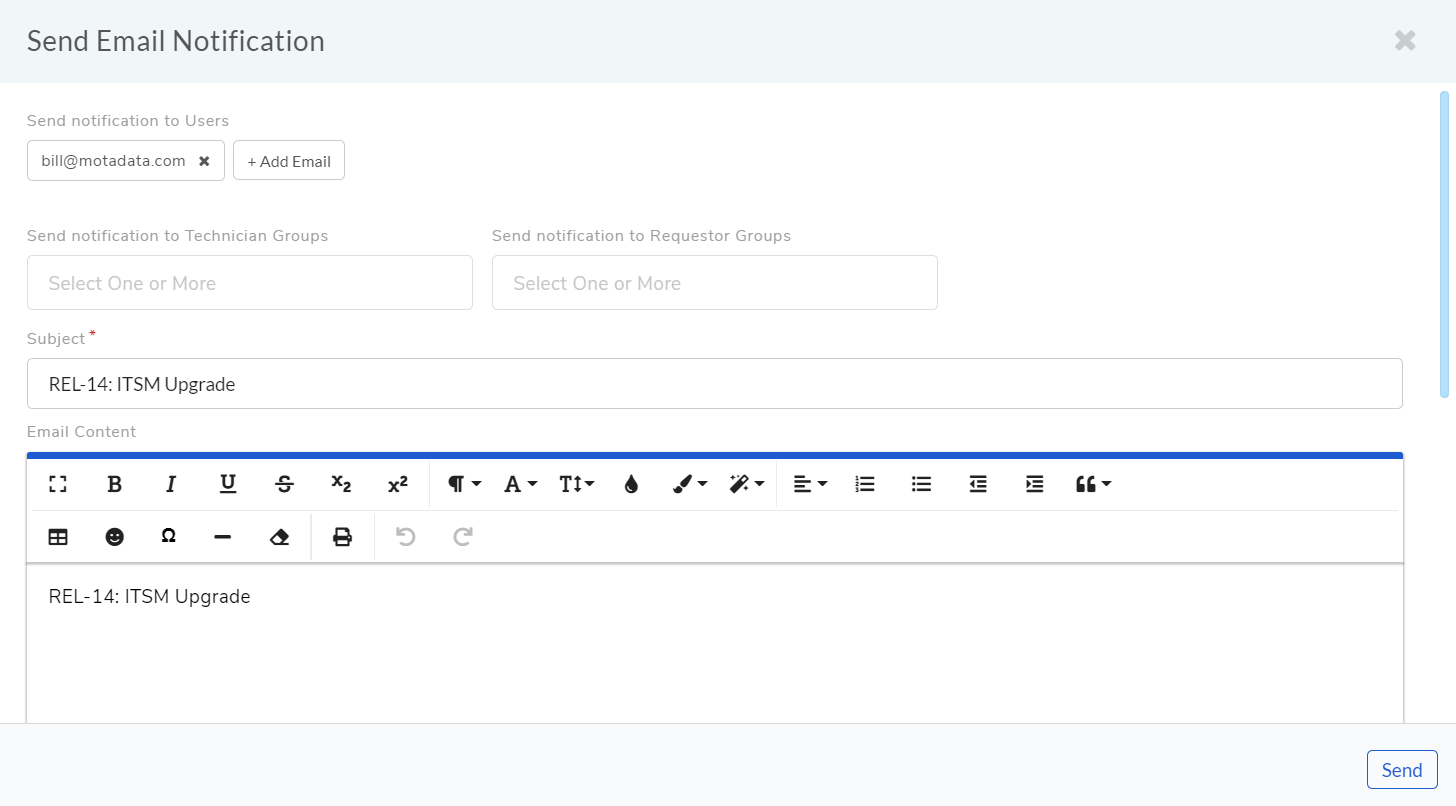
Send Notification