13.10. Deployment Request
13.10.1. Introduction
A Deployment Request is a set of instructions for Computer/Computers. An Admin creates it, or anyone with the rights, to initiate a deployment cycle. A Deployment Request mainly contains the following information:
Request details: Defining the installation criteria.
Package/Registry details: Installation of which Packages/Regsitry?
Computer details: Computers that are going to install the Packages.
Learn how Deployment Requests are created.
All Computers ping the main server periodically to check for available Deployment Requests. On finding a Deployment Request, Computers/Computer can acquire the Packages info from the File Server and install them following a Deployment Policy. A single end to end process of fetching and installing/deploying Packages or registry values is called Deployment Cycle.
13.10.2. Adding a Package/Registry Deployment Request
Currently, all package/registry deployment requests are created by users. To create a deployment request:
Click on the Launcher icon and select Deployment.
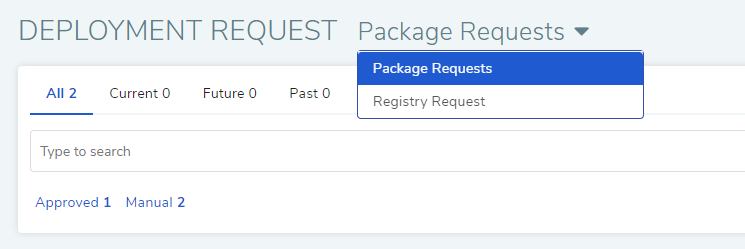
Select Deployment Request from the Package menu.

Select what you want to deploy: either a Package Request or Registry Request.
The Deployment Requests page opens. Here you can view existing Requests either drafted or published. Click on Deploy Packages/Registry situated in the top right corner of the page.
The Create page opens. The page is divided into four sections; they are as follows:
Request Details:


Name: You can provide a name to the Deployment Request instead of the default placeholder. It is advisable to keep the date part of the placeholder.
Platform: Select the platform for which you are deploying Package/Packages. Currently, we support only Windows and Ubuntu Linux. For a Registry Request, the default platform is Windows.
Deployment Action: It shows whether the deployment is for install or uninstall of Packages. This info is missing in a Registry Request.
- Deployment Policy: Select a Deployment policy from the
drop-down list. A Deployment Policy governs how the deployment of Packages is carried out. Learn about Deployment Policies.
Install After: Provide a date and time after which the request tells the Computers to commence the installation process
Expire After: This is the date and time after which the
request ceases to be a valid request.
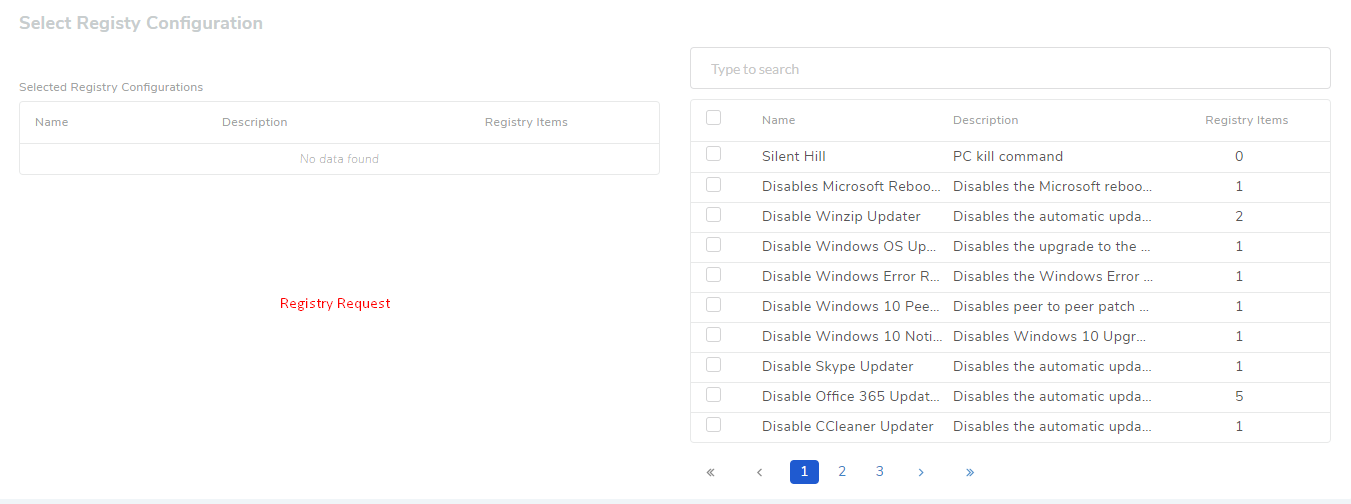
Select Package: Here you add the Package/Packages/Registry/Registries that you want to deploy.

Section-A (
spf-34) is the area where you view the selected Packages/Registries and select whether the deployment is for install or uninstall of Packages. This info is missing in a Registry Request.Section-B has a search bar for searching all available Packages/Registries for the selected OS. The search bar supports the Advanced Search (not when searching for Registry) feature. Learn how to use Advanced Search (refer to how search works in Package List View).
Section-C is where you view the available Packages/Registries in the main server. Clicking a checkbox selects a Package and transfers it to section-A.
Select the Packages/Registries that you want to deploy.
Select Target:
Target refers to Computer/Computers where Packages/Registries are going to be installed/deployed.
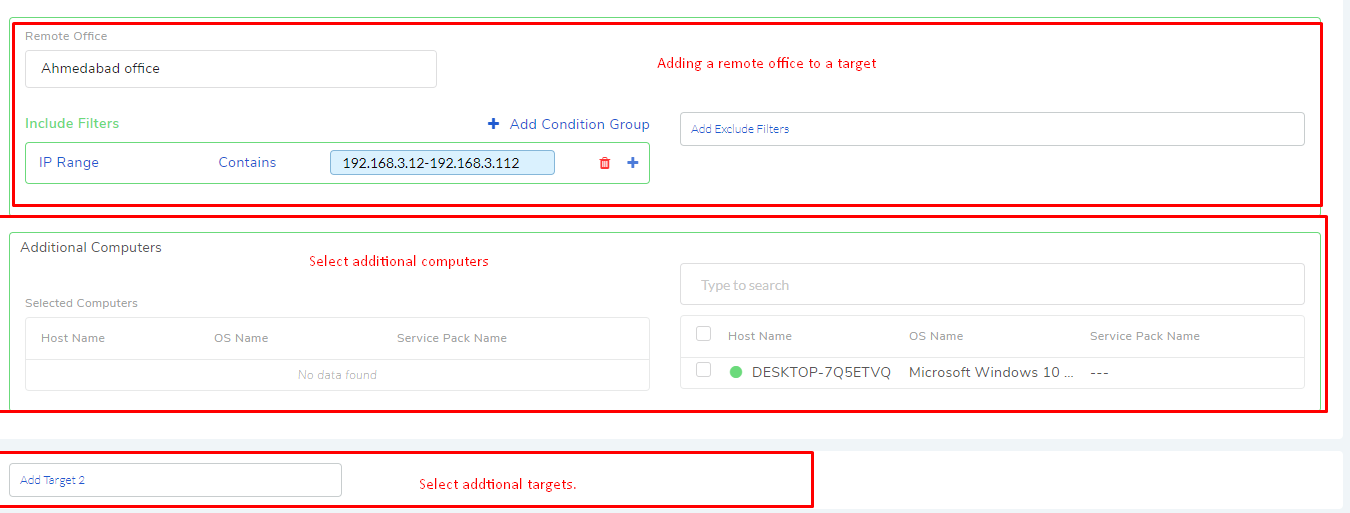
Here you set your target computers which requires you to set the following things:
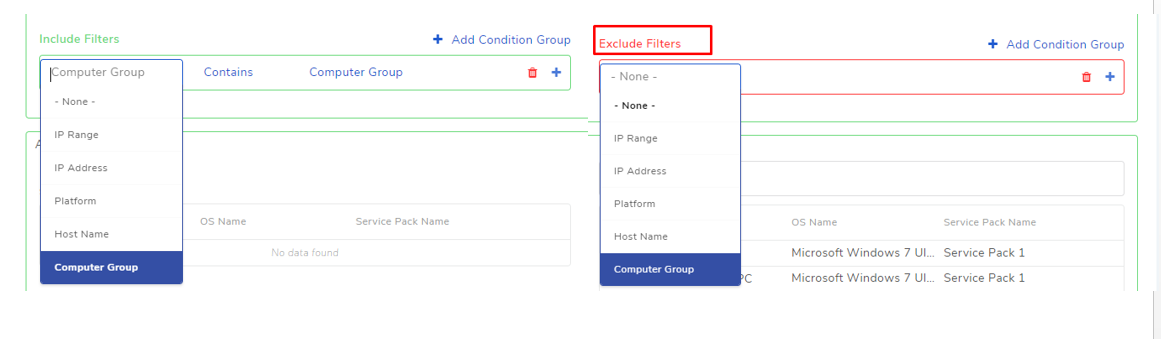
Set a Remote Office. This will allow auto selection of multiple computers from a Remote Office’s network may or may not be based on include and exclude conditions.
You can use a Manage Computer Groups (Package/Registry Deployment) to filter a Remote office. Computers (of the Remote Office) in the Group will be either included or excluded.
Set individual computers.
Set a different Scope (Target) if there are multiple Remote Offices.
Retry Configuration:

The retry configuration limits the number of times an Agent tries deployment when faced with failure.
You can define the maximum number of times to try deployment during system start-up.
You can define the maximum number of times to try deployment once at each refresh cycle (by default refresh cycle is set to 1 hour).
During each retry cycle, the deploy status swings from In-Progress to Failed and vice-versa for each package/registry till success is reached in deployment.
Fill in all the necessary details. Now you have two options; you can publish the request or save it as a draft.
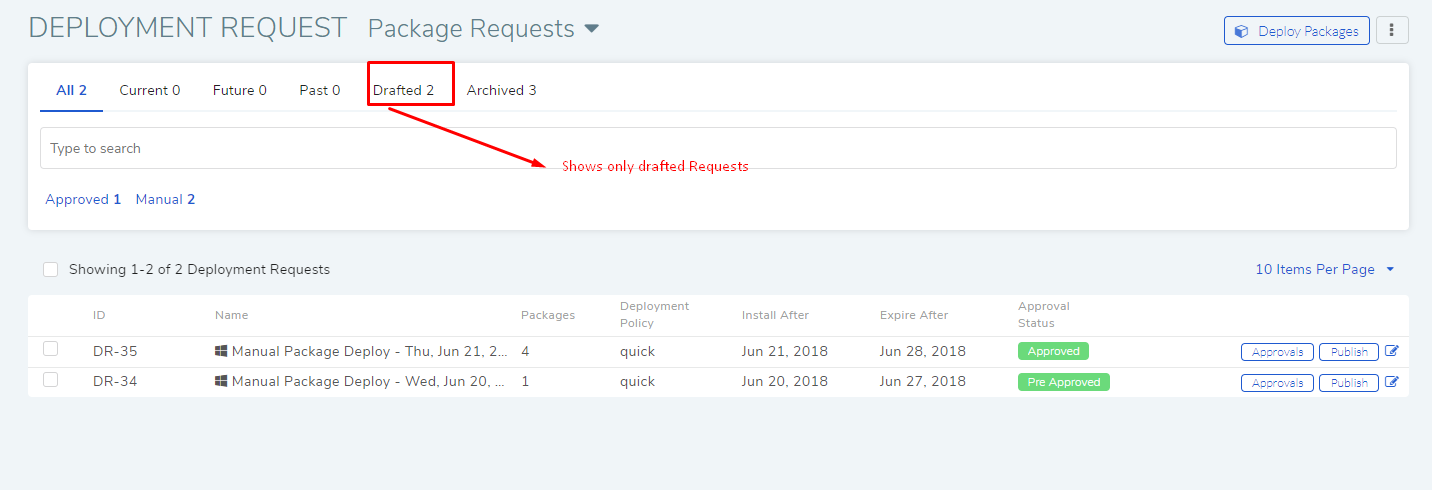
If you save the request as a draft, then the request appears as drafted in the Deployment Requests page. You can view all drafted requests using the Quick Filter Drafted.
If you want to publish the request, then click on Publish. This might or might not activate the request immediately, depending on Custom Rules. If Deployment Custom Rules (refer Admin Manual) demand Approval, then you have to seek Approval before you can publish the Request.
You can publish a drafted request from its Update page (clicking on a request opens it in edit mode), or you can click on the publish button adjacent to a request.
13.10.3. Other Ways to Add a Deployment Requests
13.10.3.1. Adding a Deployment Request from the Package/Registry List View:
Our tool allows you to select a Package/Packages/Registry/Registries from the List Page directly and deploy them.
Go to the List View of either Windows, Ubuntu Linux or Windows Registry.
Select Package/Packages/Registry/Registries from the list area. A Deploy button appears above the list area.
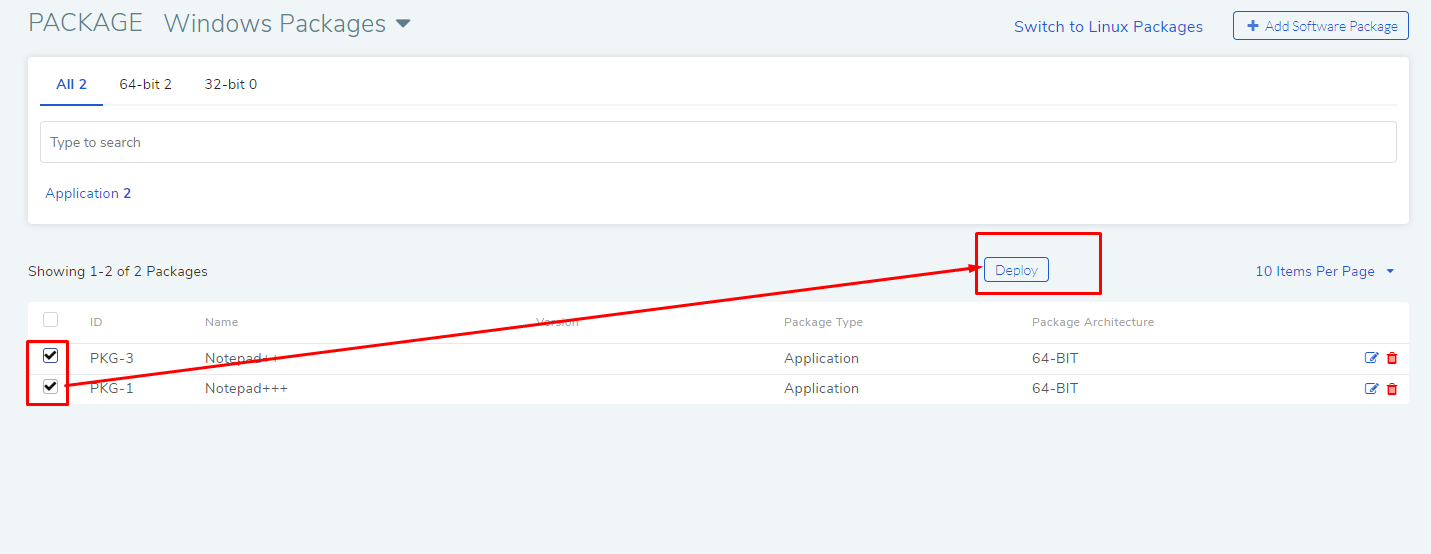
Click on Deploy which opens the Create page. Use the page to create the request. The dialog box has the Package/Packages/Registry/Registries preselected.
13.10.3.2. Adding a Deployment Request from a Computer’s Details Page:
Go to the Computer List Page.
Click on a Computer. This takes you to the Details Page.
Click on Deploy Packages from the Action Menu.
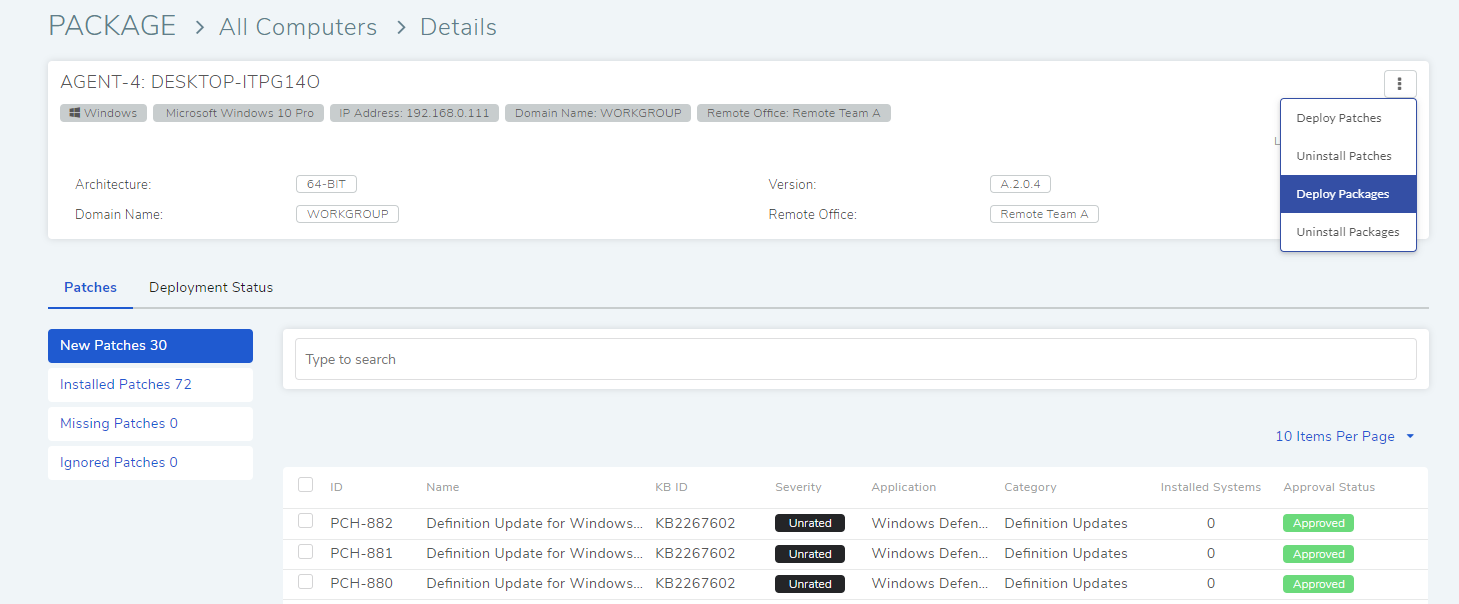
Create page for request opens. Create your request and publish it, or you can save it as a draft.
13.10.4. Approval
In case there is a custom rule (Refer admin manual for Patch Custom Rules) defined, then you have to make every drafted request go through an Approval process before publishing it. In an Approval process, you seek approval from a set of approver/approvers.
13.10.4.1. Asking for an Approval:
Go to the Deployment Request page.
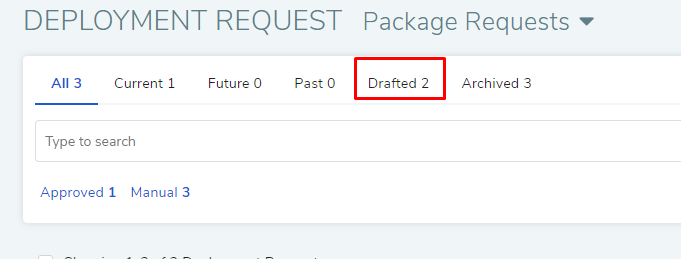
Click on the Quick Filter Drafted to sort all drafted requests.
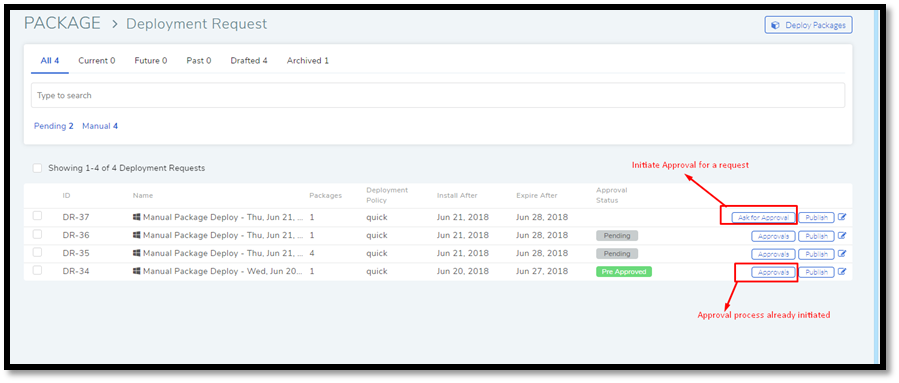
You can initiate an Approval process for a request by click on the adjacent Ask for Approval button.
When Allow Manual Approval feature is turned on, you will be shown a dialog box that you can use to create a manual Approval. If you skip this dialog box, then the Approval goes to the Workflow.
13.10.4.2. Different States in an Approval
Pending:
Rejected:
Pre-Approved:
Approved:
13.10.4.3. Approval Process:
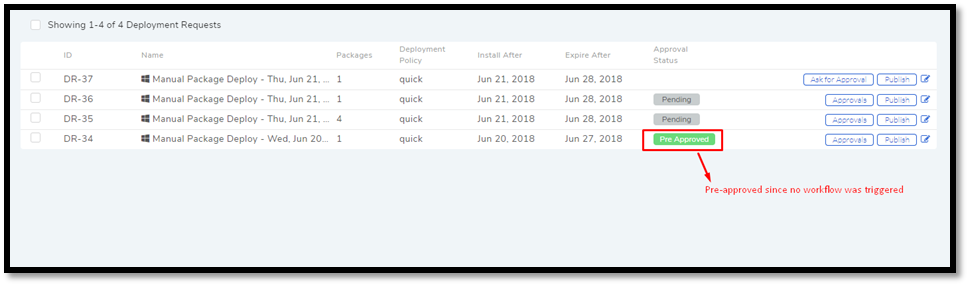
In case of automatic approval, first, the system checks all available Approval Workflows when an Approval is asked. If there are no workflows or the present workflow conditions are not meet, then the drafted request/requests are Pre-Approved, and you can proceed with publishing. If there is a workflow/are workflows, and their conditions are met, then approver/approvers are auto-assigned for each request.
When there are multiple requests, it may happen that some may trigger the Approval conditions and are put in Approval, and some may not trigger the conditions and are Pre-Approved.
When you Ask for Approval for a request, an Approval button appears adjacent to the request. The button gives you access to the Approval details dialog box where you can view all the approvers and their comments and even re-ask for an Approval (this again checks for all available workflows).

For requests that have Approvers, the Approval Status changes to Pending, and it stays there as long as the approver/approvers don’t express a decision.
An approver can see his Approvals in the My Approvals section of his account.
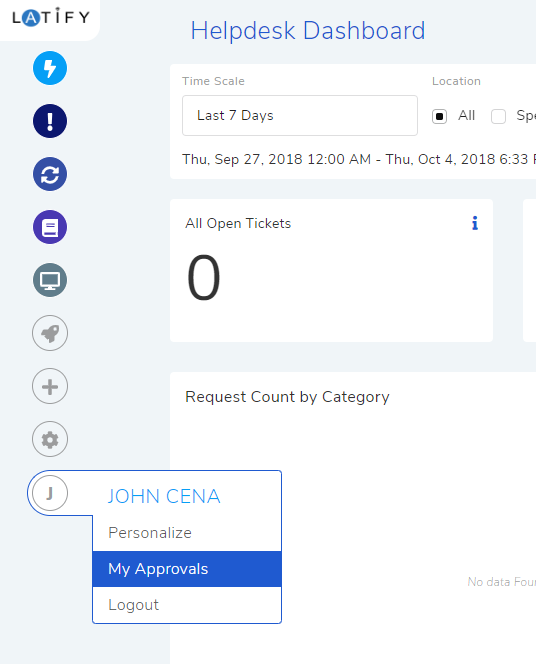
Clicking on My Approvals (
spf-44) opens the My Approval page where he can view his Approvals.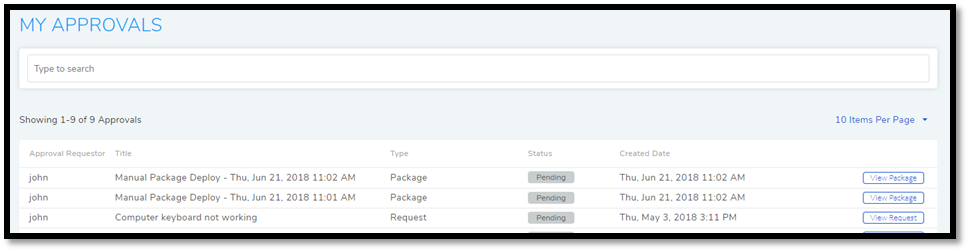
Clicking on an Approval in My Approval opens a new page. There he can perform the following actions:
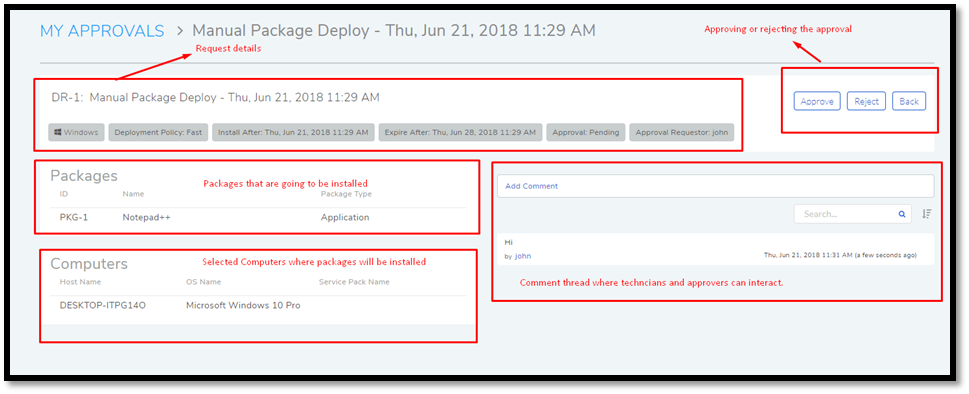
View request details, target Packages/Registries, and Computers.
Start a comment thread.
Approve or Reject the Approval.
The outcome of an Approval process is decided in two ways:
Unanimous: All of the Approvers have to approve else the Approval is rejected.
Majority: If the majority of Approvers agree then Approval is successful.
In case there are multiple Approvals, the decision to go with unanimous or majority can be set from Admin (A Navigation Tab) >> Approval Workflow (Automation) >> Approval Settings, but the rights to do it lies with the Super Admin.
On success, the Approval moves to the Approved stage where the author can publish the draft. On failure, the Approval moves to the Reject stage where the author has to initiate the Approval process. The author (assigned Technician) reinstates an Approval process using the Re-Approve option. A Re-Approve puts a request back to the pending stage.

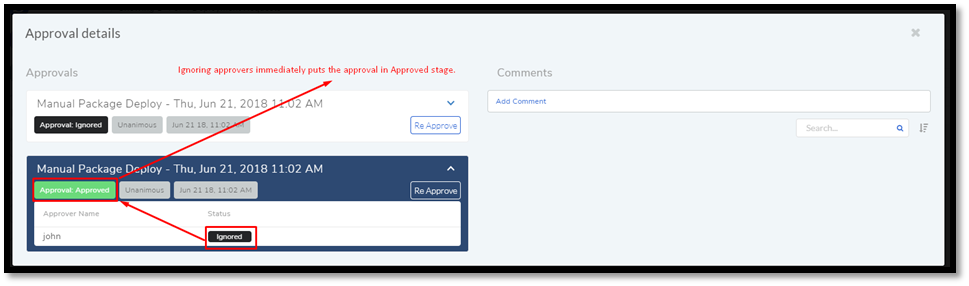
Any Technician with the Can Ignore Approval right can ignore approvers and push the Approval towards the Approved stage; where he can publish the draft. The ignored approvers can see their Approval status as Ignored in Approval details dialog box of the Article.
13.10.5. Searching Deployment Requests
There are two broad ways to search Deployment Requests in the tool:
Using Search Bar
Using Filters

13.10.5.1. Search Bar
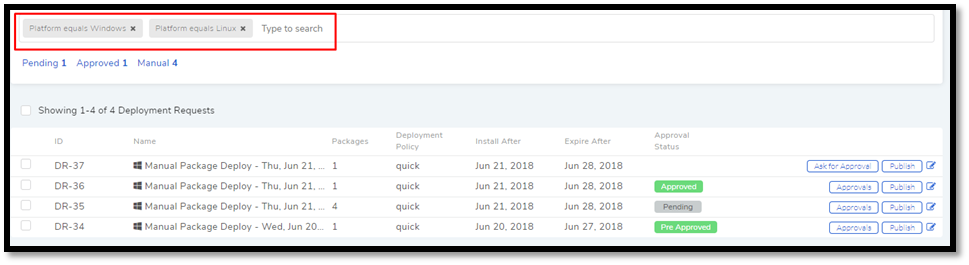
In the Deployment Request page, you get a search bar to search through requests. The search bar supports the Advanced Search feature where you get a set of search options. Click on the search bar to access all search options.
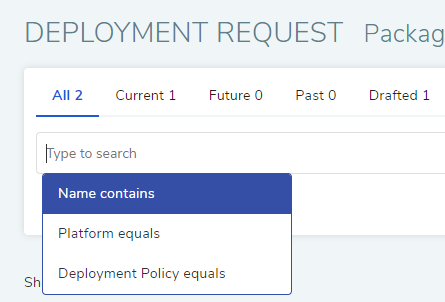
In some options, you have to enter a value, and in others, there are predefined values. You can create conditions using multiple options. Between two different conditions of the same option type OR logic is followed. Between different types AND logic is observed. An example of same option type contradiction is Platform equals Windows vs. Platform equals Ubuntu Linux.
13.10.5.2. Filters
You can search for requests in the Deployment Request page using Quick Filters. There are four types of filters available:
Filters based on time of deployment.
Filters based on Approval status.
Filters based on origin.
Filter based on deployment type (Package or Registry).
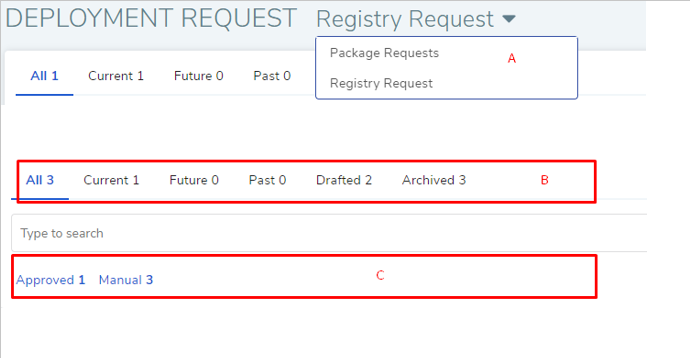
Section-A lets you decide whether you want to work with only Packages or Registries.
Section-B (spf-52) is a quick filter to toggle across the following
views:
Current: Shows all the published and drafted requests that can start the deployment process immediately.
Future: Shows all the published requests that can start the deployment after a future date and time.
Past: Shows all the requests that have expired.
Drafted: Shows all drafted requests that are yet to be published.
Archived: Shows requests that have been deleted, includes drafted requests.
Section-C (spf-52) allows you to filter request based on origin and
Approval status. There is only one possible origin to a Deployment Request,
and the Approval statuses are Approved and Pending.
13.10.6. Managing Deployment Requests
13.10.6.1. Deploy Status
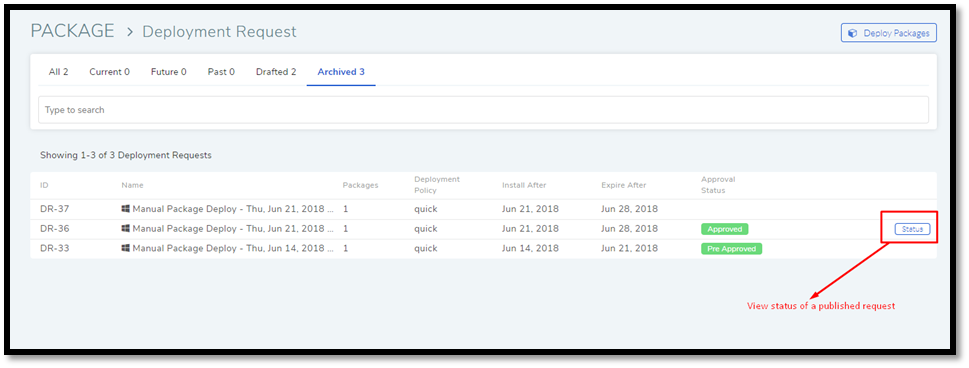
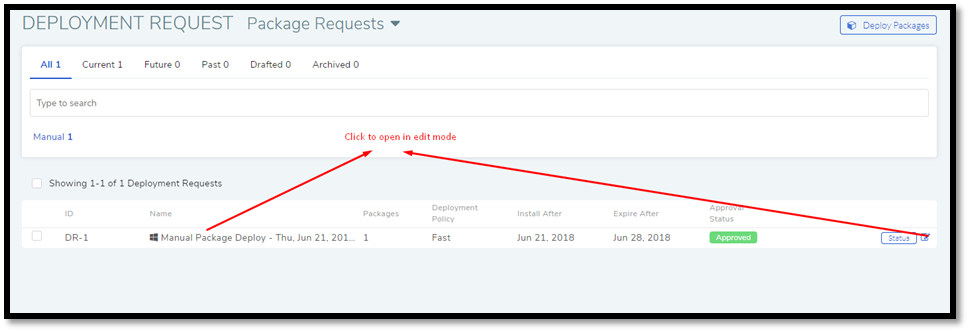
In the Deployment Request page, every published request has a Status button.
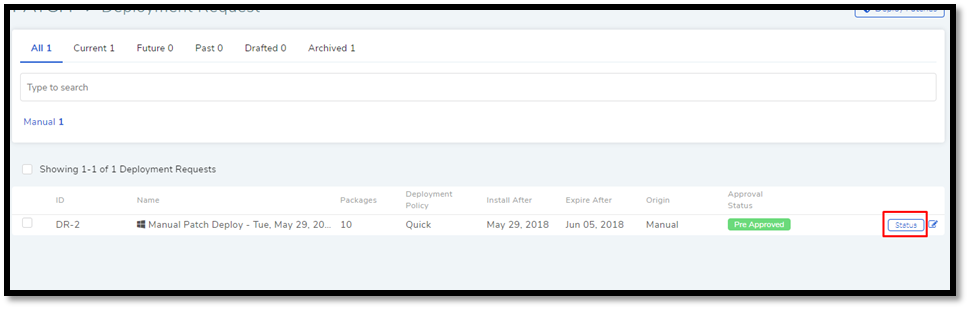
Using the Status button, you can check the Deploy Status of all associated Computers.
Clicking on a Status button opens a new page where you can view all associated Computers that are going to deploy the Package/Packages/Registry/Registries.
Each computer has a Deploy Status button which opens a dialog box where you can view the installation statuses of each Package/Registry. Computer transitions through various statuses when installing a Package/Registry values. Some of the statuses reflect a stage, and some are conclusions. Altogether there are six statuses:
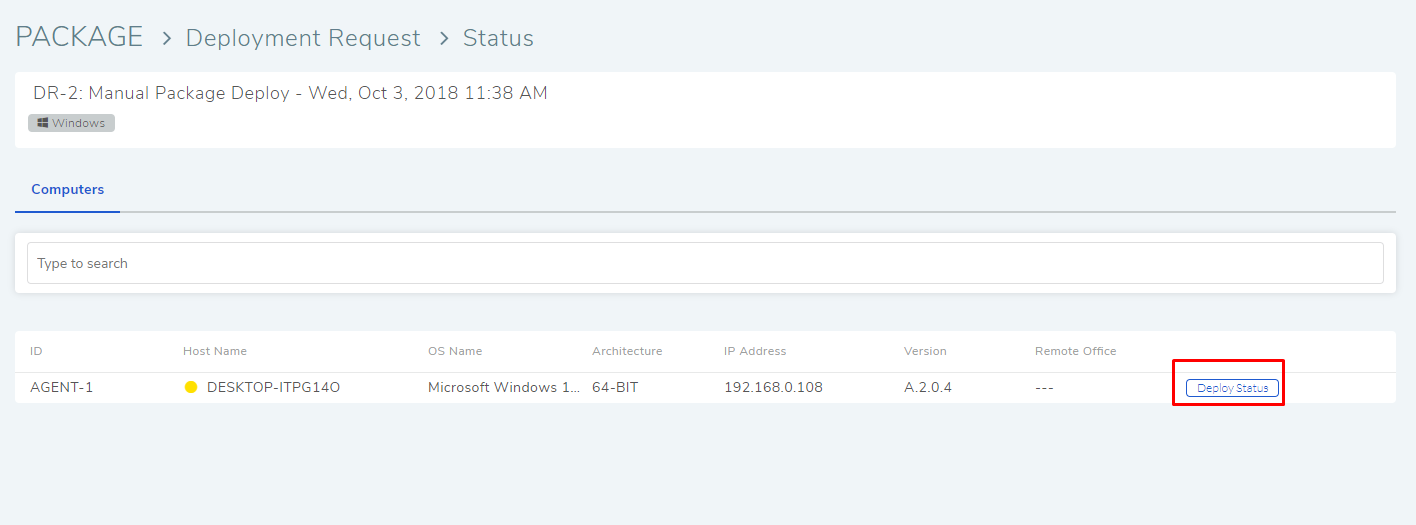
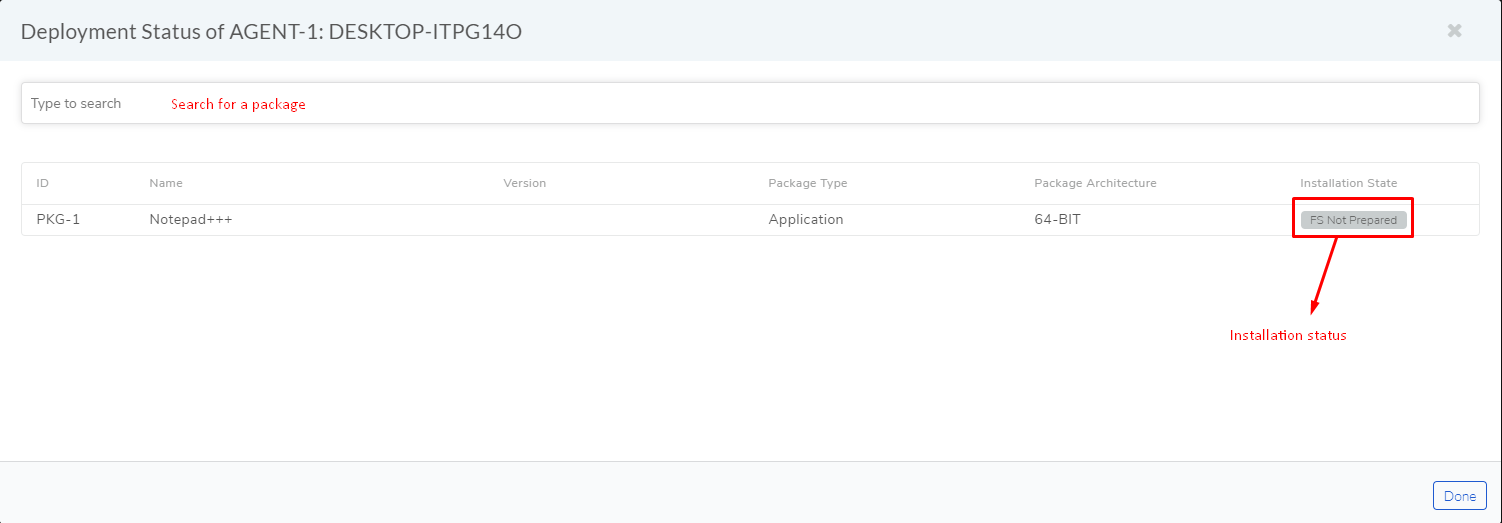
FS Not Prepared: This shows that the File Server is not setup.
Yet to Receive: The Computer is yet to receive instructions from the request to install the Package.
In Progress: The Computer is in the process of installing the Package after receiving the instructions.
Success: The Computer has successfully installed the Package.
Failed: The Computer has failed to install the Package.
Cancelled: The request was deleted before the Computer could receive the instructions for installation.
Not Applicable: The Package is not meant for the Computer.
13.10.6.2. Unsupported Computers in a Deployment
During deployment it may happen that certain target Computers don’t support all the Packages/Registries; in that case, the Not Applicable status is helpful.
Go to the Status of a request. Click on the Deploy status of a Computer; there the Packages/Registries that don’t support the Computer have the Not Applicable status.

13.10.6.3. Edit/Archive a Deployment Request:
You can update Deployment Requests that are in draft mode. Once published, a request cannot be edited.
Go to the Deployment Request Page.
The Status button adjacent to a request shows that the request is a published request.
You can open a request in edit mode by clicking on it or by clicking the Edit icon.
Archiving
The tool allows you to delete published and drafted Deployment Requests. You can delete multiple requests.
Go to the Deployment Request page from the Package Menu.
Select one and more requests. The Archive button appears.
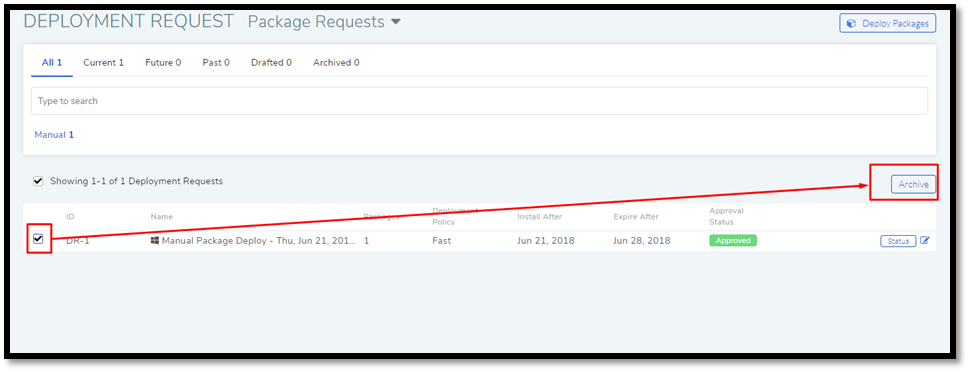
Click on the Archive button. On confirmation, the request/requests are deleted.
Deleting an Active Deployment Request:
Deleting a published request has the following effects:
Installation of Packages/Registries is canceled in Computers that are yet to receive instructions.
13.10.6.4. View Archived Deployment Requests
You can view an archived request along with its status. An archived request may have partially finished operations that might need scrutiny. To view an archived request:
Go to the Deployment Request page.
Select Archived from the Quick Filter section.
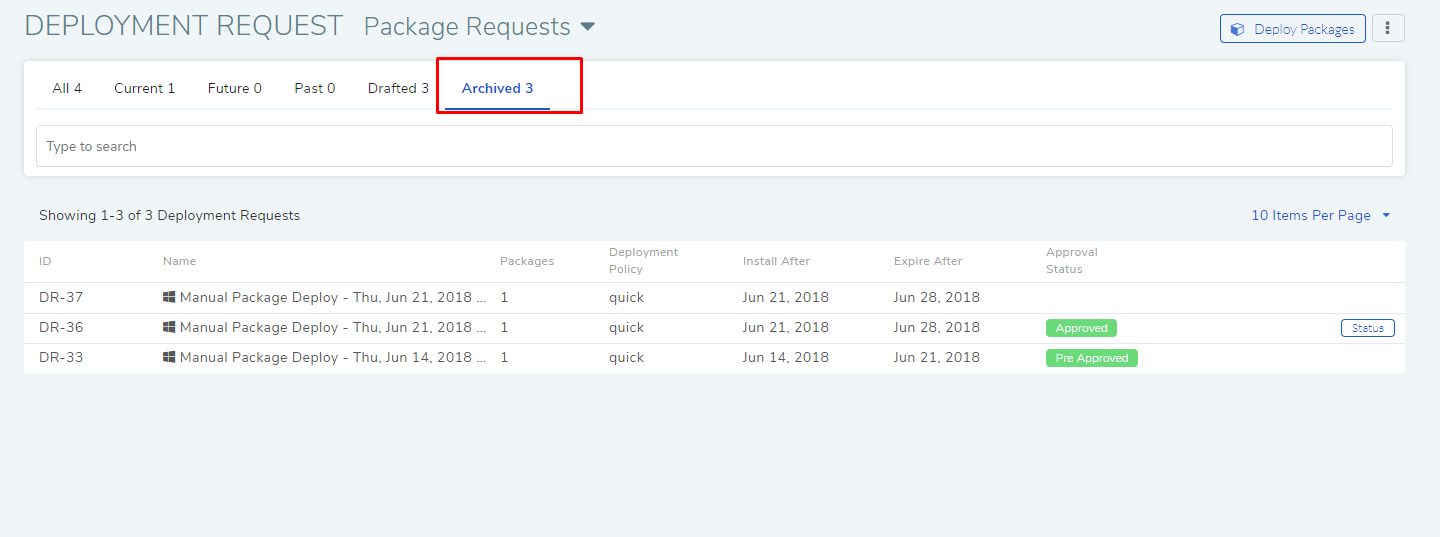
Now you can view all archived requests. Use the Status button to view deploy status.