13.7. Managing Software Packages/Registry Configurations
The first step towards Deployment is to add Software Packages/Registry Configuration in the system. A Package/Registry Configuration has to be manually added to the Deployment module before it can be attached to a Deployment Request.
Whatever Packages/Registry Configurations you add, they all appear on the Deployment List View (either in Windows Packages, Ubuntu Linux Packages or Windows Registry). After adding, you can modify a Package/Registry Configuration details and also delete them.
13.7.1. Adding a Software Package
Go to the Package List View (either Windows or Ubuntu Linux).
Click on the Add Software Package button situated in the top right corner.
The Add Software Package page opens. Here you get the following fields:
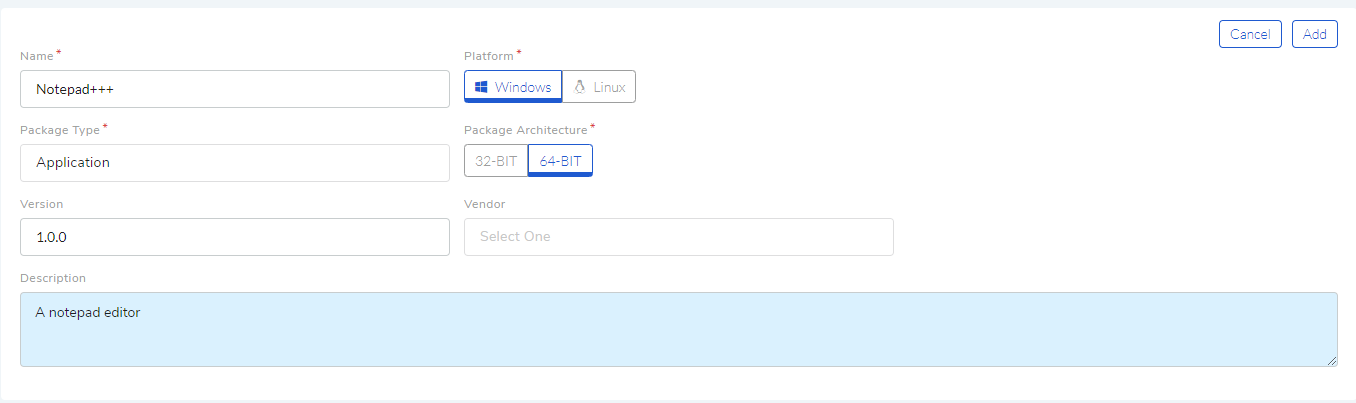
Name (Compulsory Field): Here you type the name of the Package. The best practice is to type the name of the Software.
Platform (Compulsory Field): Select the OS on which the package runs. Here you get a predefined list containing Windows and Ubuntu Linux.
Silent Installation Argument: Learn More.
Package Type (Compulsory Field): You select any one of the options:
Application Patch: Refers to a component of a computer program.
Application: Refers to an entire program designed to perform a set of coordinated functions.
Unknown
Version: Type in the version of the Software.
Vendor: Name of the entity who created the Software Package. The list is populated from the Vendor Catalog List.
Package Architecture (Compulsory Field): Architecture of the package either 64bit or 32bit.
Description: Add a Brief explanation of the Software Package.
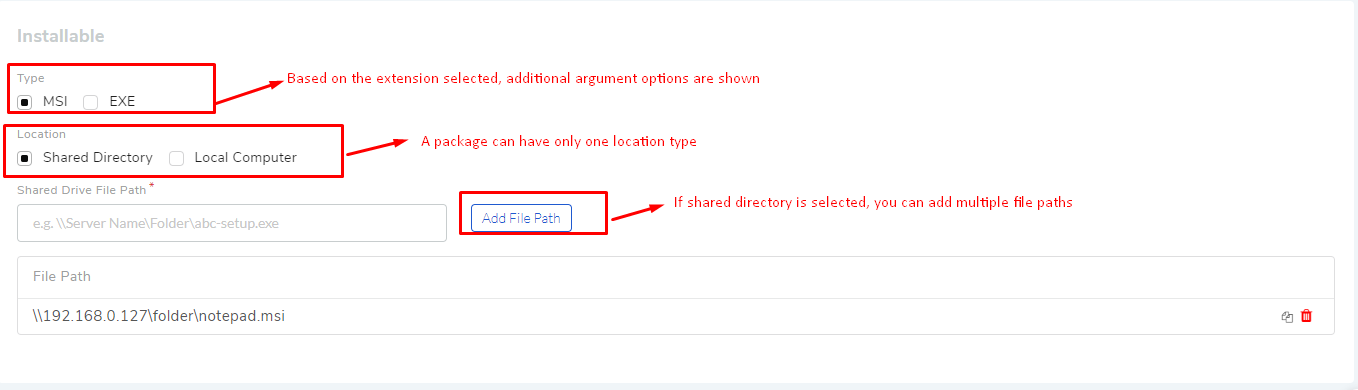
File Type: Currently we support msi and exe file extensions in Windows.
Location Type: Here you state whether the location is for a Shared Drive or from a Local Computer. A Share drive is a locally hosted storage location whereas in Local Computer you have to upload the file. A package can have only one location type.
You can add additional arguments controlling install and uninstall behavior of the package; they are:
MSI File Parameter
Parameters of Other Files (EXE/Ubuntu Linux)
Fill in the fields and click Add. Now you have successfully added a Package, and it now appears on the Package List View.
13.7.1.1. MSI File Parameter
When uploading a MSI file you can attach/add additional files and arguments to control installation and uninstallation operations:
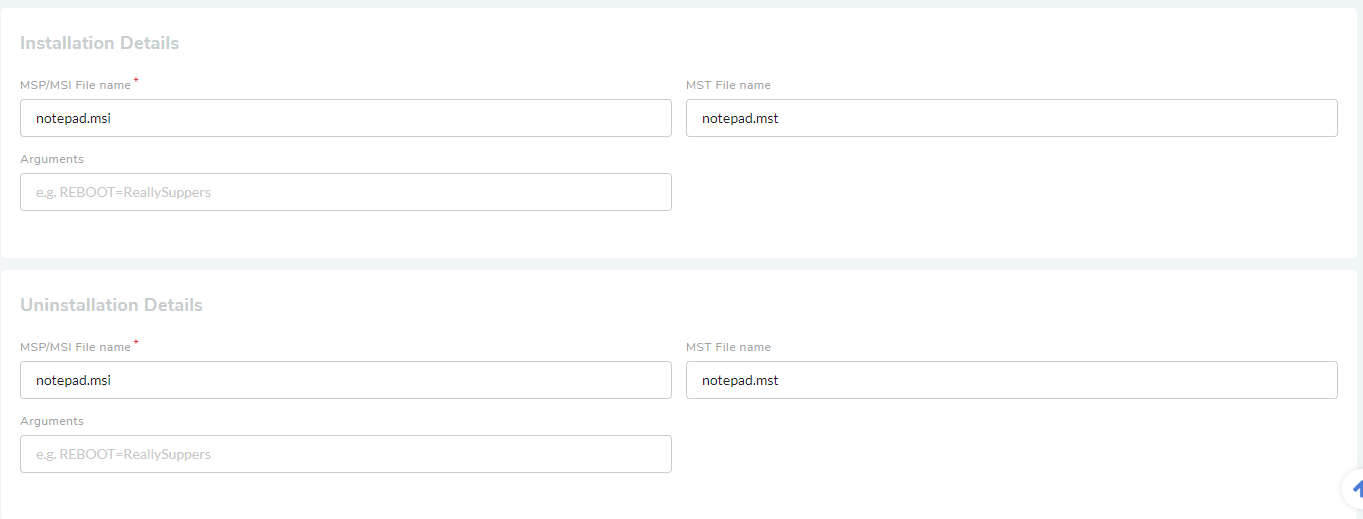
MSI Filename: Type in the exact filename of the msi file. This allows the system to identify the installation file.
MST Filename: A MST file allows you to collect installation options for programs that use the Microsoft Windows Installer in a file. They can be used on the Installer (MSIEXEC.EXE) command line, or used in a software installation Group Policy in a Microsoft Active Directory domain. Specific the exact name for the system to identify the file.
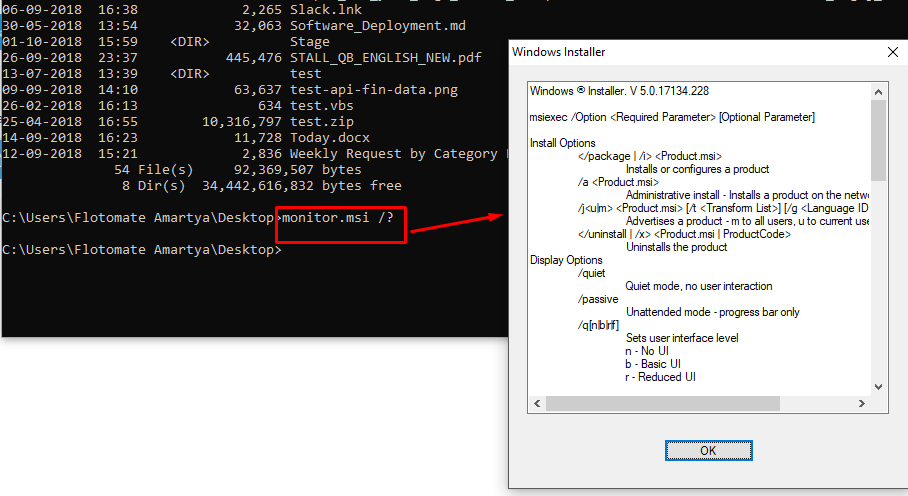
Arguments: For example, if you want a reboot after installation then you can put an argument for that. You can access the the list of all the arguments from the CMD, by typing filename.msi /?.
13.7.1.2. Parameters for Other Files (EXE/Ubuntu Linux)
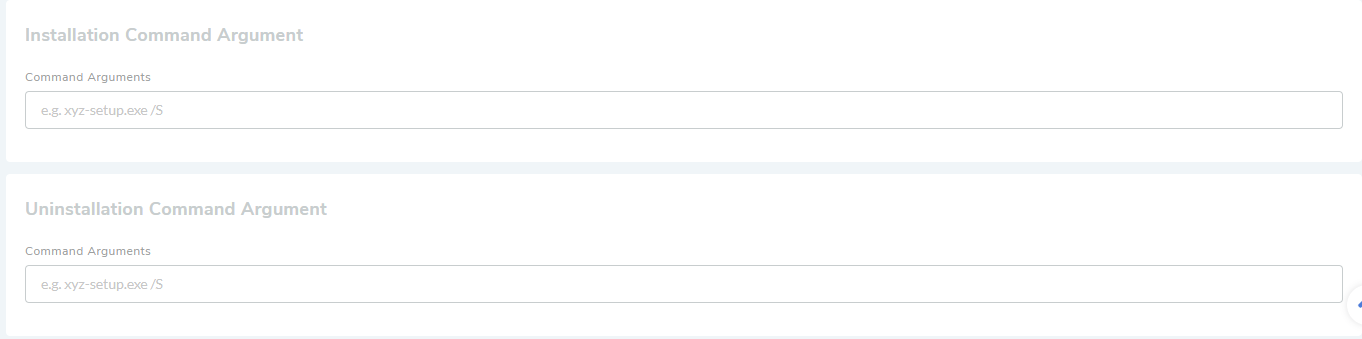
The default behavior of our Agent Application is to install/uninstall Software silently; for this /S is added after the filename by default. Some software have a different argument value; for example, Skype (version 8.25 and above) has /Silent as the argument.
If you want silent installation of a Software ,with a different argument, then type the exact filename followed by the argument.
13.7.1.3. Editing/Deleting a Software Package
To Edit a Package:
Note
Only Packages that are not associated with a deployment request can be edited.
Go to the Package/Registry List View.
In the list area, click on the Edit Icon adjacent to the package that you want to edit or click on the package name.
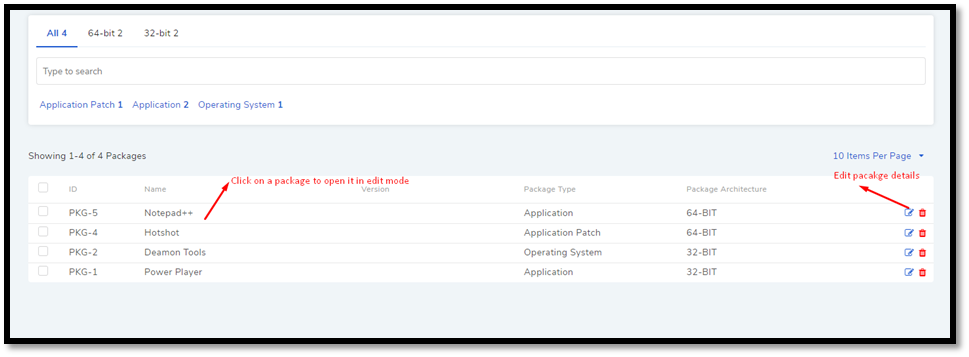
The Update package page opens. Make your changes and hit Update.
To Delete a Package:
Note
Only Packages that are not associated with a deployment request can be deleted.
In the List Page, click on the Delete Icon adjacent to the Package that you want to delete. On confirmation, the package is deleted.
13.7.2. Creating a Registry Configuration
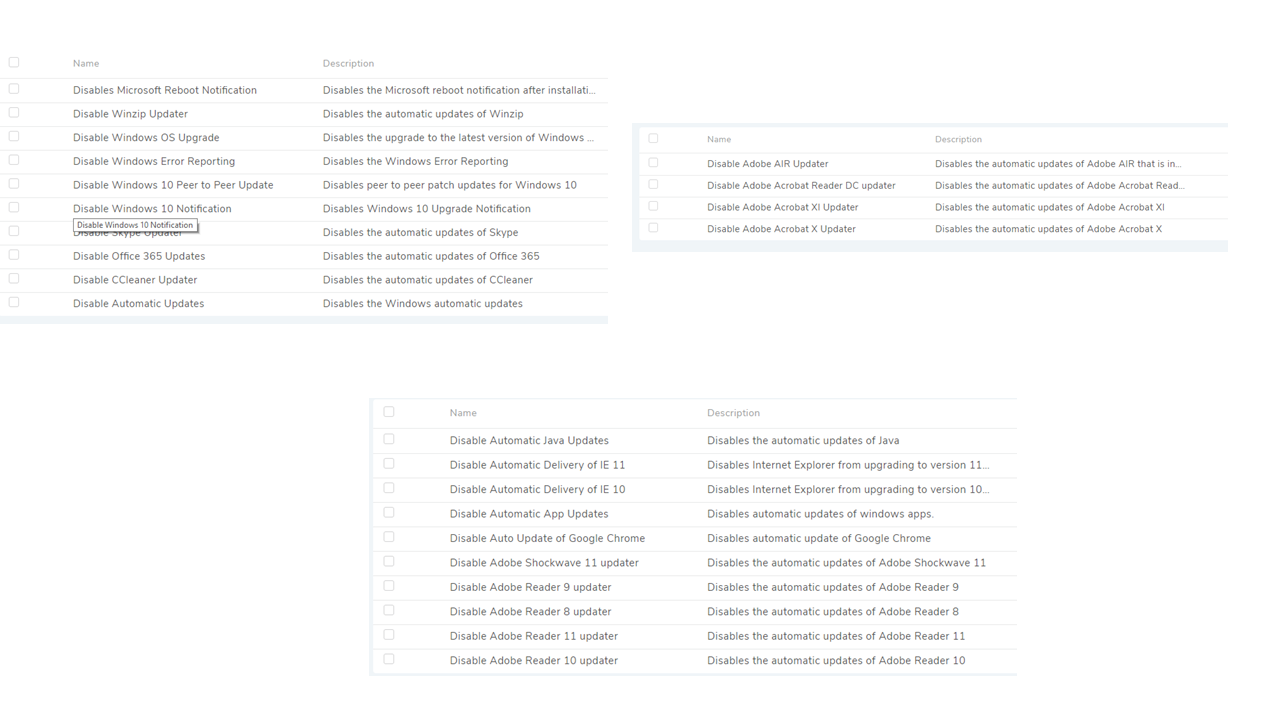
A Registry Configuration created as part of Deployment has Keys and Values, when deployed can manipulate the behavior of Windows components, Hardware and Software of a computer. The system has 23 pre-defined Configurations out of the box; they are as follows:
Note
Related Topic: Registry Deployment Use Case.
To create a New Registry Configuration:
Go to the Registry List View.
Click on Create Windows Registry Configuration situated in the top right corner of the page.
A dialog box opens where you have to enter a name and description.
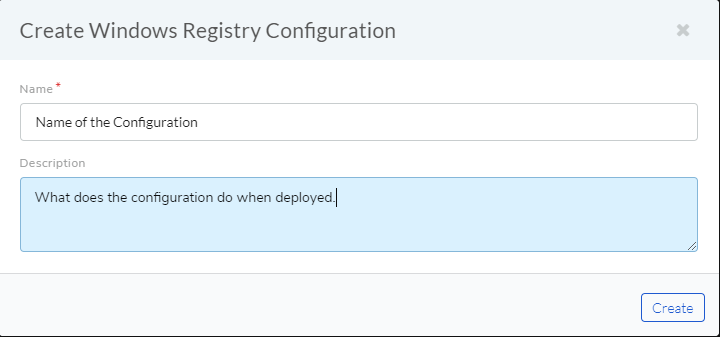
When done, click on Create and your Configuration will be created.
You will be redirected to the Update page of the Configuration where you can modify the registry items.
13.7.2.1. Editing a Registry Configuration
A user (See Technician Roles) can go to the Update page of a Registry Configuration from the Registry List View and modify its details. Clicking on a Configuration name opens the Update page.
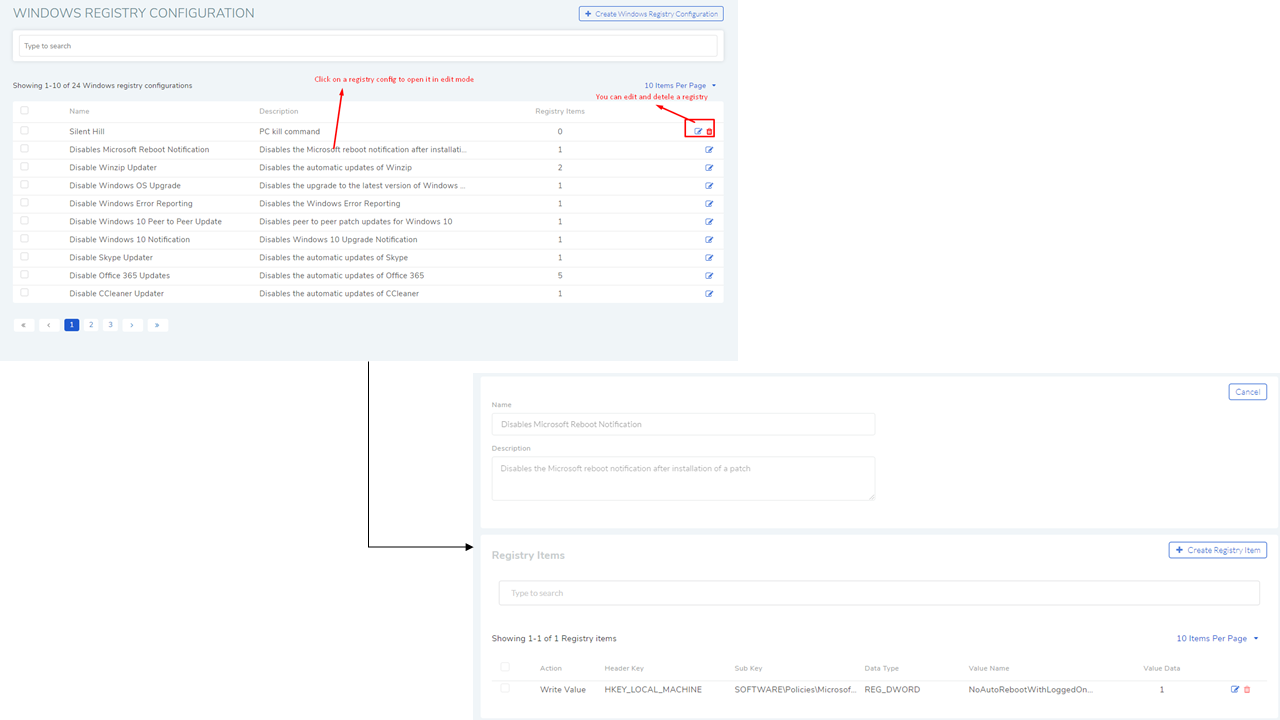
In the Update page a user can perform the following actions:
Update Name and Description of the Registry Configuration (applicable in a custom Registry Configuration).
Delete the Configuration (A pre-defined Configuration cannot be deleted).
Add and modify custom Registry Items.
A Registry item is created using the Create Registry Item button.
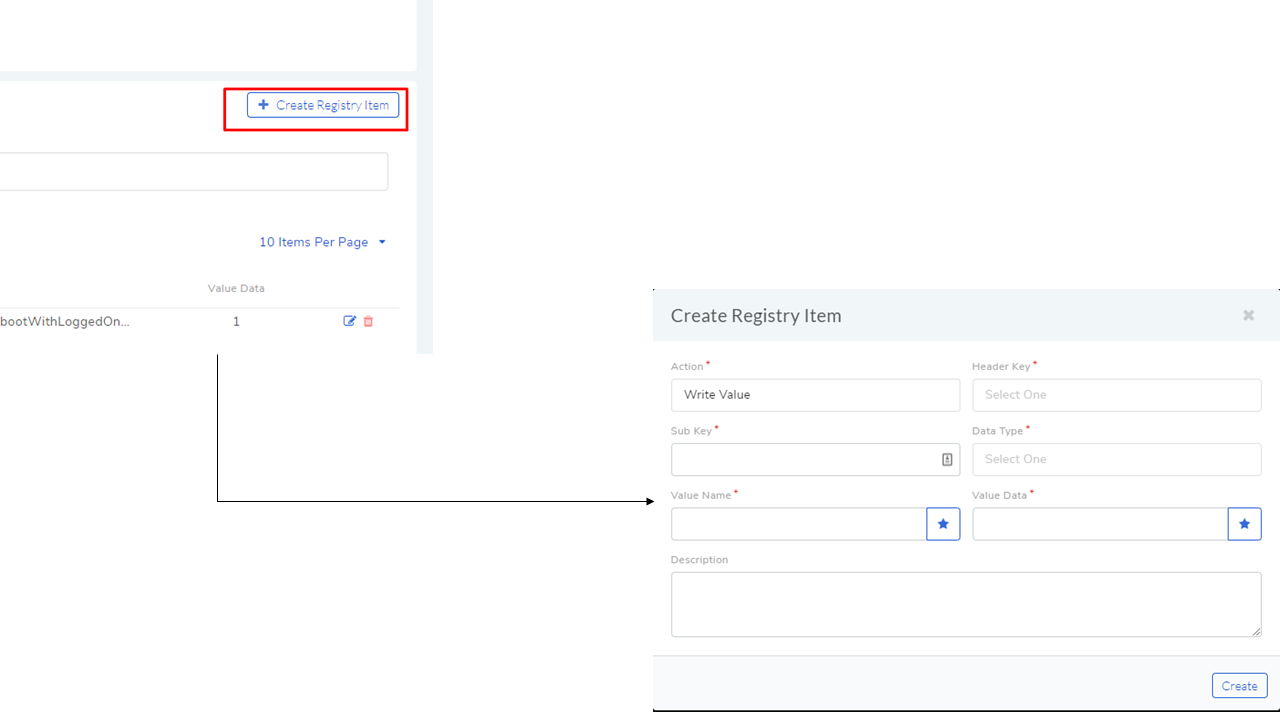
A Registry Item is a set of instructions to locate and modify a particular value name/key. A Registry Item has the following fields:
Action: Following operations are permissable:
Write Value
Delete Value
Add Key
Delete Key
Header Key: Following Header Keys are supported:
HKEY_LOCAL_MACHINE: This branch contains computer specific information about the type of hardware, software, and other preferences on a given PC. It is usually abbreviated as HKLM. You’ll mostly use the HKLMSoftware key to check machine-wide settings.
HKEY_USERS.Default: This branch contains individual preferences for each user of the computer, each user is represented by a SID sub-key located under the main branch.
Sub Key: Sub-keys are nested folders with in a hive. While creating a Registry Item, the Sub Key has to be manually filled in.
Data Type: Following data types are supported:
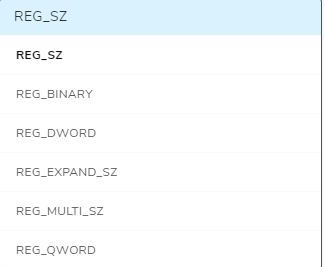
REG_SZ: This type is a standard string, used to represent human readable text values.
REG_BINARY: This type stores the value as raw binary data. Most hardware component information is stored as binary data, and can be displayed in an editor in hexadecimal format.
REG_DWORD: This type represents the data by a four byte number and is commonly used for boolean values, such as “0” is disabled and “1” is enabled. Additionally many parameters for device driver and services are this type, and can be displayed in REGEDT32 in binary, hexadecimal and decimal format, or in REGEDIT in hexadecimal and decimal format.
REG_EXPAND_SZ: This type is an expandable data string that is string containing a variable to be replaced when called by an application. For example, for the following value, the string “%SystemRoot%” will replaced by the actual location of the directory containing the Windows NT system files. (This type is only available using an advanced registry editor such as REGEDT32)
REG_MULTI_SZ: This type is a multiple string used to represent values that contain lists or multiple values, each entry is separated by a NULL character. (This type is only available using an advanced registry editor such as REGEDT32).
REG_QWORD: A 64-bit number.
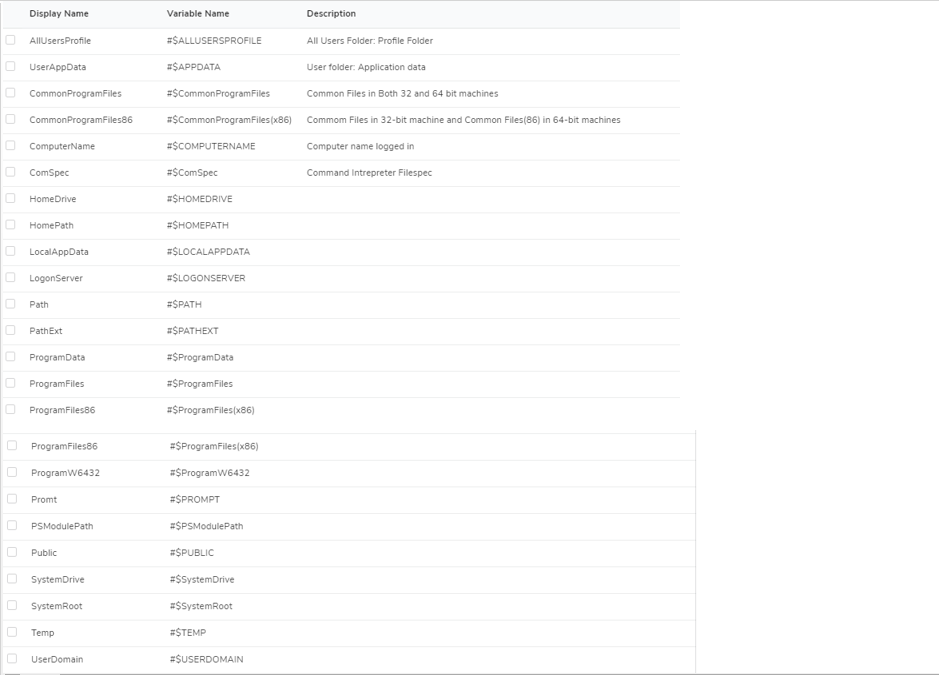
Value Name: This field supports a user defined and dynamic variable. The dynamic variables are:
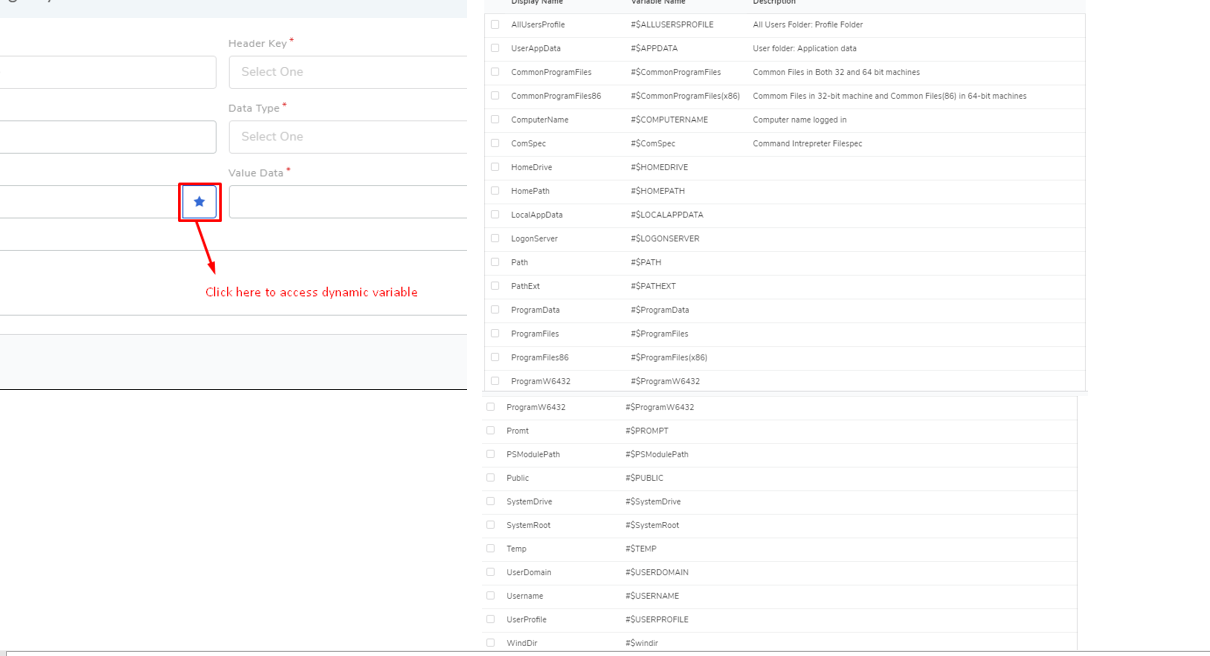
Value Data: This field supports a user defined and dynamic variable. The dynamic variables are:
You can add n number of Registry Items in a Registry Configuration, and you can modify (or delete) them later. You cannot modify a predefined Registry Item in a predefined Registry Configuration.
13.7.2.1.1. Creating a new Registry Item
Go to the Registry Configuration List View.
Click on a Configuration to open its Update page.
In the new page, you can view all existing Registry Items. There is a Search Bar for searching Items. Learn how to use the Search Bar. Click on Create Registry Item.
A dialog box opens. Fill in the fields (Learn about the fields) and add a description.
When done, click on Create.