17.2.1. Configuration Steps
17.2.1.1. Create Credential Profile
A credential profile contains the necessary information to authenticate the access of Motadata to the device. You can create a credential profile first and use it with a device type later. Also, you can also create a new credential profile while creating the discovery profile. There is no difference.

Credential Profiles Menu
You may access Credential Profiles from Admin. Follow the below steps to create credential profile:
Navigate to Admin > Network Discovery Settings > Credential Profiles.
Click on
+Newbutton. A pop-up will show to fill the required details. Use the credentials that has root (maximum) access to your devices.Fill the form. Based on the ‘device type’ some fields will show/disappear. See the following sections to understand this scenario.
Click on
Createbutton.
Note: Please type the credentials by hand. DO NOT Copy Paste.
17.2.1.1.1. Network Device Types

Create Credential Profile for SNMP
Fields |
Description |
Credential Profile Name |
The name is used to identify the credential profile |
Device Type |
Shows the list of device types supported in the system. Choose the device type for which you are creating the credential. |
Version |
Version of the SNMP device type. |
Community |
It is the unique string similar to the username used for handshaking. Motadata will send this string in request and device with same string responds back. |
Security level |
Based on the credentials used, select the type of security:
|
Authentication Protocol |
Select the pool used in SNMP device for authentication |
Privacy Protocol |
Select the protocol used in SNMP for privacy |
Security User Name |
Provide the username to access the SNMP device |
Authentication Password |
Provide encryption password to access SNMP device (if applicable) |
Private Password |
Provide private password to access SNMP device (if applicable) |
Departments |
The users of the department selected here can view and use this credential profile. |
17.2.1.1.2. Server and Application Device Types

Create Page for Other Device Type
Fields |
Description |
Credential Profile Name |
The name is used to identify the credential profile |
Device Type |
Shows the list of device types supported in system. Choose the device type for which you are creating credential profile. |
Username |
Identification used to access the device |
Password |
Security key to access the device |
Departments |
The users of department selected here can view and use this credential profile |

Credential Profiles Index Page
17.2.1.2. Create Discovery Profile
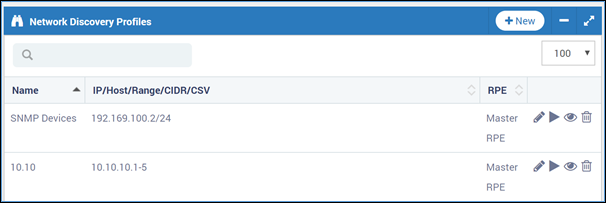
Discovery profile contains information about the network and devices that should be discovered. The page shows you all the discovery profiles. Motadata communicates with devices in your network using these discovery profile. To create a discovery profile:
Go to Admin > Network Discovery Settings > Network Discovery Profiles.
Click on
+ Newbutton. A window will pop up to create a discovery profile.Fill the details and click Create.

Create Network Discovery Profile
Fields |
Description |
Name |
The name is used to identify the discovery profile |
|
|
RPE |
It is useful when system is deployed in distributed mode. Choose the RPE from which you want to discover and poll monitors. By default, ‘Master RPE’ is selected. |
Device Types |
Shows the list of device types supported in system. Choose the device types for which you are creating discovery profile. |
Credential Profiles |
Select the credential profiles created in previous section. If not created, then create from here. See previous section for steps of creating a credential profile. |
Tags |
Tags are used by system to categorize and group profiles. |
Discovery Parameters |
Default port is visible at bottom. You can change the port by editing the section. ‘Monitor unused port’ will discover the unused ports also. To discover only used ports, edit the section and select yes. For Authentication, Key filename can be added with the passphrase too. To add Key, edit the section and input the key name/passphrase |
** Note: Use the following format to create CSV. Do not use column titles in CSV. The first column is reserved for IP addresses. Second column is reserved for the monitor name. All columns after that are reserved for monitor tags. Motadata will match the existing tags with values in 3rd column (and all columns after that). If a new word is found, motadata will create a new tag with that name and associate the monitor with it.

