Patch Management for Air Gap Networks
Air gap networks are closed networks with no interface connected to the outside (Internet) world. The resources are generally kept in an isolated network to protect them from vulnerabilities. Hence, if a machine is placed in such a network, a physical medium, like CD/USB drive, is required to transfer the data manually between them.
Now, let's understand its architecture and procedure to know more about patch management in such an environment.
Architecture
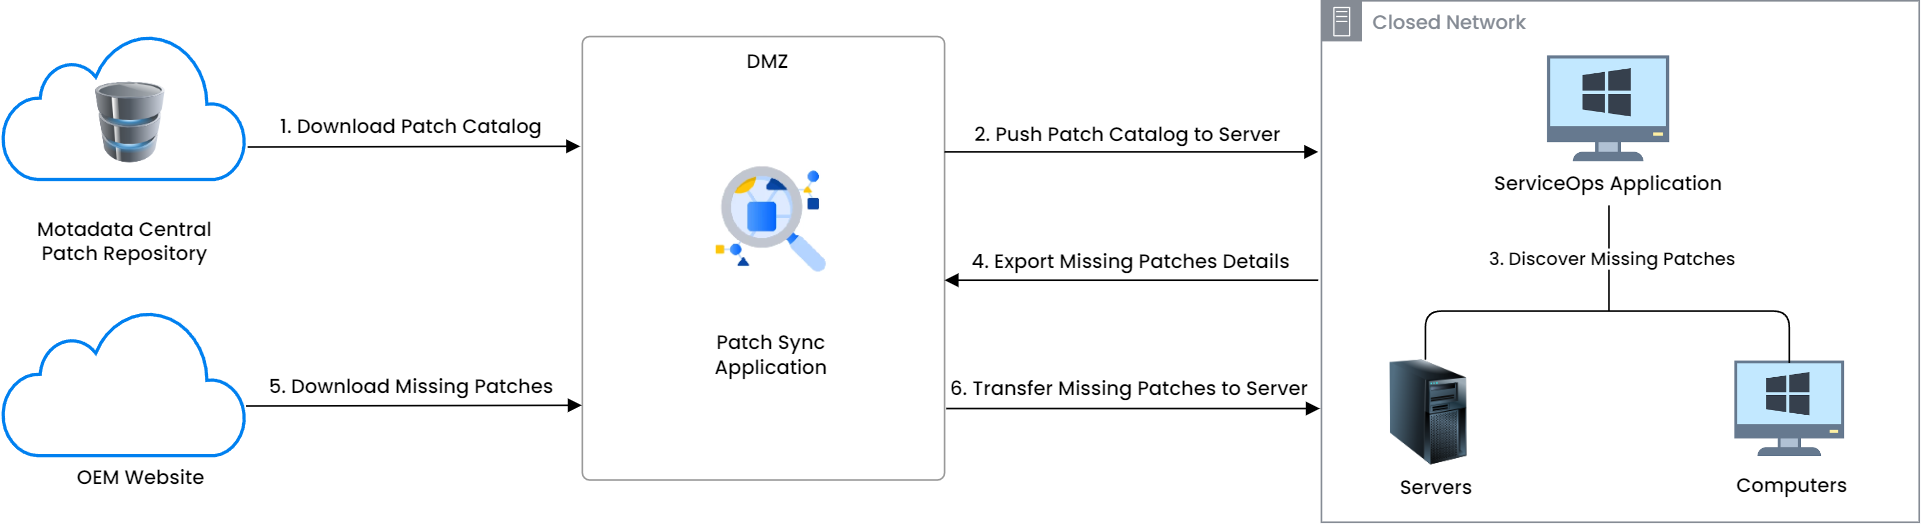
As shown above, when the ServiceOps application is installed in a closed network,
- The Patch Sync Application should be installed in a separate machine having an Internet connection.
- Once installed, sync the patch database to download the patches for the required OS.
- Copy the database to a physical drive like a CD/USB drive and manually move it to the ServiceOps server.
- In ServiceOps, the missing patches will be scanned and discovered. Then, copy these into the physical drive and export the missing patch details to the patch sync application.
- Download the patches from the Internet, copy them to the physical drive, and then transfer them to the ServiceOps server again.
Here, the Patch Management Utility application is installed in a computer having an Internet connection to import and download the patches for the ServiceOps application located in the Closed network.
Procedure
To perform patch management in a closed network, follow the below steps:
Download the PatchManagementUtility.exe file on the computer that has an Internet connection.
noteThe free space required in the target machine is based on the patches to be downloaded.
Run the .exe file with administrator rights.
The following screen appears. Register the user by entering the below details: • Name: Name of the client. • Email: Email address of the client. • Activation Code: Agent activation code can be taken from the ServiceOps > Admin Settings > Organization > Account > License Details page.

Once done, click Register, and a confirmation message "User Registered!" will appear. Click OK, and the following screen appears.
In the Patch Sync tab,
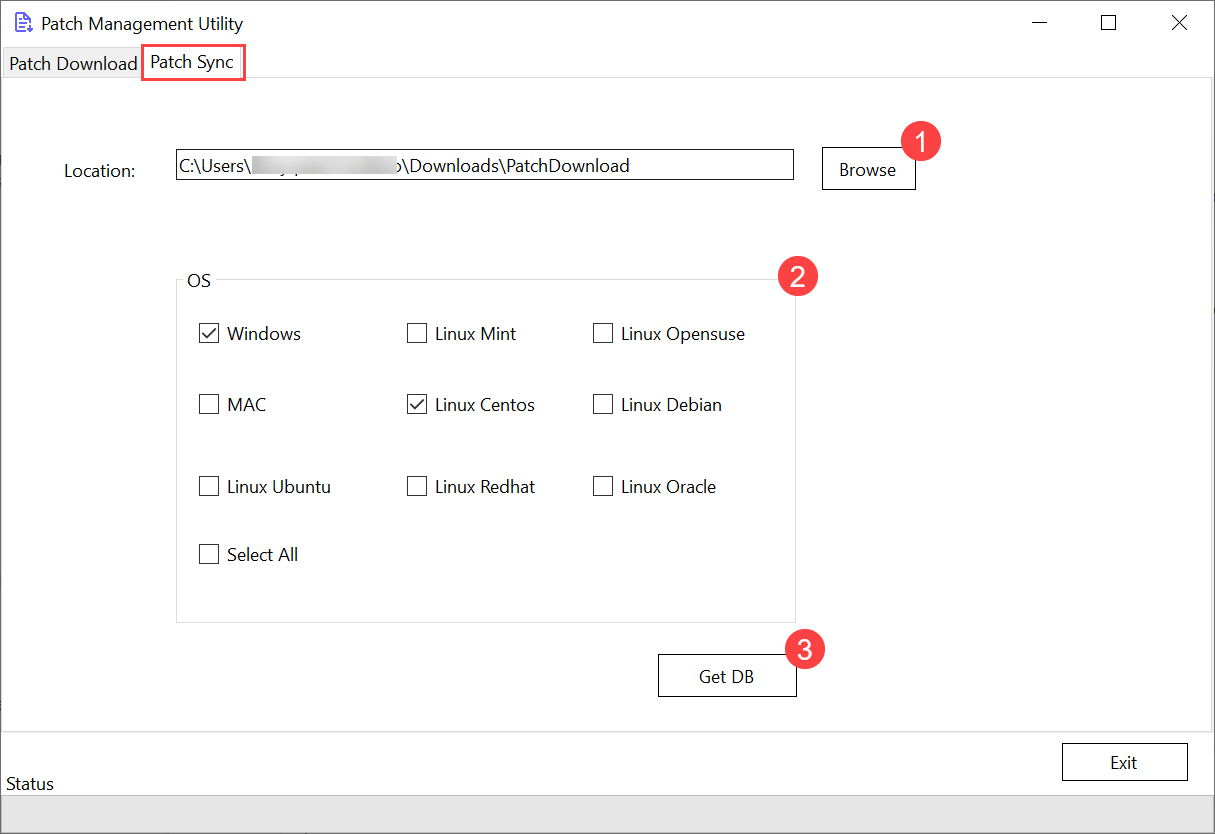
- Create a folder in your system to store the Patch DB Dump.
- Once created, select the location (1) where the Patch DB Dump should be downloaded. Here, the "PatchDbDumpLocation" folder is used.
- Select the OS (2) for which you want to download the Patch DB Dump. You can select multiple OS.
- Click Get DB (3) to start the Patch DB download process. Once the patches are downloaded from the Central Patch Repository, you will get a zip file. Copy the zip file into a physical drive and upload it to the ServiceOps server.
tipPatch Sync configuration is a one-time process.
In the ServiceOps server, upload the zip file at the below location.
/opt/flotomate/main-server/configUnzip the file and grant fmt user permission using the below command.
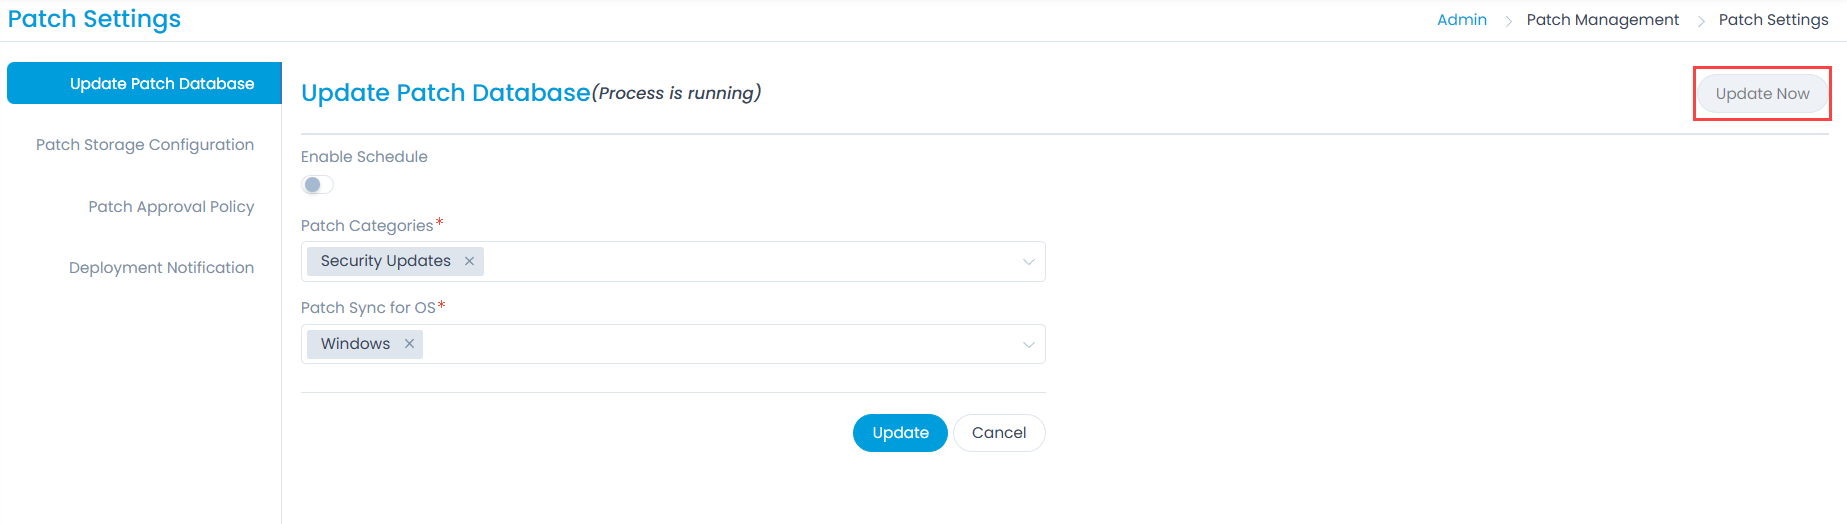
chown -R fmtuser:fmtusergroup airgapIn ServiceOps, sync the patch database from Admin > Patch Management > Patch Settings > Update Patch Database tab.
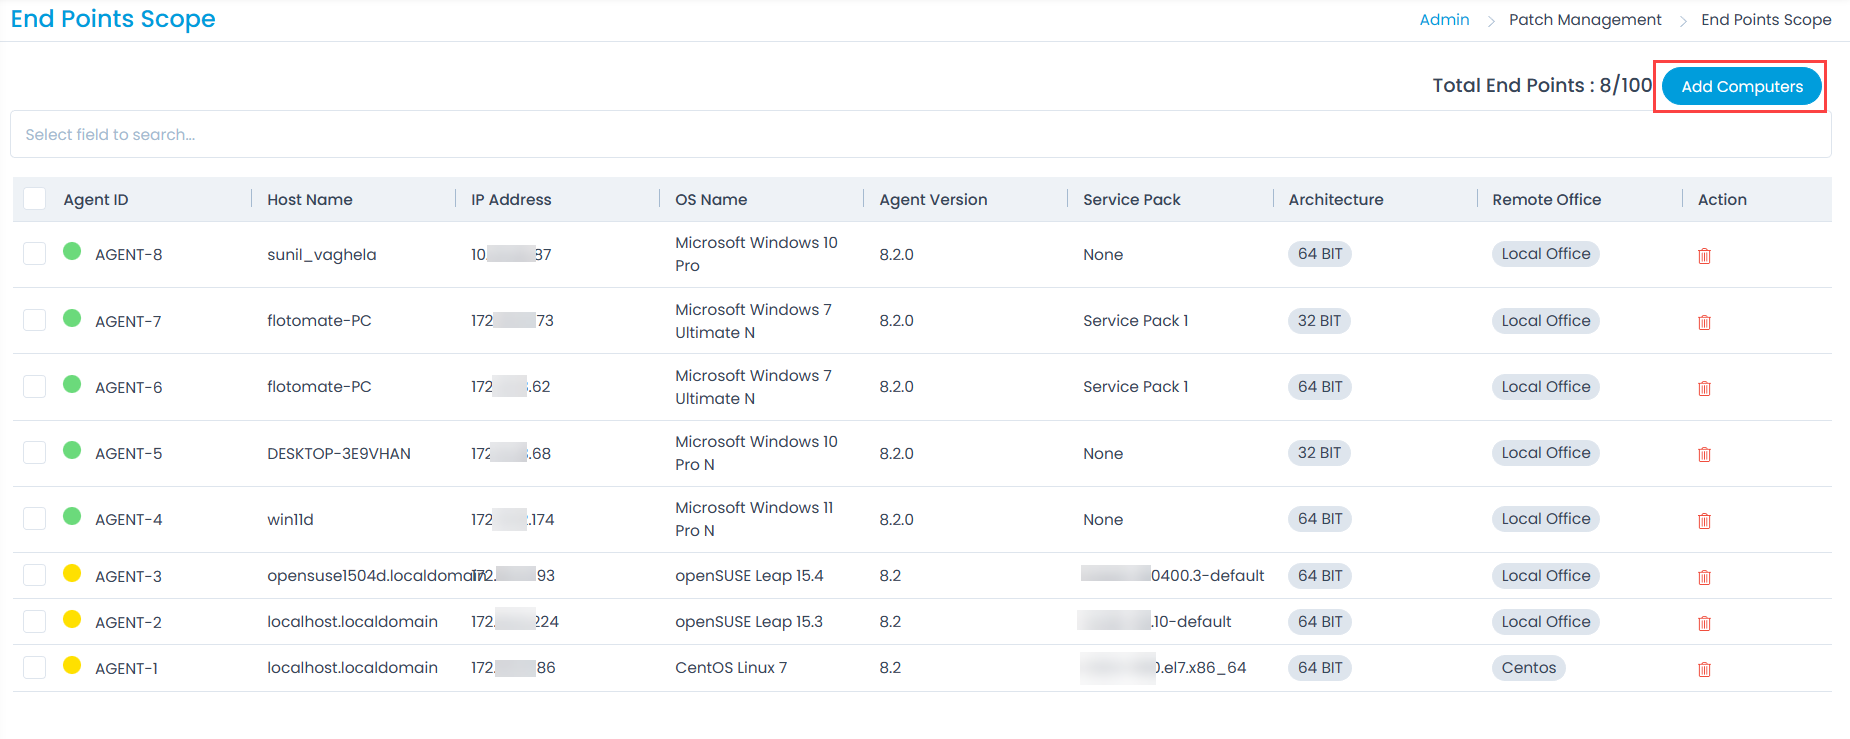
- Once the patch sync process is completed, add the Computers in the End Points Scope.
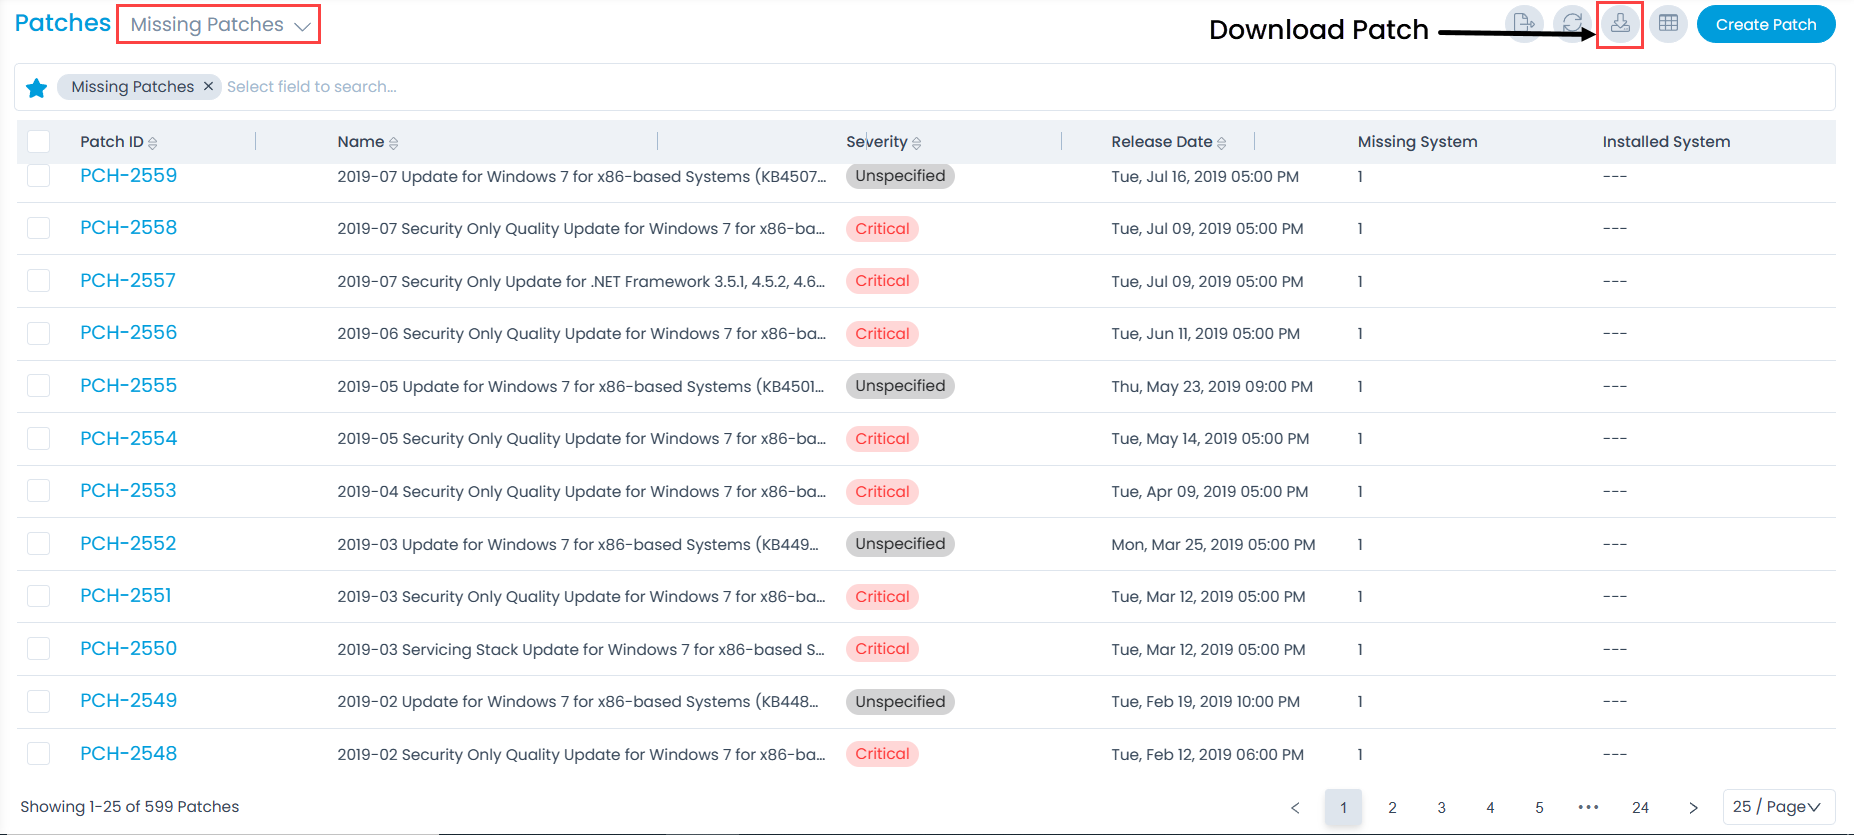
- Next, navigate to Patch Management > Patches page. Check for the missing Patches and download them by clicking the Download Patch icon. A JSON file will get downloaded.
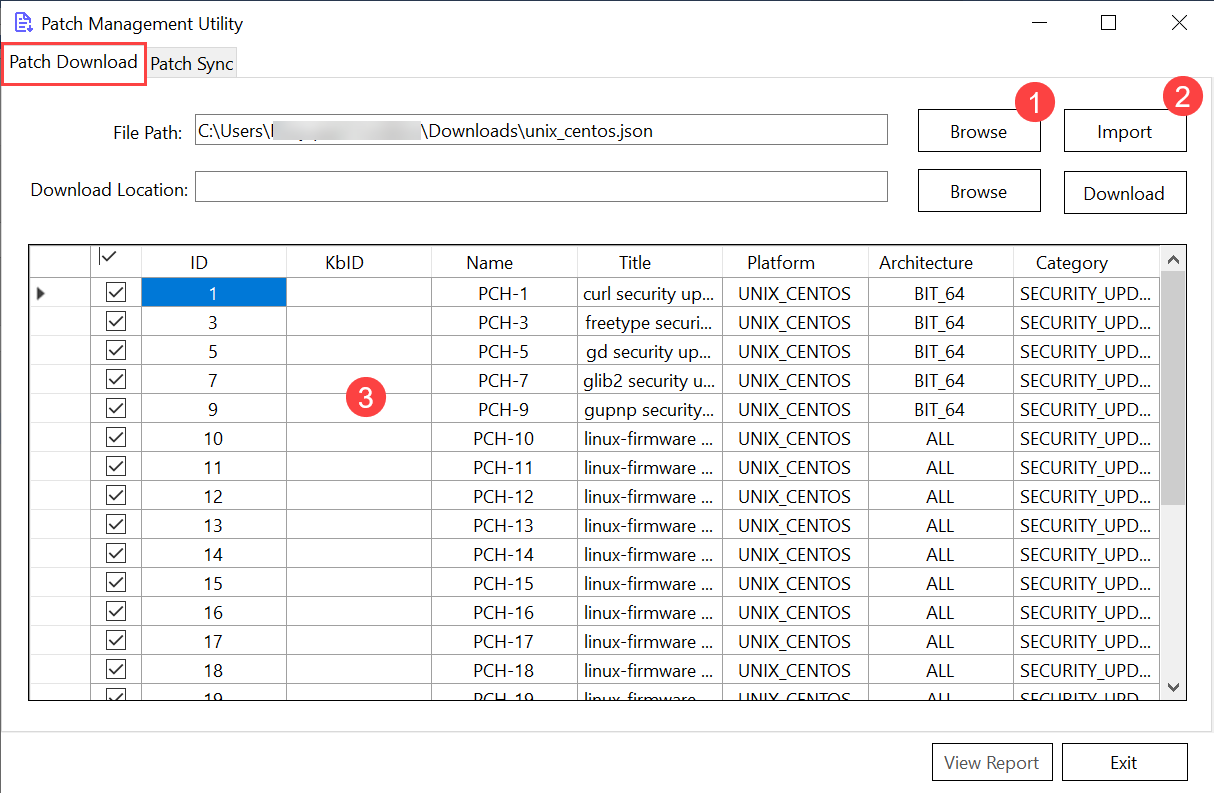
- In the Patch Sync application, in the Patch Download tab,
Select the JSON file received from ServiceOps, using the Browse button (1), and click Import (2). Here, the "unix_centos.json" file is used as an example. Once done, the patch list will appear in the below pane (3).
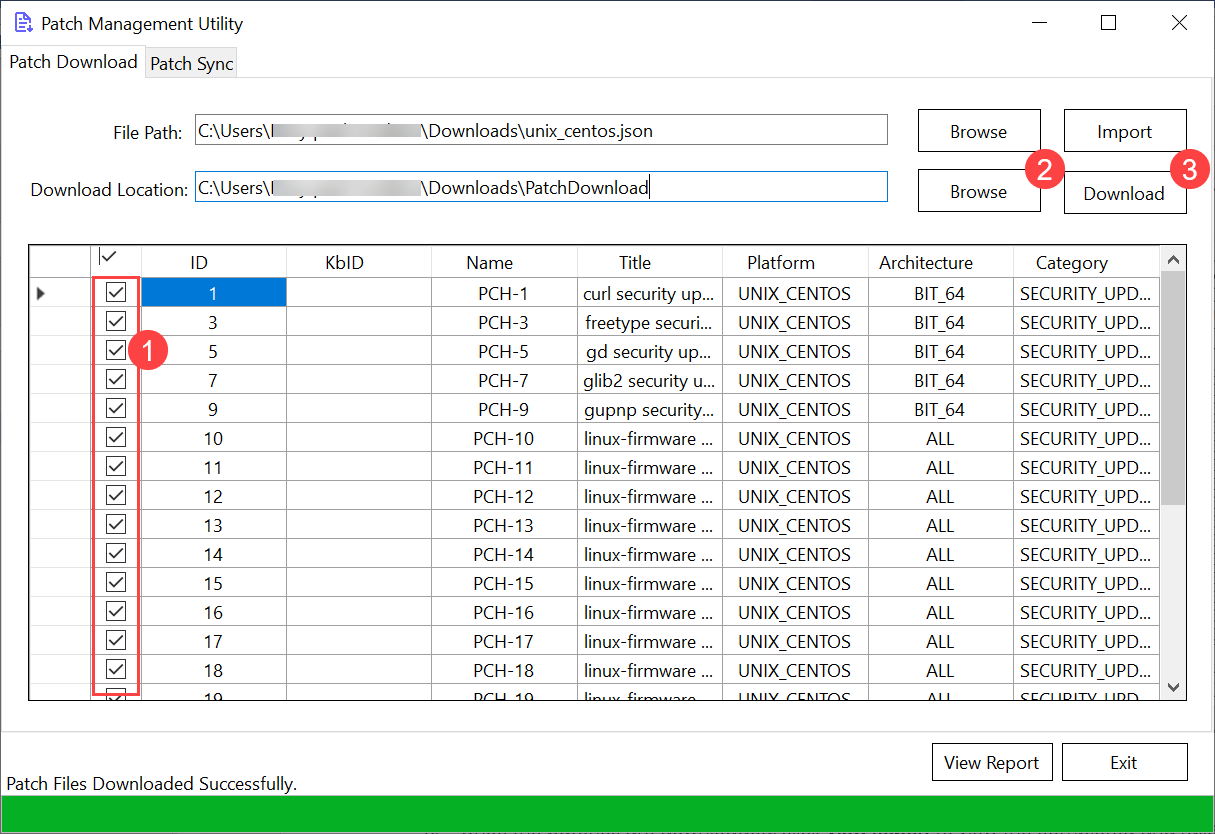
- Next, create a folder to save the downloaded patches in the system. Here, the "PatchDownload" folder is used.
- Select the patches to be downloaded (1), click Browse (2) to select the Download Location (3), and click Download. The imported patches will get downloaded in the selected folder.
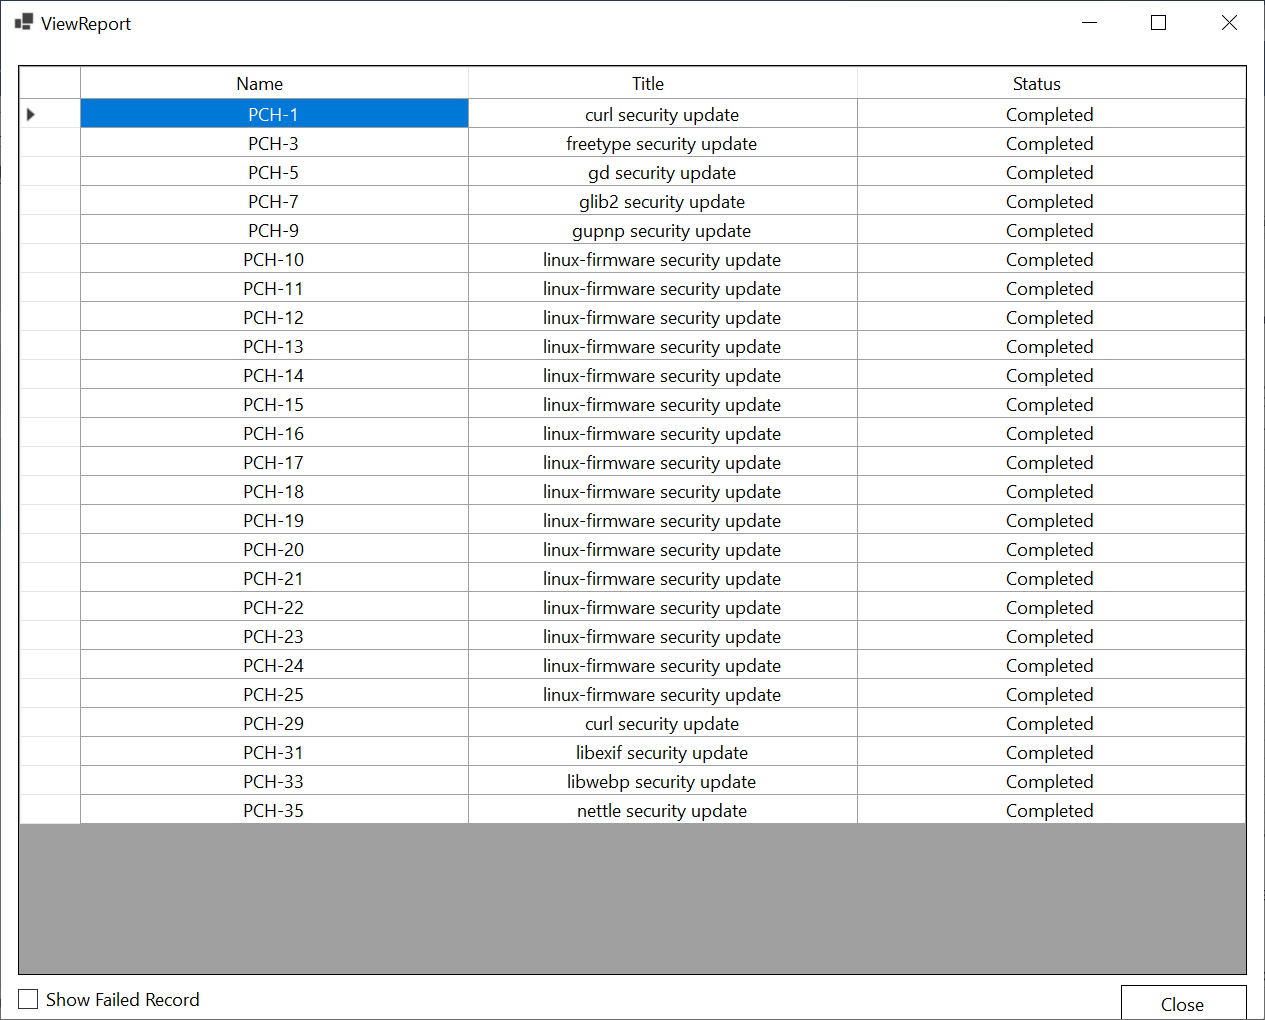
- Once downloaded, you can view the report by clicking the View Report button. Also, you can view the failed patches by enabling the Show Failed Record option.
Next, in the ServiceOps server, check in the filedb folder whether the tenant folder is created. If not, create the folder using the below command and grant it the fmt user permission.
mkdir {tenant-name}Once the tenant folder is created, create the patch folder in it using the below command.
mkdir {patch-folder-name}Next, you can take the downloaded zip file in a physical drive, upload it to the main server, and move it to the ServiceOps application in the Air Gap network at the below path.
/opt/flotomate/fileserver/filedb/{tenant_name}/patchNext, unzip the file.
Now you can deploy the patches and carry out the patch management process in a closed network.