4.1. Create New Dashboard
You can create your custom dashboard for personalized information about your network.
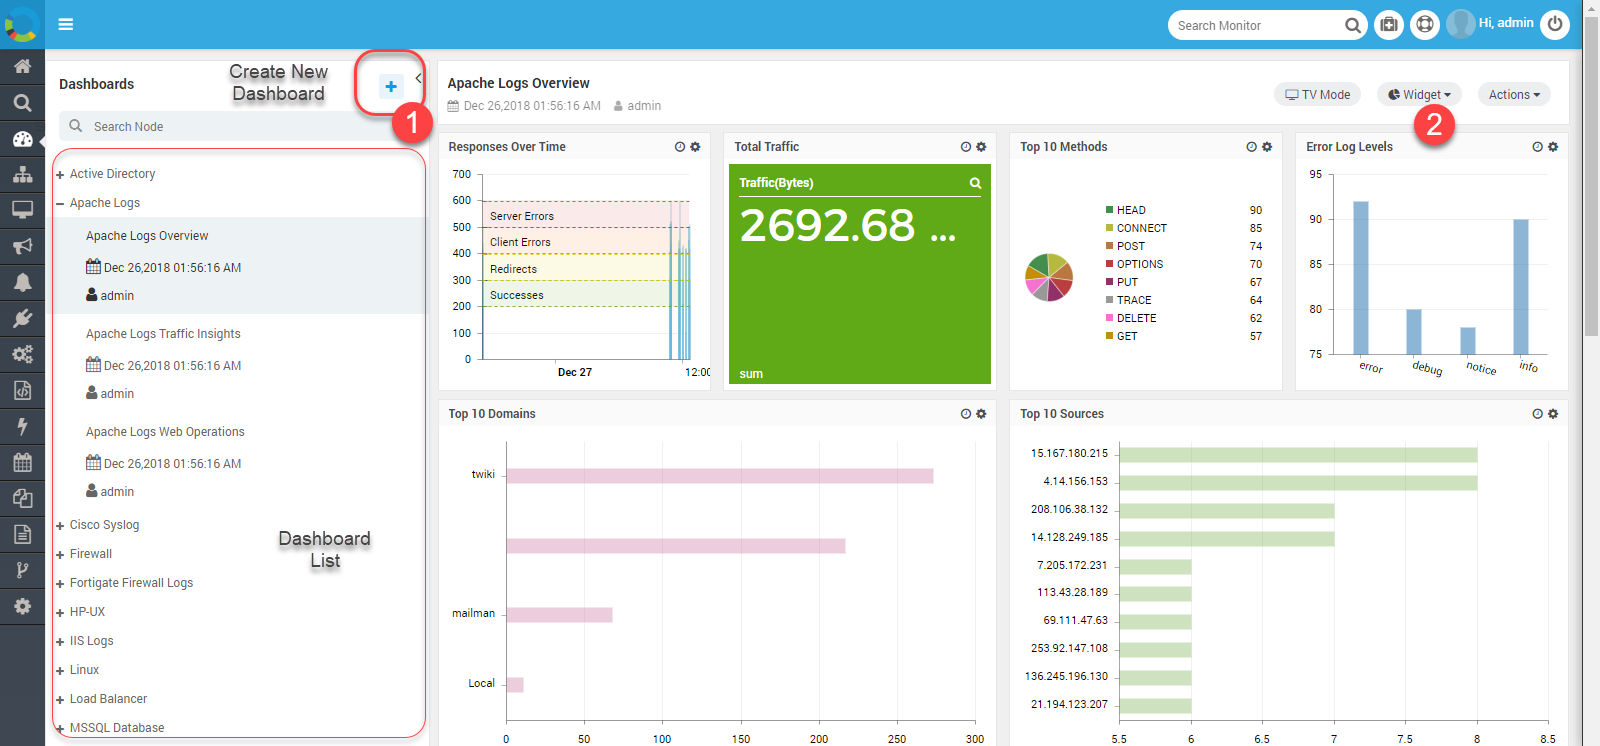
Tree View
Step 1: Create Dashboard
- Navigate to Dashboards > Click Dashboards icon to add new dashboard.
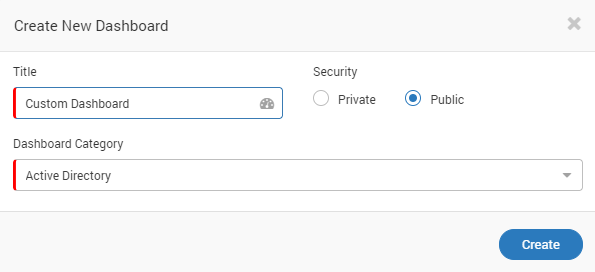
- Dashboard popup appears.
- Give a title to the dashboard.
- If you want to keep dashboard accessible to others then choose public.
- Select Dashboard Category. Provide description if needed.
- Enter a brief Description on the main focus of the Dashboard.
- At last click on Create Button.
Create New Dashboard
Step 2: Add Widgets in Dashboard
- Select the widget from the drop down.
- Create the widget. (Click here for widget details)
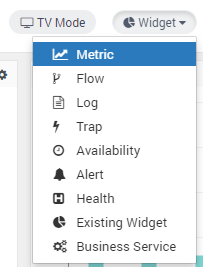
Select Widgets from List
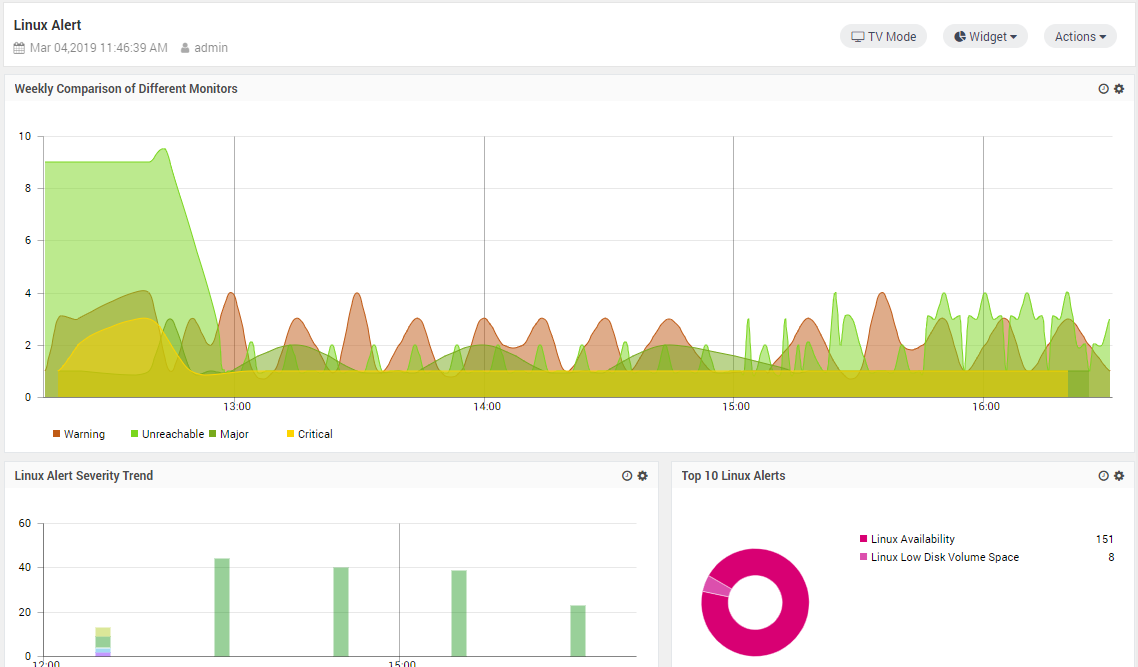
Sample Weekly Analysis of Monitors