18.1. Request Management for Requesters
The Customer Portal provides a simple interface for Requesters to perform the following operations:
Create and manage tickets.
Access service catalog.
Open knowledge articles and FAQs.
View announcements.
18.1.1. Creating a Request
The Create a Request form on the Customer Portal is a toned down version of the Technician Portal.
In order to create a new request ticket, a requester will go through the following steps:
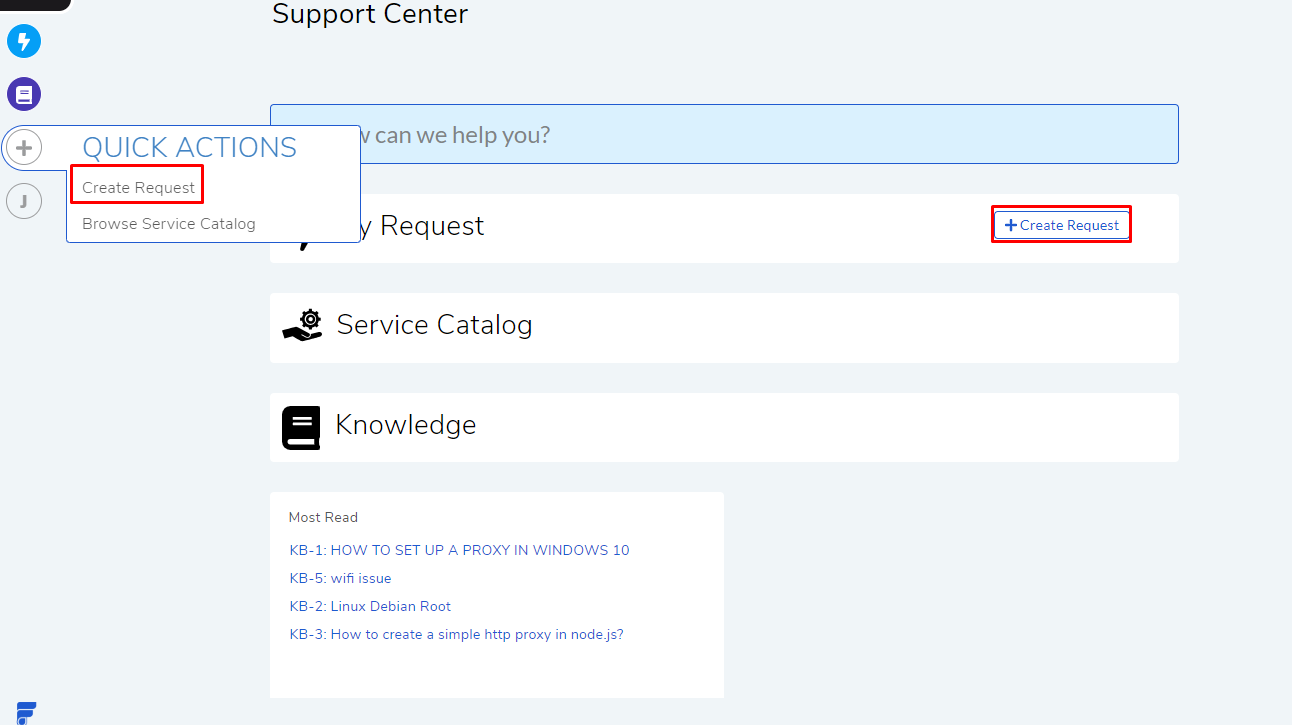
He logs into the customer portal and clicks on Create Request.
Note
Requesters can create tickets without login, if the admin has set the permissions in preference.
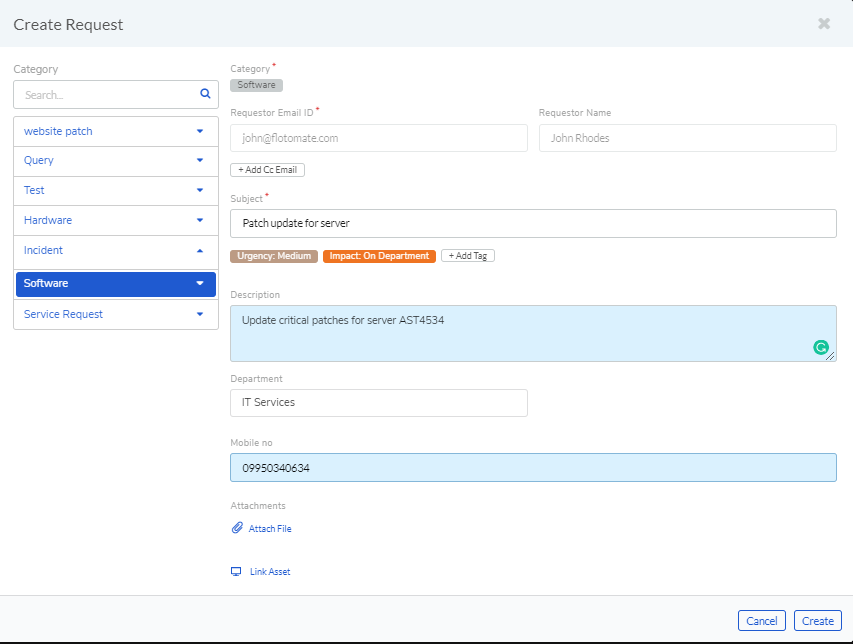
The Create Request dialog box opens. He fills the request form and submits. Some of the important fields are:
Category
Requester Email ID
Subject
The moment he clicks on Create a new ticket is create.
18.1.1.1. Creating a Request with an Email
Motadata gives the option to set up an email as the Helpdesk email address. Requestors can send an email to create a request ticket.
The question, who can create a Request, depends on the Preference settings in the Admin. If security settings allow creating Requests without login, then anyone can create a Request. Else, the system accepts email Requests from registered emails only.
When you create a Request using an email, the email subject becomes the Request Subject, email body becomes the Request Description, and any attachments become the Request ticket attachment.
18.1.2. My Request
Requestors can manage their Requests from the Customer Portal’s My Request section.
A requester can access the My Request section by:
Logging in to the Customer Portal.
Clicking on My Request.
In the My Request section a requester can view all this request tickets.
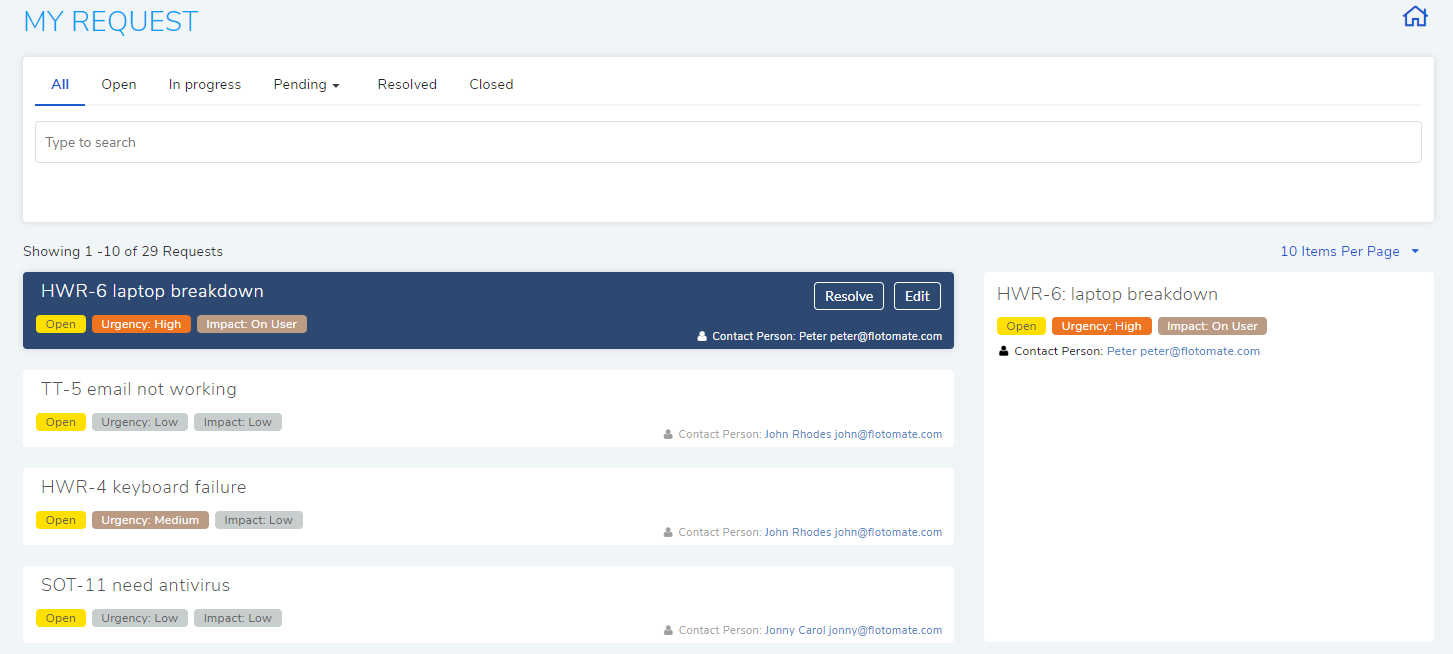
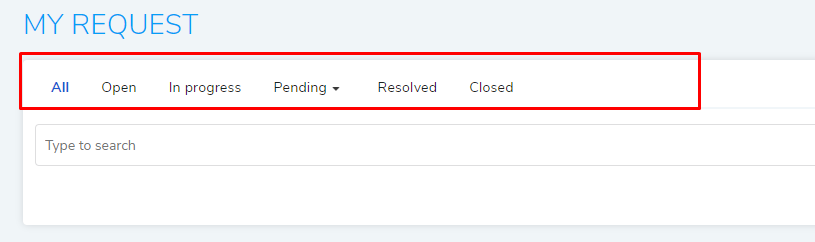
18.1.3. Searching Request
There are two broad ways to search requests:
Search Bar: This search bar is similar to the one in the Technician List View.
Filters: Status-based filters that tell you about the distribution of Requests under various predefined and custom statuses:
18.1.4. Request Details View
A requester can open one of his requests from the My Request section. The details view opens, where the requester can perform the following actions:
Update request details.
Communicate with a technician.
Edit custom fields.
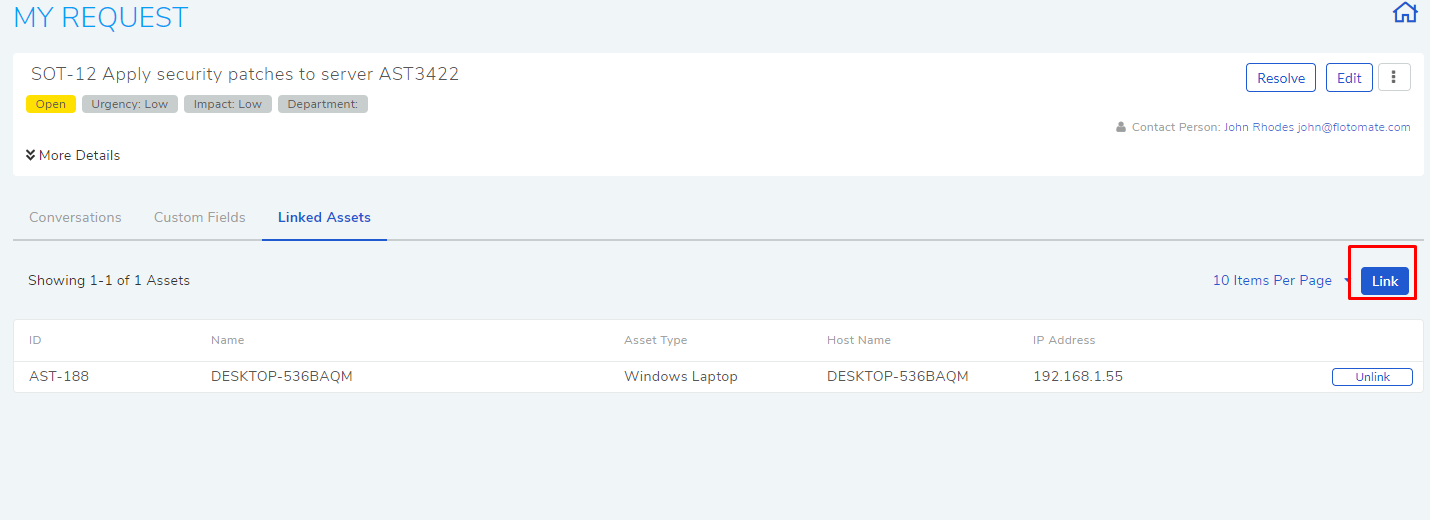
Link assets. This feature has to be turned on by an admin from Admin >> Preference.
In the details view of a request, the requester will have the following sections:
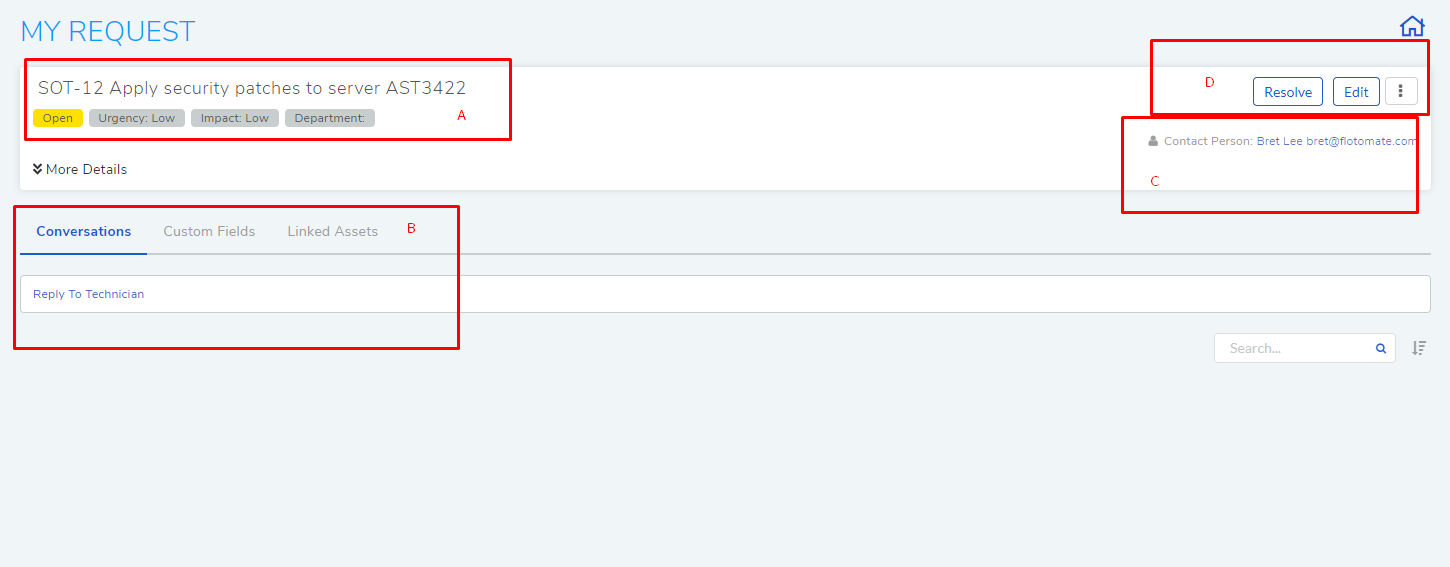
Section –A are the classifiers.
Section-B is the comment section. The Requester can also view any linked Knowledge Base write-ups here.
Custom Fields tab allows the requester to modify custom field values.
Linked Assets tab lists all linked assets with the request. A requester can only link assets that are assigned to him/her.
Section-C shows the name and email of the assigned technician.
Section-D houses Resolve and Edit options. Along with them, there’s an action menu with the option to attach documents.
18.1.5. Classify Requests
Motadata allows requesters to classify Requests, from the details view, based on the following:
Urgency: Setting this label shows the Technicians which Requests to give priority. These are predefined labels that are immutable, and they are Low, Medium, High, and Urgent.
Impact: Setting this label shows where a Request has its effect which is either on User, Department or Business.

18.1.6. Conversation with Technician
Requesters can start a conversation thread with a Technician:
To write a comment, a requester can:
Go to the Details View of a Request.
Scroll down to the Conversation tab and click on Reply to Technician. The pane expands to show an editor.
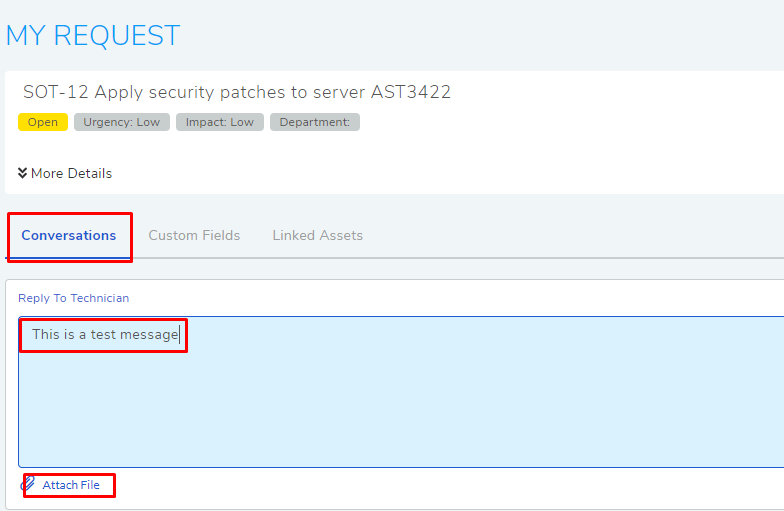
Write his/her comment and also attach files with the comment.
A requester can search and sort the comment thread.
18.1.7. Resolving a Request
A Requester can resolve a Request in the following ways:
In the List View, he clicks on the Resolve button adjacent to a Request’s Subject line. The Status changes to Resolve.
In the Details View, he clicks on the Resolve button situated in the top right corner of the page. The Status Changes to Resolve.
18.1.7.1. Reopening a Request
A requester can open a Request in the same ways he/she resolved it, instead of Resolve he has to Reopen.
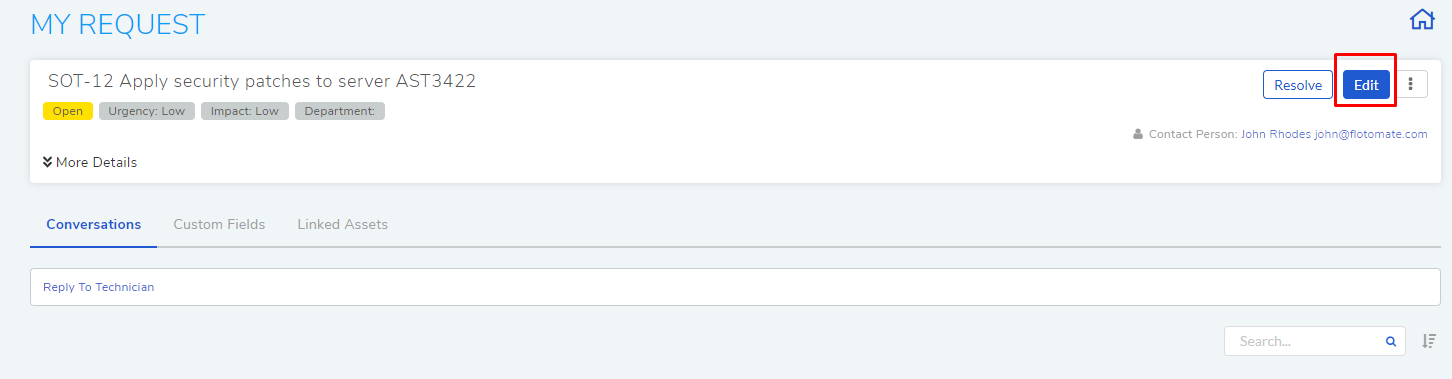
18.1.8. Editing Subject and Description
Requesters can edit the Subject and Description of a Request in the following ways:
In the List View, he clicks on the Edit button adjacent to a Request’s Subject line. A dialog box opens, where he performs the edits and hits Update.
In the Details View, he clicks on the Edit button situated in the top right corner of the page. A dialog box opens, where he performs the edits and hits Update.
18.1.9. Requester Linking Assets with Request tickets
If linking assets is allowed by the admin, then a requester can attach assets, which he is assigned to, with a request ticket.
He can attach an asset while creating a request.
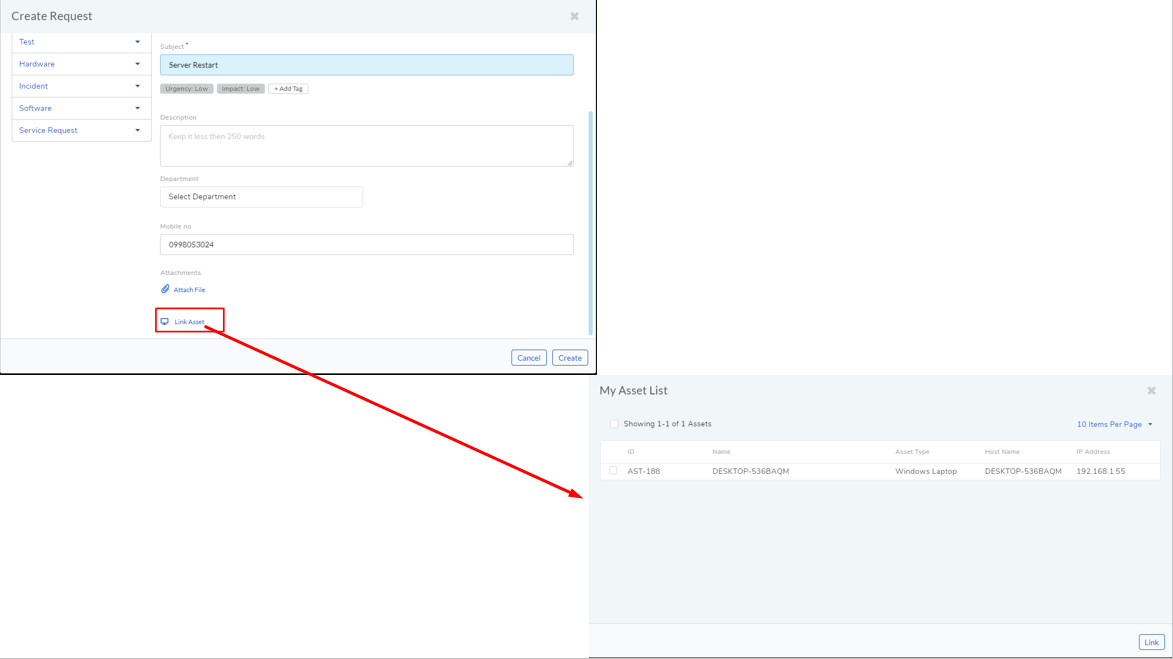
He can attach an asset from the details view of a request.