1. Introduction
Motadata ServiceOps is all in one management software for help desk and asset management. Organization can integrate this solution to monitor and maintain the assets and IT requests generated from their Account’s users of the IT resources. For process of reporting the issues to the IT help desk easier Motadata provides you with a Self-Service Portal where you can search solutions for the most common issues before raising a request.
It can be accessed using the portal where you can login your complaints and issues online with the help of our Request and Problem Management modules.
Let us start a short journey of the ServiceOps Software:
2. Portal Login
After Installation, you need to access the portal using the created credentials.
Let us say the technician login credentials is are as below:
Username: toms@gmail.com
Password: toms@123
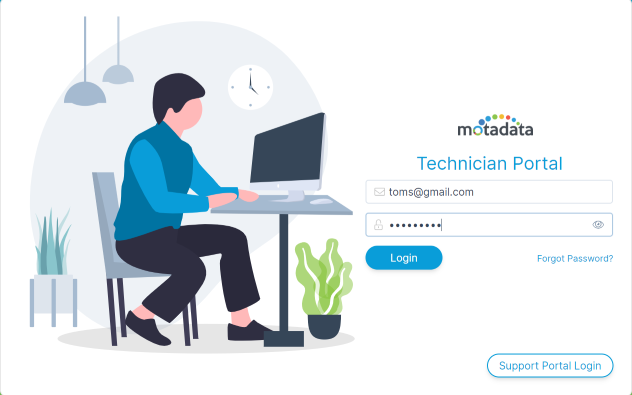
Portal Login
Once you have logged in using the credentials, for admin Configuration go to the top most corner as highlighted in below image for accessing admin settings.
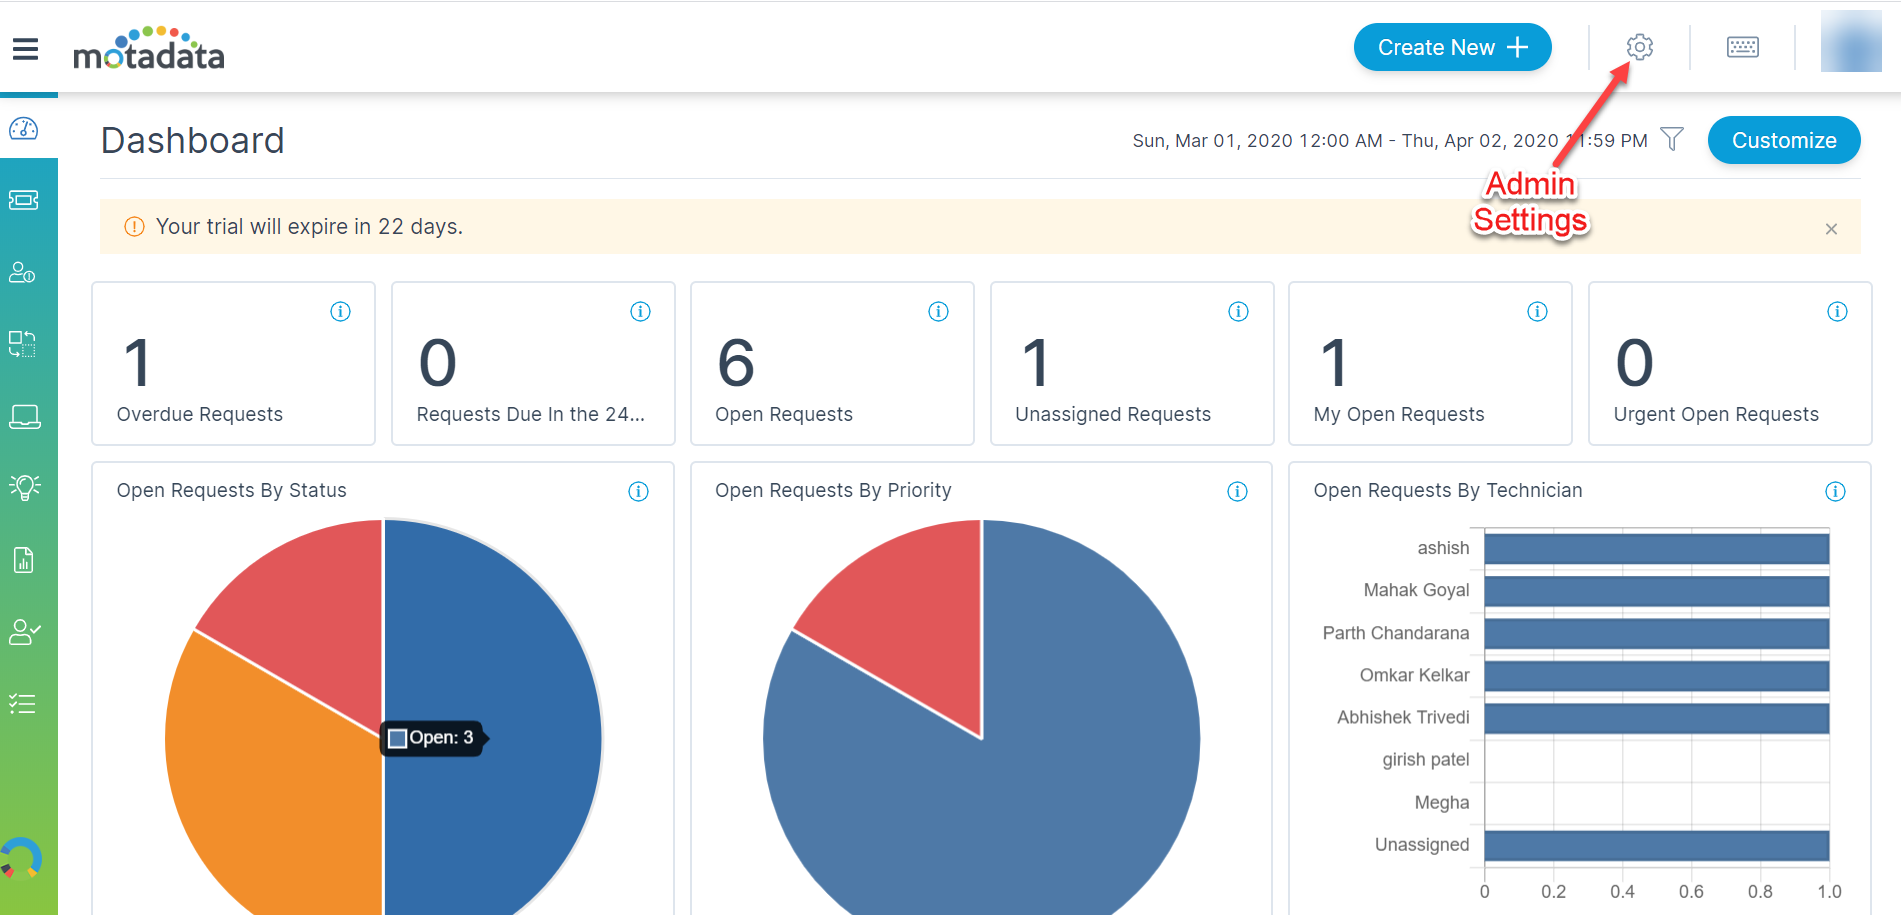
Landing Page
3. Company Details and Branding Configuration
This section shows the complete details and Branding of the organization such as administrator details and logo used by the company.
Go to Admin >> Organization >> Account
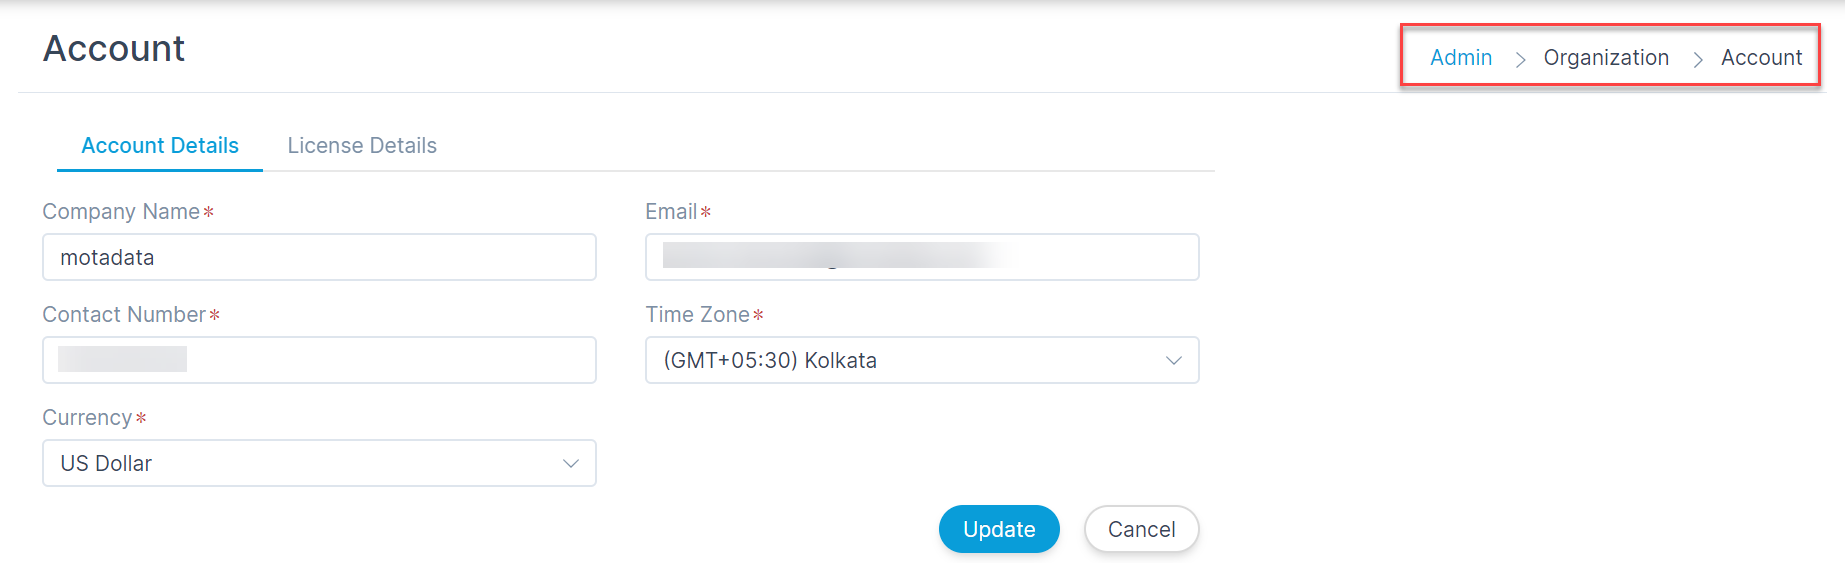
Account
Here, Provide the basic information like name, address and contact information of your organization.
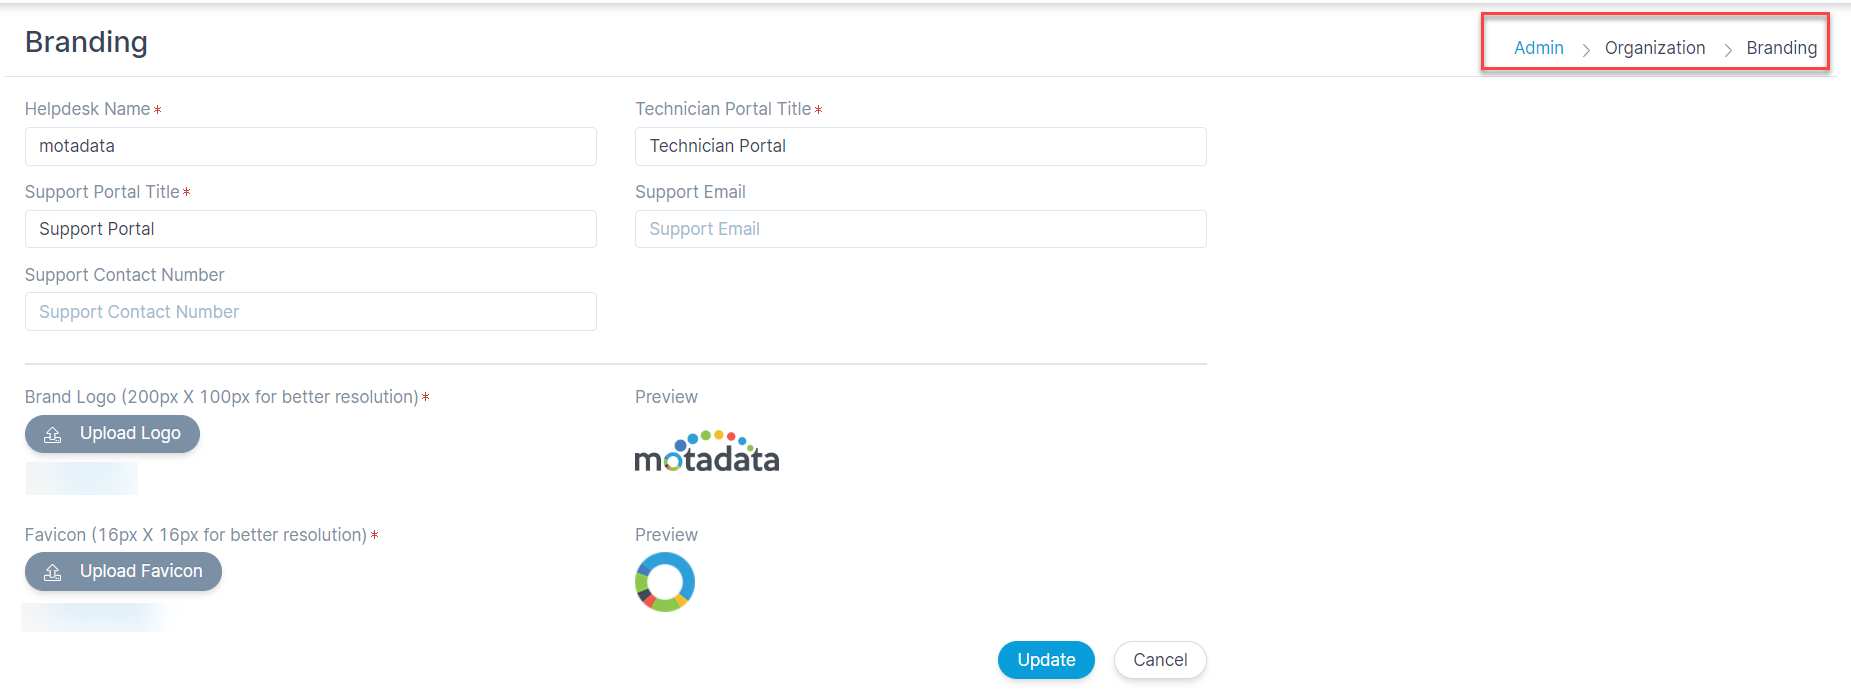
Branding
Upload the logo of your company under the “Company Logo” section. This will be found updated logo on the portal pages and exported reports.
4. Setting Application URL
In this section you can set your service desk application url, for example: http://apolo.example.com
Go to Admin >> Organization >> System Preference
Here, In application settings, you need to change the Base URL of the GUI to be accessed.
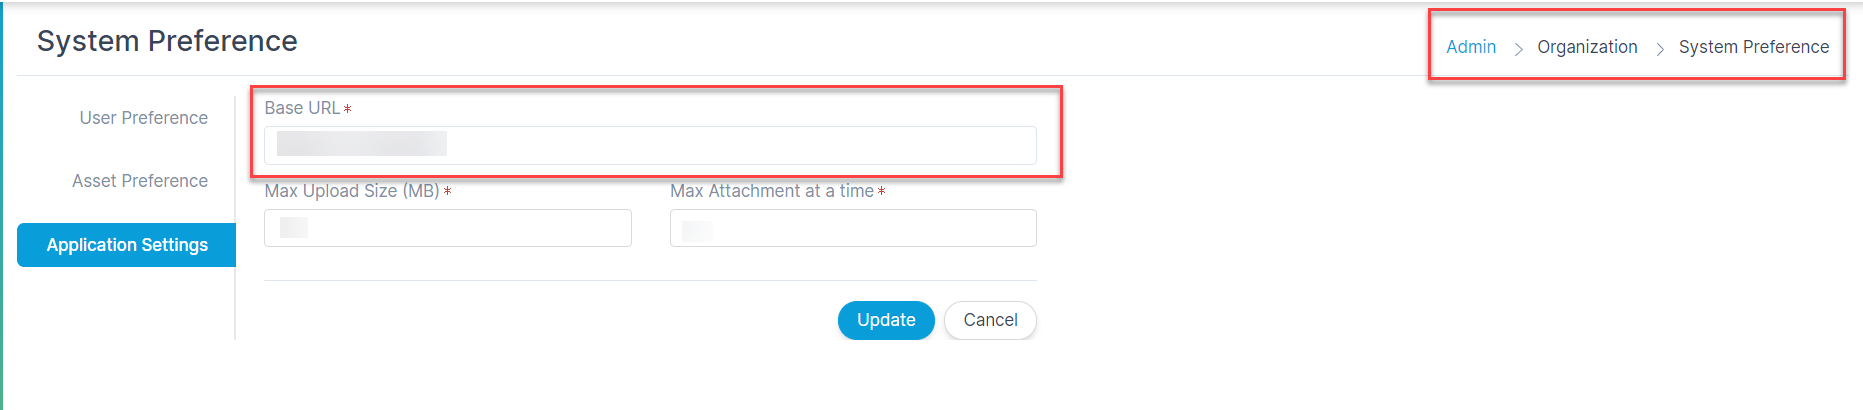
Change in Base URL
5. Outgoing Email Settings for Notification
For all the email notifications to be send outside the solution, Out Going Email Server Configuration is mandatory.
Go to Admin >> Support Channels >> Email
Configure the email address from which system will send the emails. There will be only one outgoing email server.
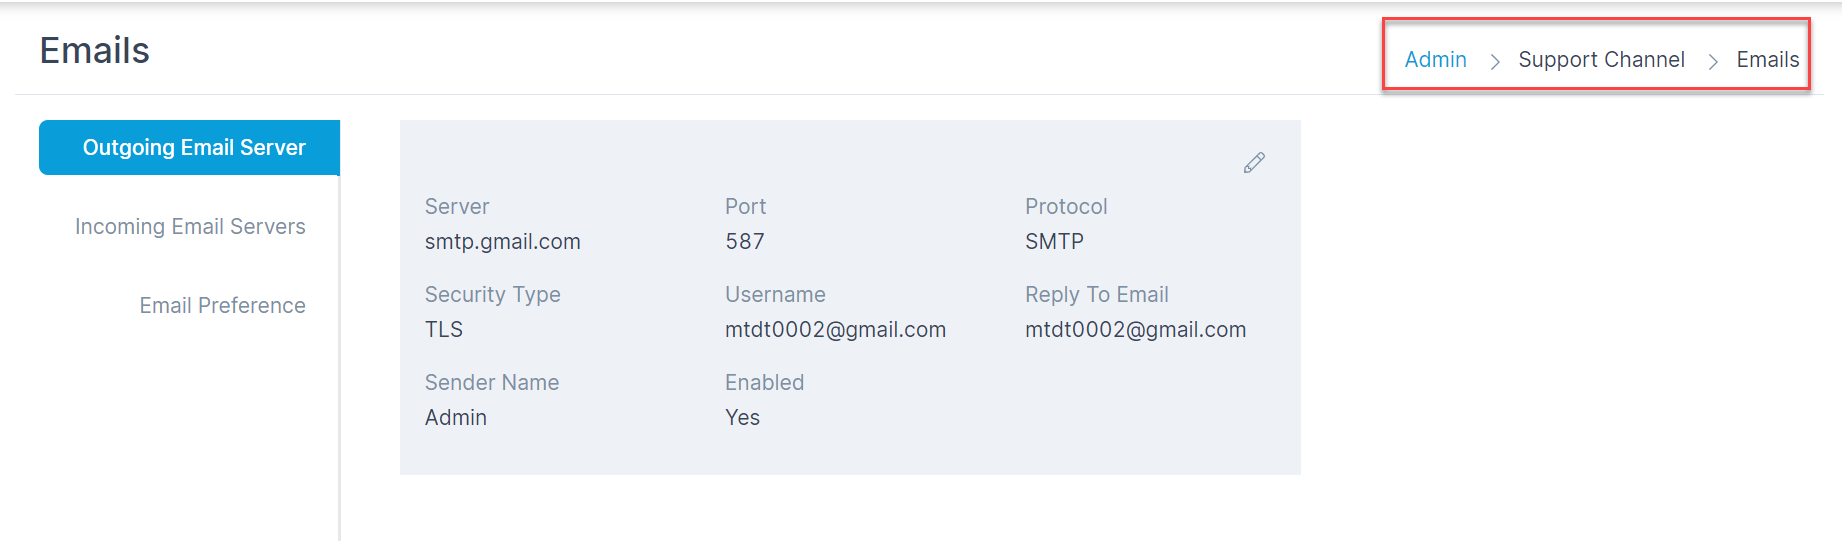
Outgoing Email Server
6. Creating User Accounts
In this section you can create user accounts for Requesters and Technicians, who are going to use the application.
Technicians are responsible for providing solution, handling requests/problem, etc. A Technician can be converted to a requester.
Requesters are the end-users who access the portal to seek information regarding their requests. The requesters have access only to the request management, knowledge and approval management sections.
6.1. Import LDAP USers
Here you can directly import the users from the Active Directory using the mapping parameter, where desired logon names or email can be useful for importing.
Go to Admin >> Users >> LDAP Configurations

LDAP Configuration
Provide the URL, domain Name and credentials. Also, add the email id on which email needs to be received.
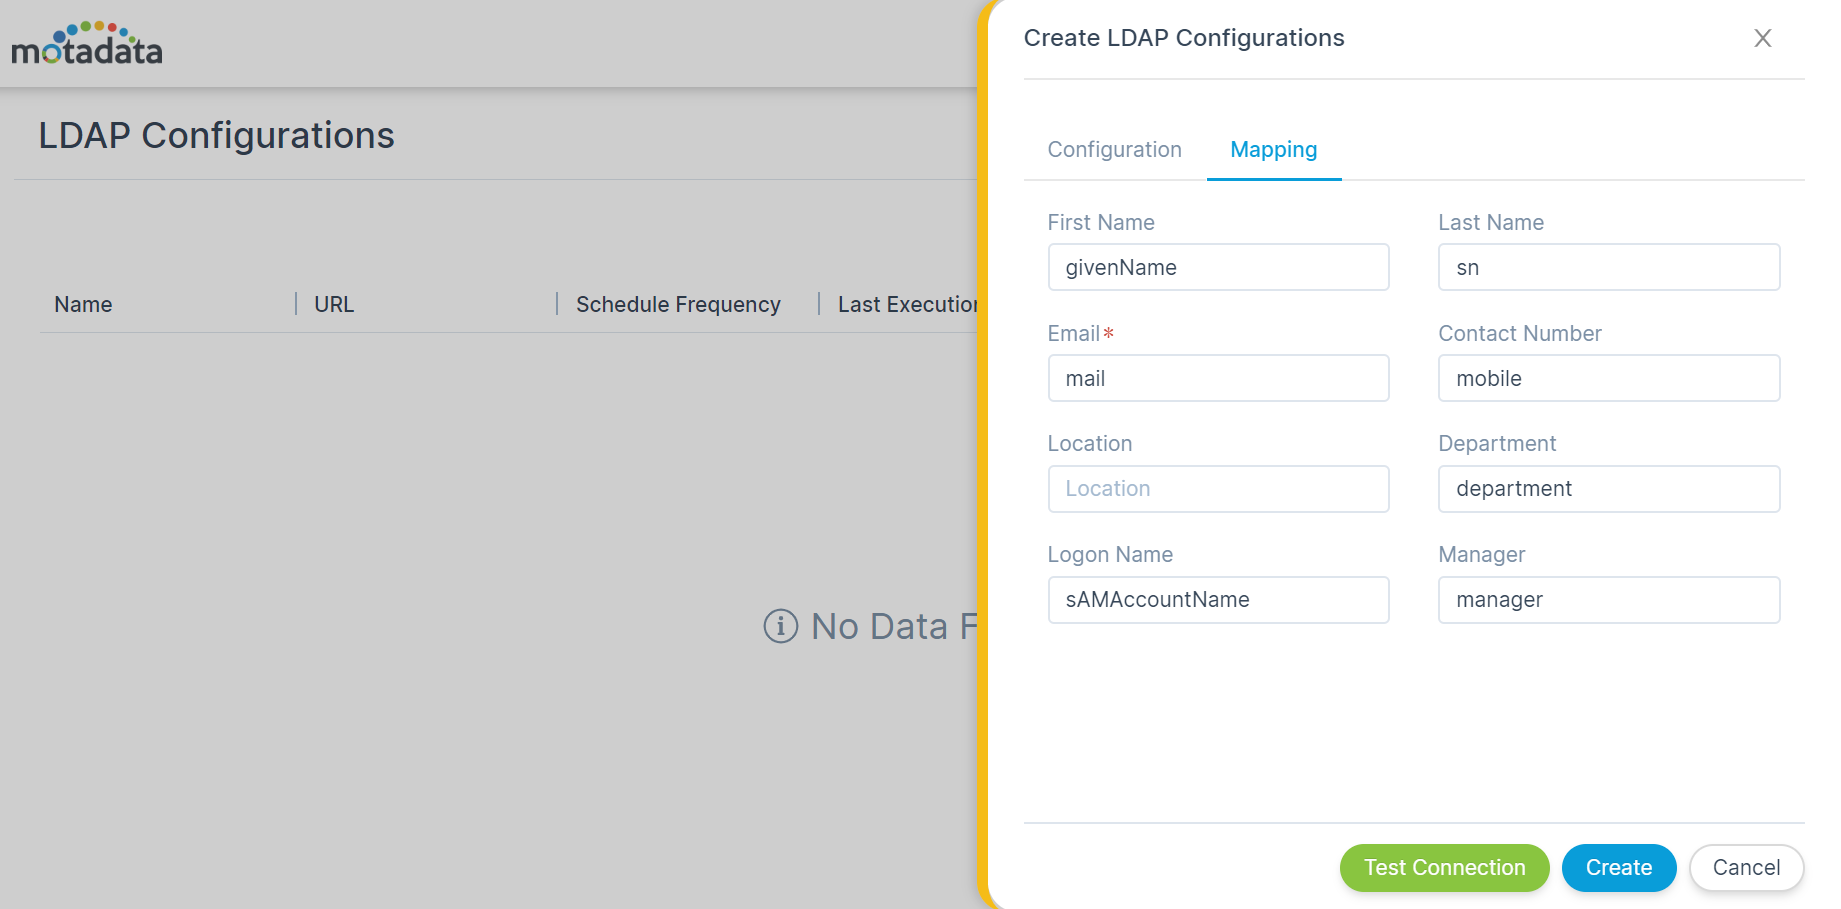
LDAP Mapping
Provide the Logon Name, email-id and Department
Later, after the connection is successful, import the users.

6.2. Manual User Creation
In this section you can create the users i.e Technician or Requester manually.
6.2.1. Add Requester/Technician
Here, you can create the Technician or Requester via portal.
Go to Admin >> Users>> Requesters/Technicians
Click on Add Technician/Add Requester and fill up the required details such as Name, Email, Department, Roles and other details
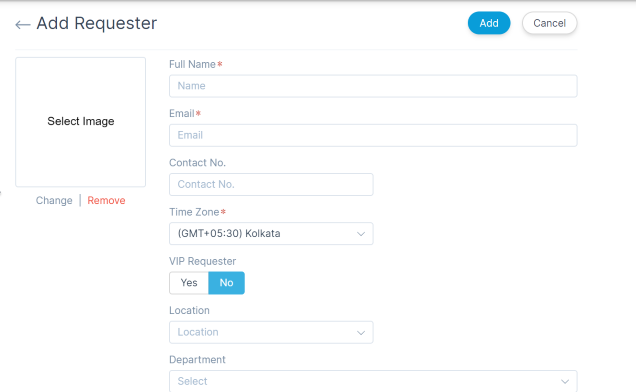
Create Requester
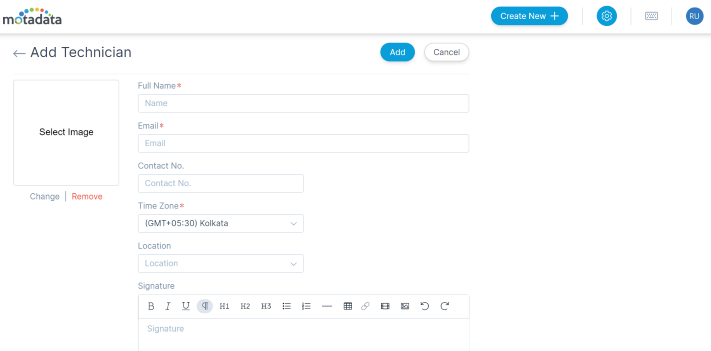
Create Technician
7. Incident Management
Incident requests are initiated when there is a degradation or failure of service. This section manages the list of incidents reported.
Admin has all rights to close/create incidents.
This section helps in viewing and managing all the incident and relative actions.
7.1. Help Desk Mailbox Configuration
Firstly for emails for the incident reception needs to be configured.
Go to Admin>> Support channels >> Incoming Email Servers
Here, you can “Setup your Help Desk mailbox to start receiving requests on emails from requesters.”
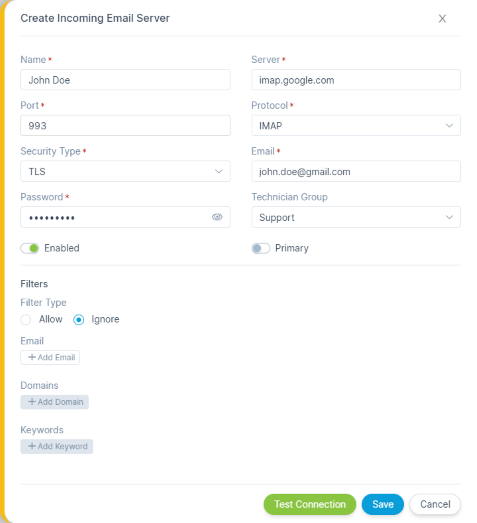
Incoming Email Server
Here, please fill up the details of the form as mentioned below
Name: Type the name of the incoming email server.
Server: Type the IMAP address of the email server.
Port: Type the port no. of the email server.
Protocol: Select the protocol supported by the email server.
Security Type: Select the type of the security supported by the email server.
Email: Type the email address.
Password: Type the password of your email address.
Technician Group: Select the technician group that should be assigned when a new request is created from email.
Enabled: Toggle the switch to enable/disable the email address.
Primary: Toggle the primary switch to use this email if other emails are not working.
Filter Type: Select allow/disallow to create allow and disallow conditions
Email: Type the email address that should be evaluated with filter type.
Domains: Type the name of the domains that should be evaluated with filter type. (e.g. yahoo.com)
Keywords: Type the keywords that should be evaluated with filter type. System will look for keywords in email subject and body.
NOTE: Additional Information (Primary Email): Suppose Mr. Sam is sending an email to request@motadataservice.com to create a request from his email sam@example.com. System will communicate with Sam from request@motadataservice.com only. Later in some stage, request@motadataservice.com doesn’t work. In this case, system will look for primary email address. For further communication, system will use the primary email address until request@motadataservice.com comes up again.
7.2. Manual Incident Creation from Technician Portal
In this section you can create requests/incident from technician portal manually using the request form.
Go to Dashboard and directly from the dropdown available and click on ‘Create Request’- Fill up the required details and submit the request.

Request
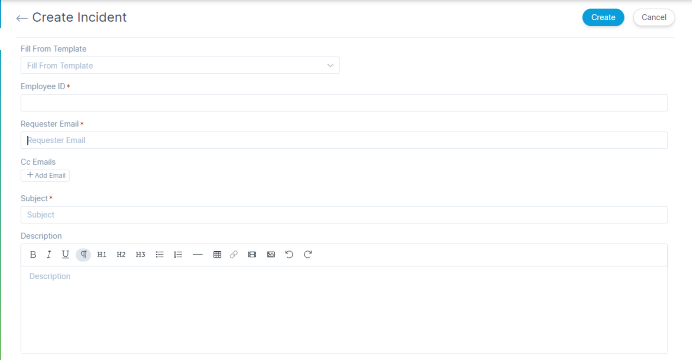
Create Request
Fill up the details such as Subject of the request, Email of the requester and other fields as shown in the form.
7.3. Request Form customization
In this section you can add extra customized fields to be included in the form while creating a request.
Example Scenario: For example, every request in an organization requires a follow-up date. This is the date by which a technician has to close the request. All SLA, KRA and KPI(s) of technician are computed using this date.
Go to Admin >> Request Management >> Request form
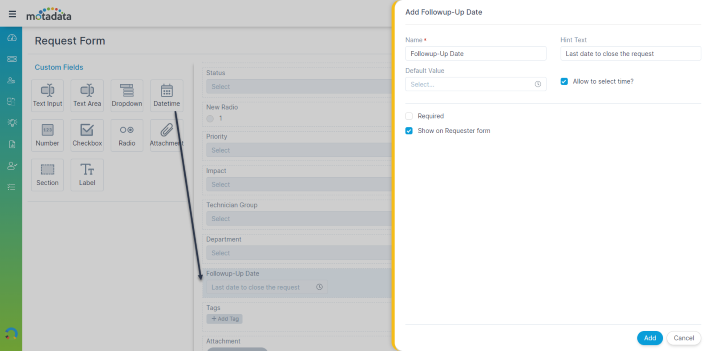
Request form
7.4. Manage Requests (Search/View Request Details)
In this section you can manage the list of the received or updated requests.
The list has main fields such as Subject Name, Requester Name, Status and created Date. Additional, fields to be shown can be selected from show/hide columns option available.
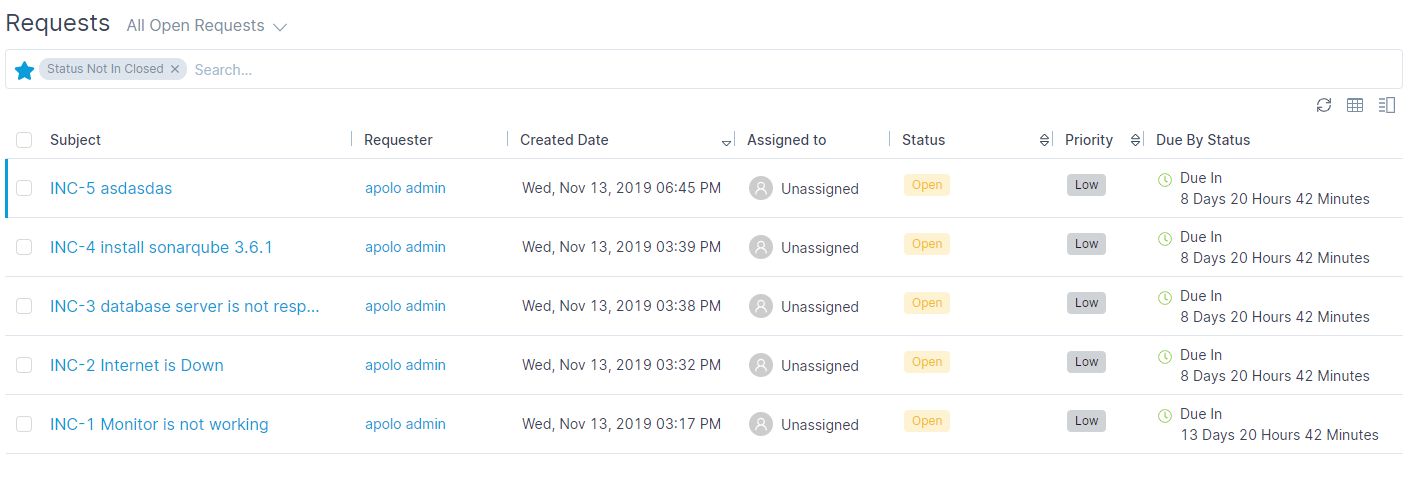
Request List
You can also search any requests with the keywords or different criteria.
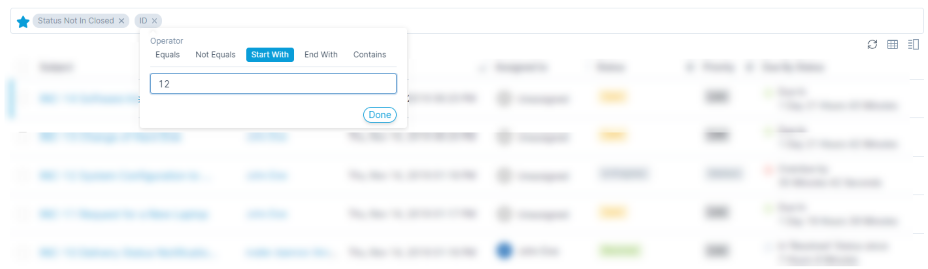
Search Request
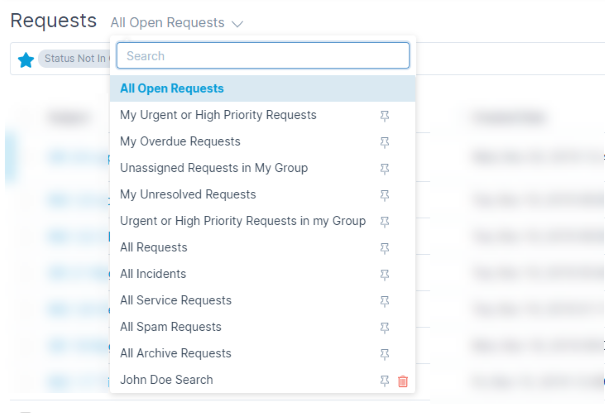
Search Request using pre-defined
7.5. Manual Technician Assignment
In this section, you can assign or re-assign the request to desired technician.
Go the desired Request and then click on assignee which would open a pop-up which contains a list of technicians.
Select the required technician, and the request gets assigned to the selected technician.
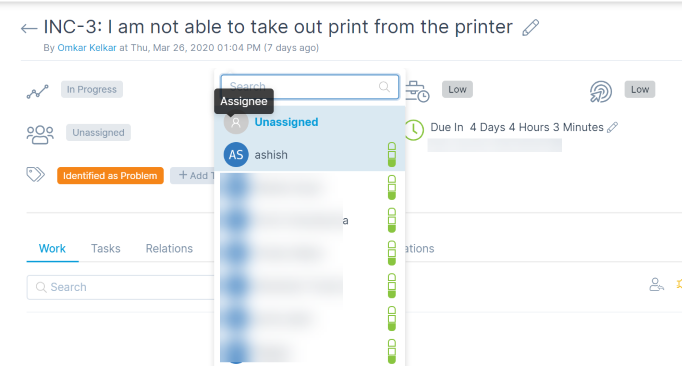
Technician assign
7.6. Automate Request Workflow & SLA
Automating Workflow works when someone does any activity on a request ticket and system compares the values of ticket with the conditions in the workflow. If the condition matches, system reads the action and applies on the ticket.
You can create a workflow for requests and Automate the process by defining as per the requirement.
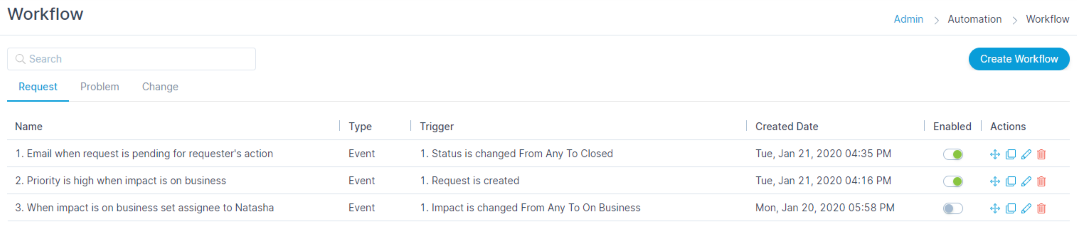
Request Workflow
SLA (Service Level Agreements) defines the commitment determined on basis of level of urgency, response time, and the time required for tickets to get resolved.
You can create an SLA using different conditions such as resolution date, time and its respective action.
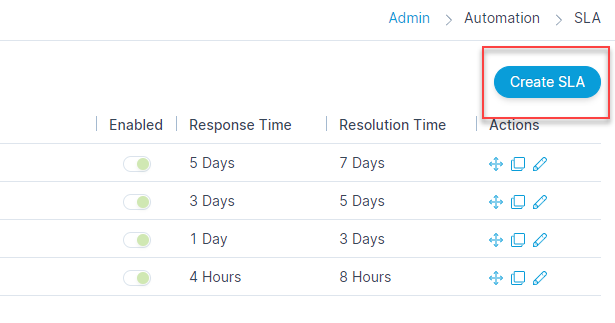
SLA
7.7. Request Update
In this section you can update requests directly by “Replying” to the requester from the detail page of the request.
Here, you can directly communicate with the requester for any queries and updates regarding the request
Addition to the replies, you can also change the Priority, urgency, Status and Impact of the request.
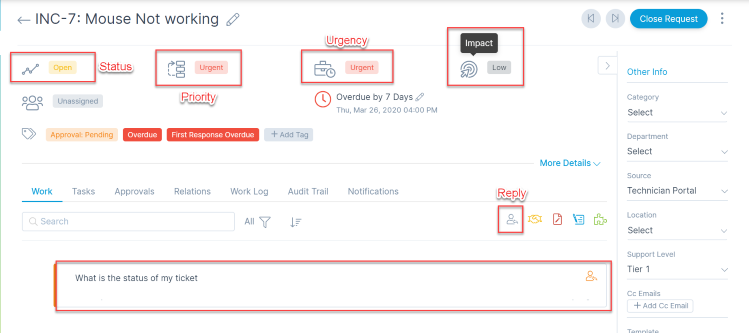
Update Request
7.8. Response Template Configuration
Here you can manage the content of the work templates. This makes sure that the responses provide sufficient information, grammatically correct and cuts the ambiguity.
You can create response template from Admin >> Request Management >> Response Template. A form opens which allows you to fill the details.
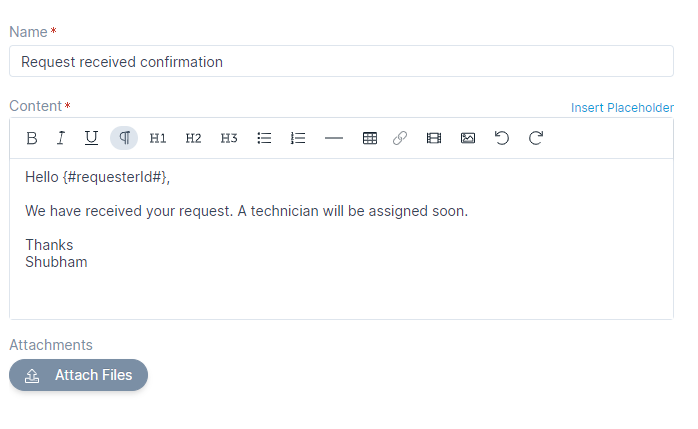
Response template
7.9. Resolution and Closure
When a request is received and a technician starts working on the same all worklogs are recorded for each respective request.
Once it is solved, the technician has a facility to fill up the resolution details for future reference and close the request manually.

Resolution and closure of request
8. Asset Management
Asset Management supports extended Asset Type Hierarchy and related properties.
It manages almost all the assets in the system and gives a visual cue to tell where and to whom the Asset belongs.
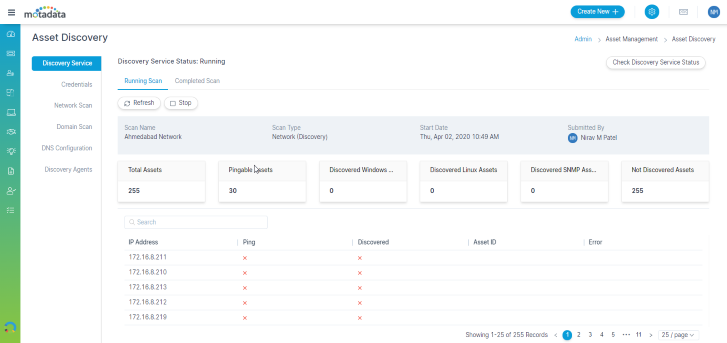
8.1. Auto Discover Asset
Asset discovery includes the overall scan of all pingable IT Assets in or outside a network.
Assets Discovery is supported Windows Domain and IP Range Networks
Go to Admin >> Asset Management >> Asset Discovery
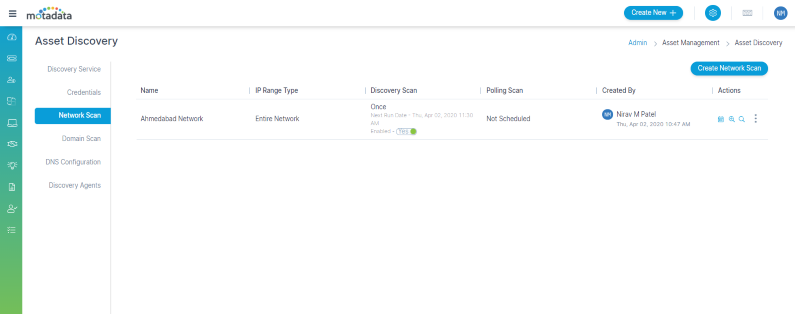
8.2. Add Network Scan
Here, we can add a criteria of the network we want to scan for the assets to be discovered.
You need to mention the network area, IP range and protocol type to be used.
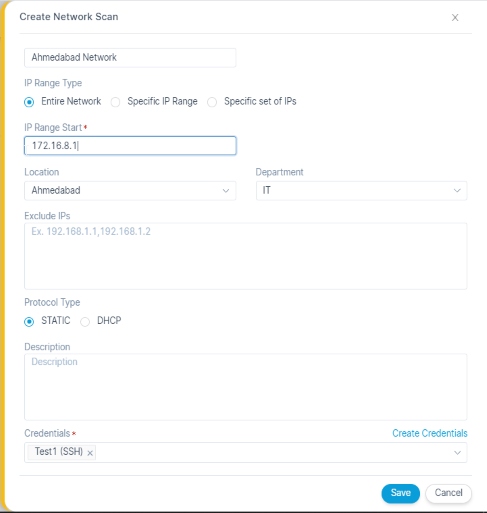
Network Scan