6.4. Creating a Service Catalog Template
A Service Catalog Template allows you to define a service. You define a Template in a particular Service Category (Learn more). A Template is defined with respect to the following:
Form fields that will capture custom data.
Specific workflow to automate the handling of the life-cycle of the Requests created using the Template.
Specific SLA to control the response and resolution time, and escalation.
Specific Approval workflow to add supervision.
Create associated task for Requests created using the Template.
We are going to create a Template called On-Boarding that will be used to create a Service Item which will be used by the HR dept to create Request for on-boarding of new employees in the Marketing department. Learn about the Use Case.
6.4.1. New Service Catalog Template
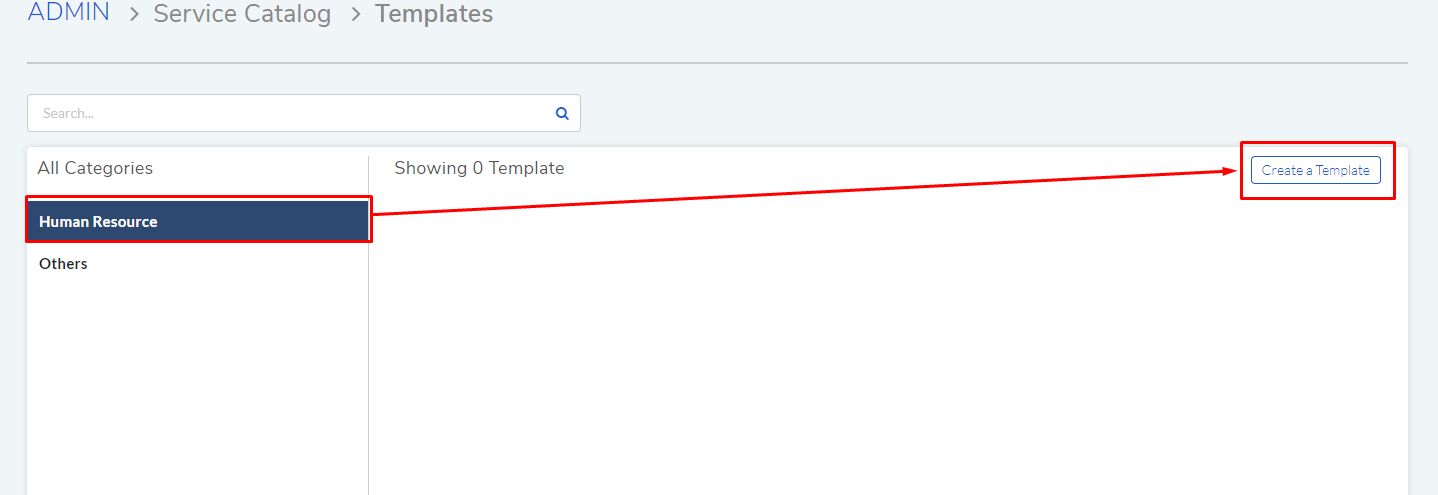
We go to Admin (A Navigation tab) >> Templates (under Service Catalog).
Templates page opens. Here we can see all existing categories and their templates. We select the category Human Resource (Learn how we created the Category) and then we click on Create Template.
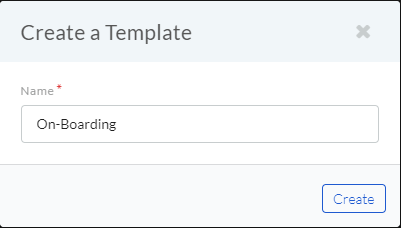
A dialog box opens, asking for a name, and we give the name On-Boarding.
A new page opens, here we have to create a form, define a workflow, create a SLA and create an Approval workflow, and add tasks.
6.4.1.1. Create Form
Note
Related Topic: Working with Form Fields
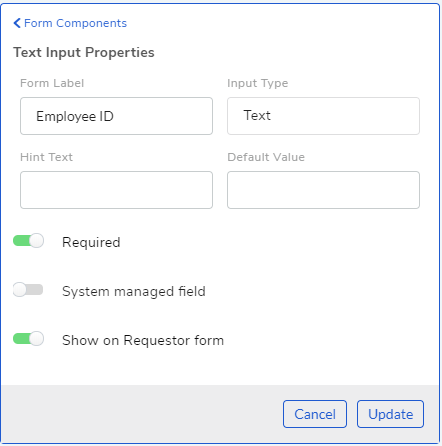
Using drag and drop we create the following form:
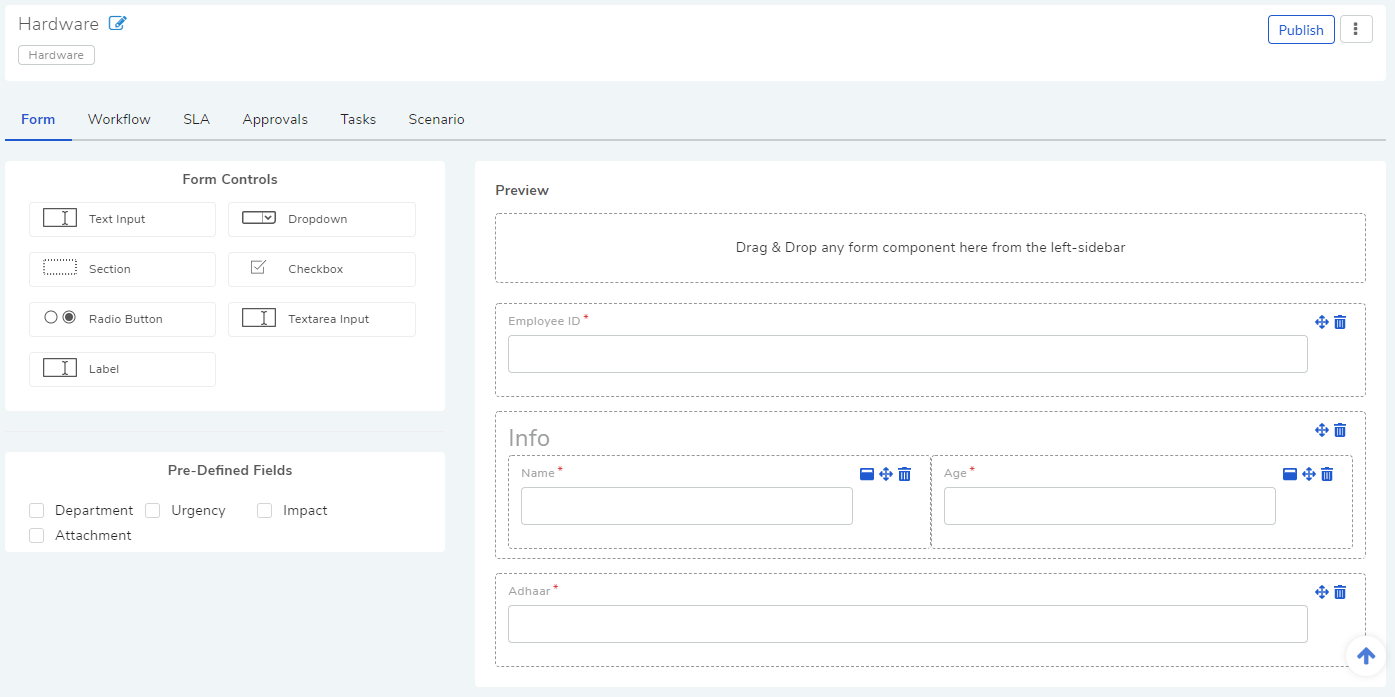
All of the fields are Text Fields. Learn about the different types of fields. You can access the properties of a field by clicking on it. We have set the fields to be compulsory and visible to the requesters.
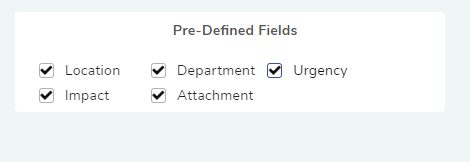
You can select what default fields to show on the Service Item Request form.
6.4.1.2. Create Workflow
Workflow automation enables Administrators to channel tickets through a funnel with predefined rules. Administrators set the rules that interact with the ticket details (Department, Type, Support Level, etc.) and even change them if required.
Implementation Behavior:
Workflow created here will work specifically for Requests created using a Service Item having the On-Boarding Template.
The Workflow created here works parallel with the generic WorKflow in Admin. Both the Workflows might get initiated together and perform their own actions after checking their conditions.
The Template Workflow is initiated based on the When Condition of a workflow.
Note
Related Topic: Learn how to create a Custom Workflow.
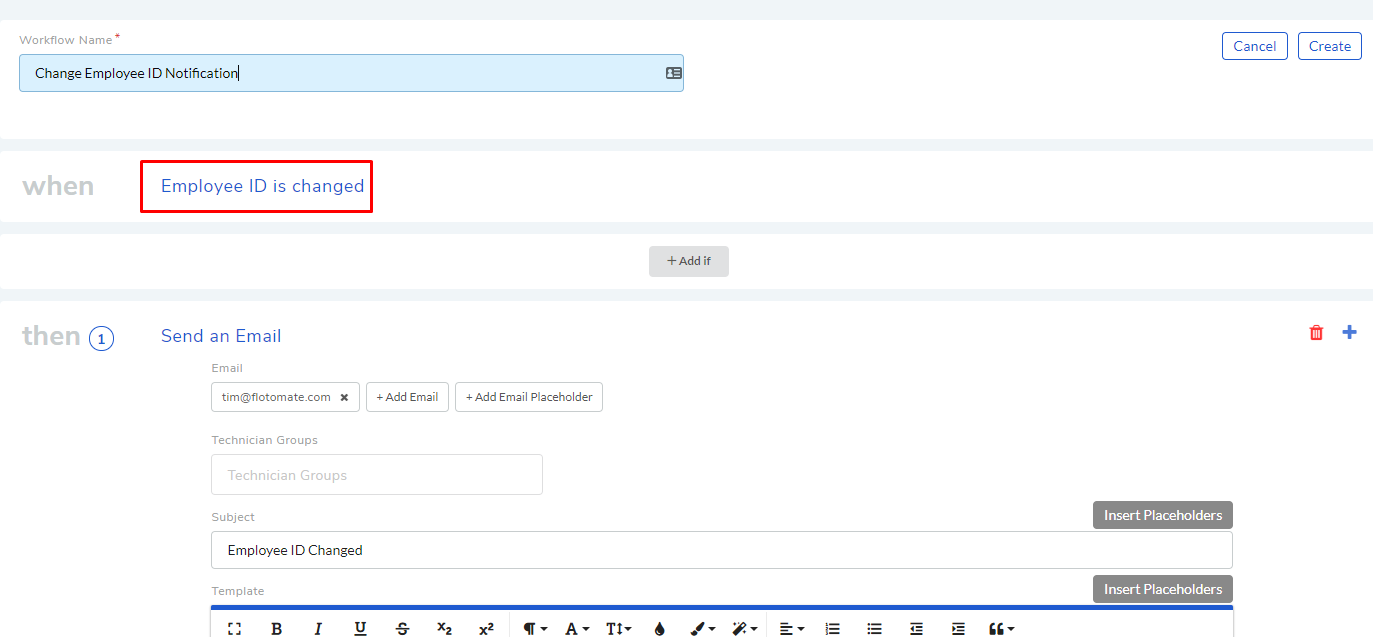
We click on the Workflow tab. Here we see all Workflows specific for that Template, if any. We click on Create a Workflow button to add a new workflow.
In the new page, we define a name, add parameters and select actions.
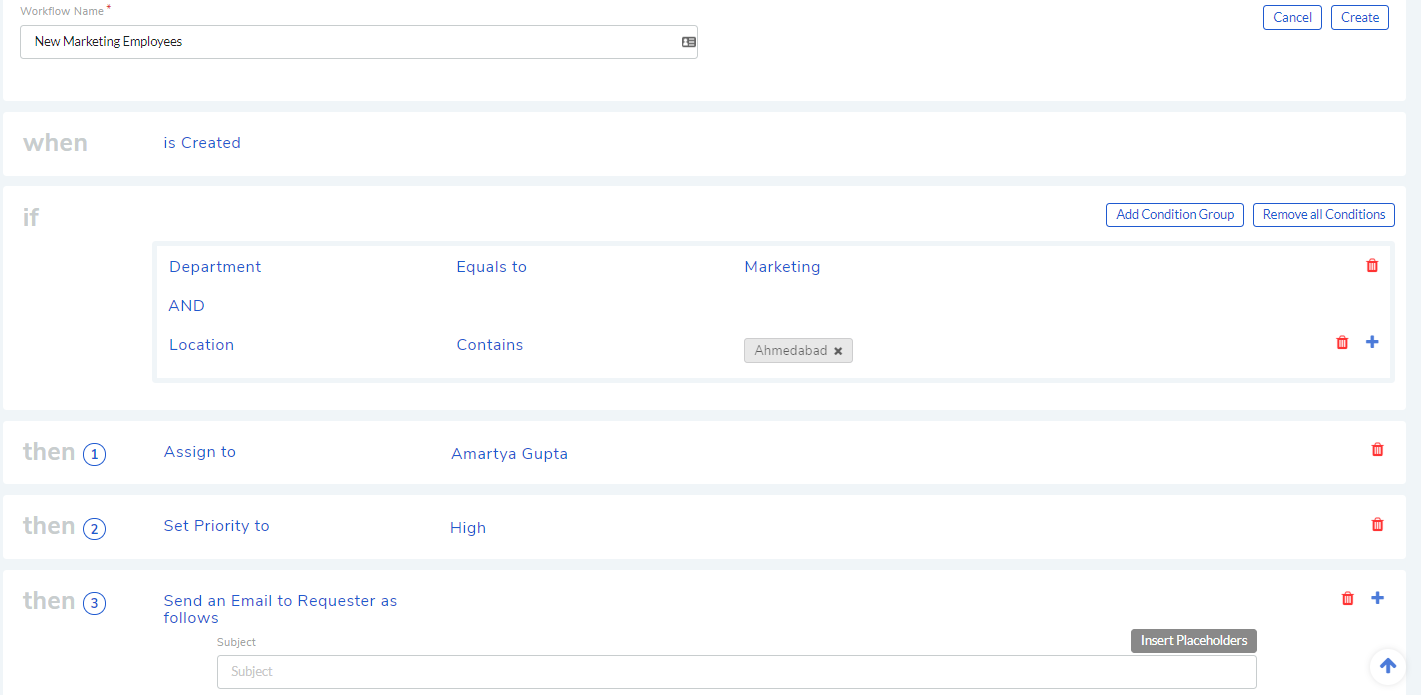
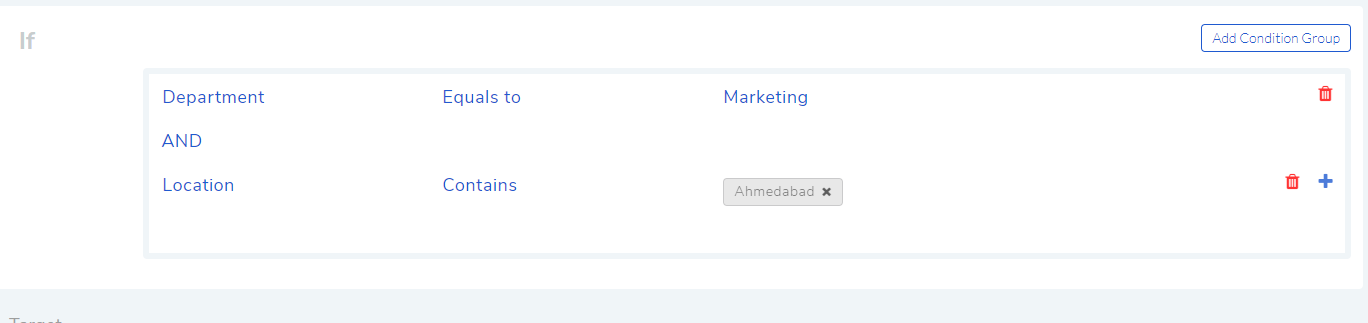
The workflow wil work on Requests satisfying the parameters, which are Department equals to Marketing and Location equals Ahmedabad.

Following actions are taken when a Request satisfies the parameters:
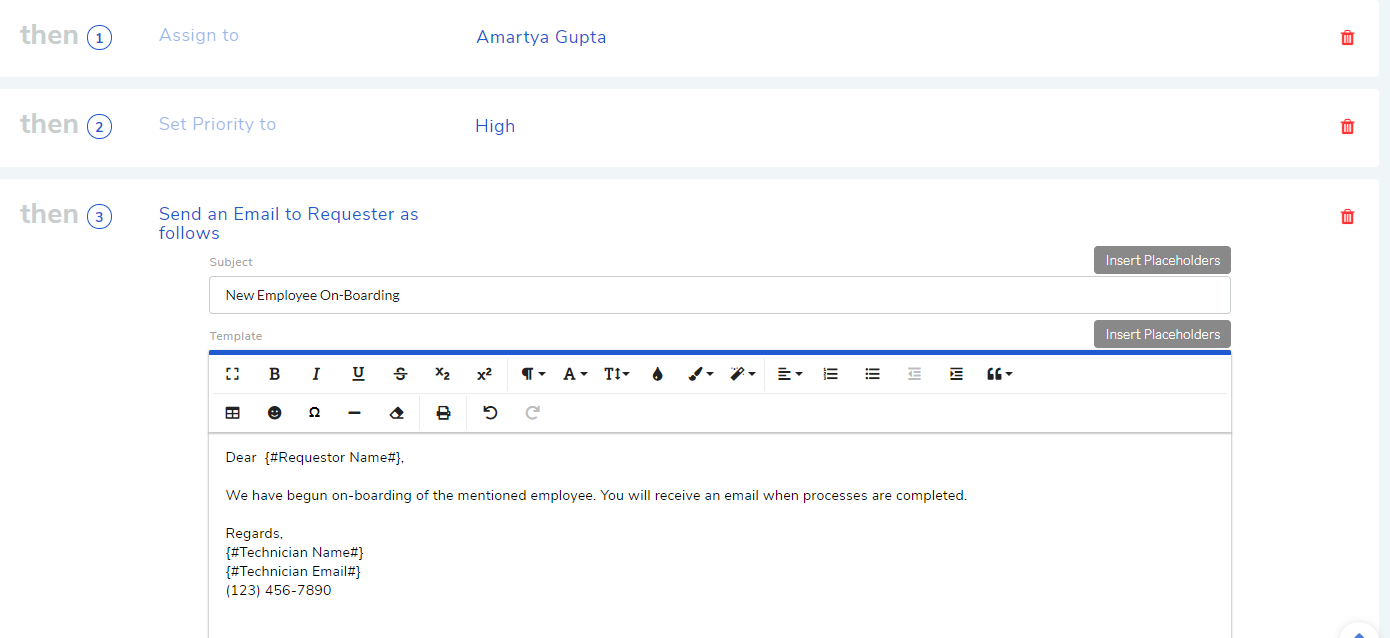
Request is assigned to a Technician.
Priority is set to High.
An Email is sent to the Requestor.
Fields created in the Form section can be used to make conditions as part of a template workflow. Custom fields are automatically added to the event list, Add if list, and Add Action list. For example, We can create an event condition with the field Employee ID:
6.4.1.3. Define SLA
Service Level Agreements define the commitment between Requestors and the IT service provider in an organization. SLAs determine the level of urgency, response time, and the time required for Requests to get resolved, and they also govern the escalation rules when Requests are not resolved or responded within a stipulated time frame. SLAs can be set for a department and a sub-department.
Implementation Behavior:
An SLA created here will work specifically for Requests created using a Service Item having the On-Boarding Template.
Template SLA will decide Response and Resolution time of Requests created using a Service Item (with the On-Boarding Template).
The system SLA will not work along side Template SLA.
Note
Related Topic: Learn more about Create a SLA.
We click on the SLA tab. Here we can see all existing SLA’s specific to the Template, if any. We click on Create an SLA.
In the new page, we set the following things:
We give a name, set Operational Hour Type and Department.

We set the following parameters. The SLA will be valid for Requests satisfying the below mentioned parameters.
Then we set the minimum response and resolution time, and escalation in case of violation.
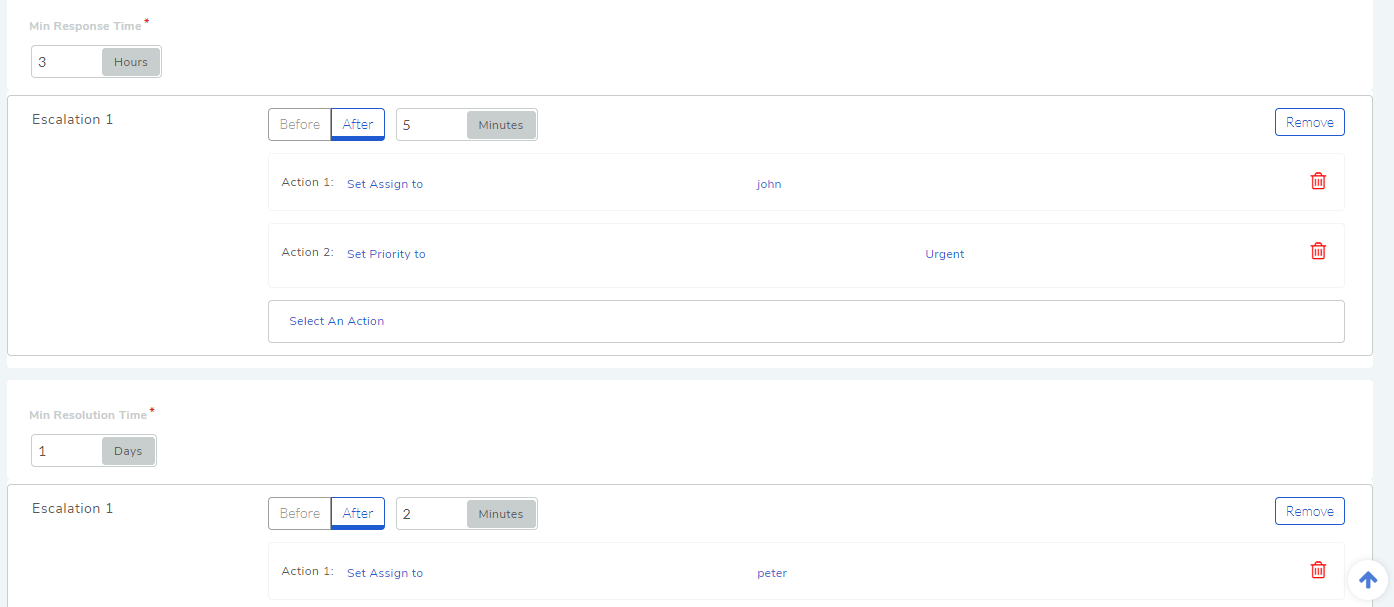
We set the response time as 3 hours and on violation the assigned Technician and Priority is changed. We set the Resolution time as 1 day and on violation the assigned Technician is changed.
6.4.1.4. Approval Workflow
Approval Workflow helps Administrators to automate the Approval process for a Request. An Approval Workflow, when initiated, creates an Approval and adds approvers to it.
Implementation Behavior:
An Approval Workflow created here will work specifically for Requests created using a Service Item having the On-Boarding Template.
The generic Approval Workflow in Admin doesn’t work in Requests created using a Service Item.
Note
Related Topic: Learn more about Approval Workflow
We click on the Approvals tab. Here we can see all existing Approval Workflows specific to the Template, if any. We click on Create an Approval.
In the new page, we give a name, parameters and actions:
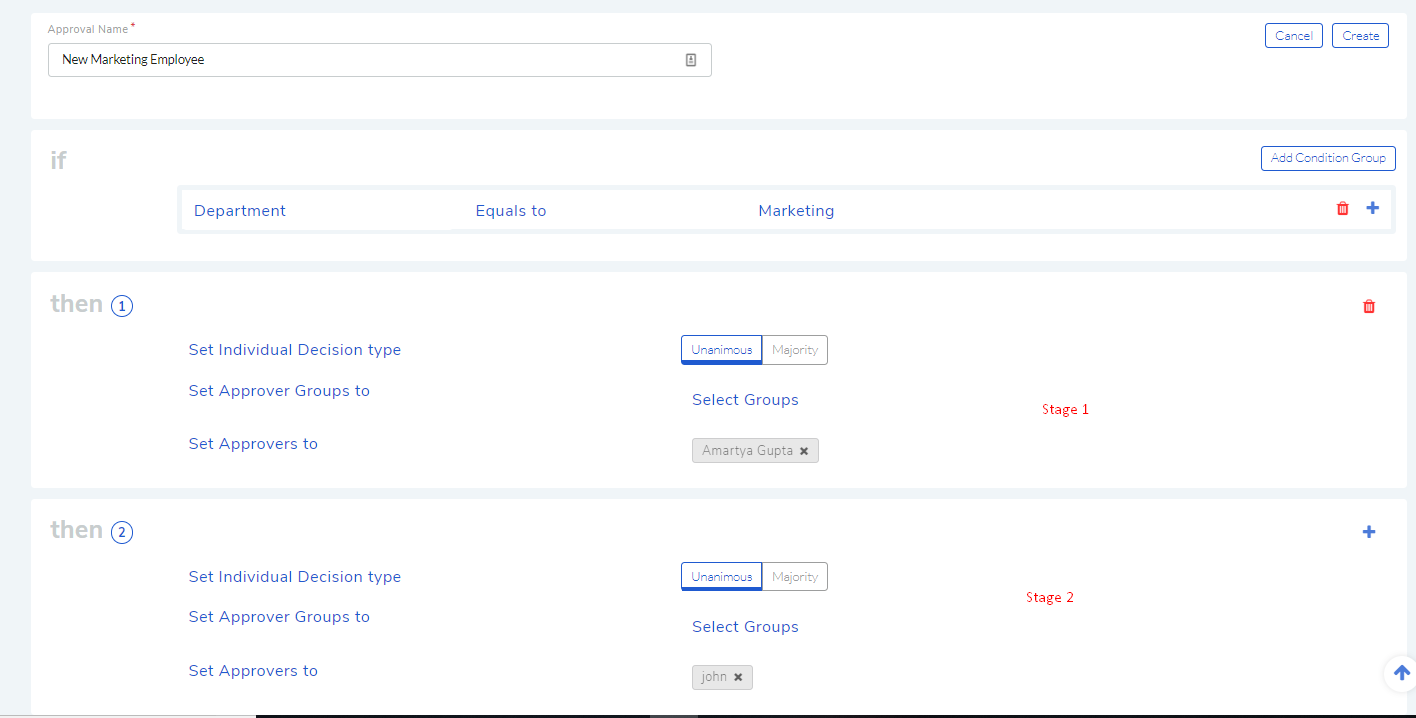
Any Request (made using the template) having the Department Marketing will have the following output:
A two stage Approval will be created.
Each stage of the Approval will have a single Approver.
Stages will have an order (Learn More)
6.4.1.5. Adding Tasks
Note
Related Topic: Learn about Managing Task
We can pre-define tasks that will be added to the Request. We can break the tasks stage wise; meaning tasks at one stage has to be completed to move to another stage. We click on the Task tab.
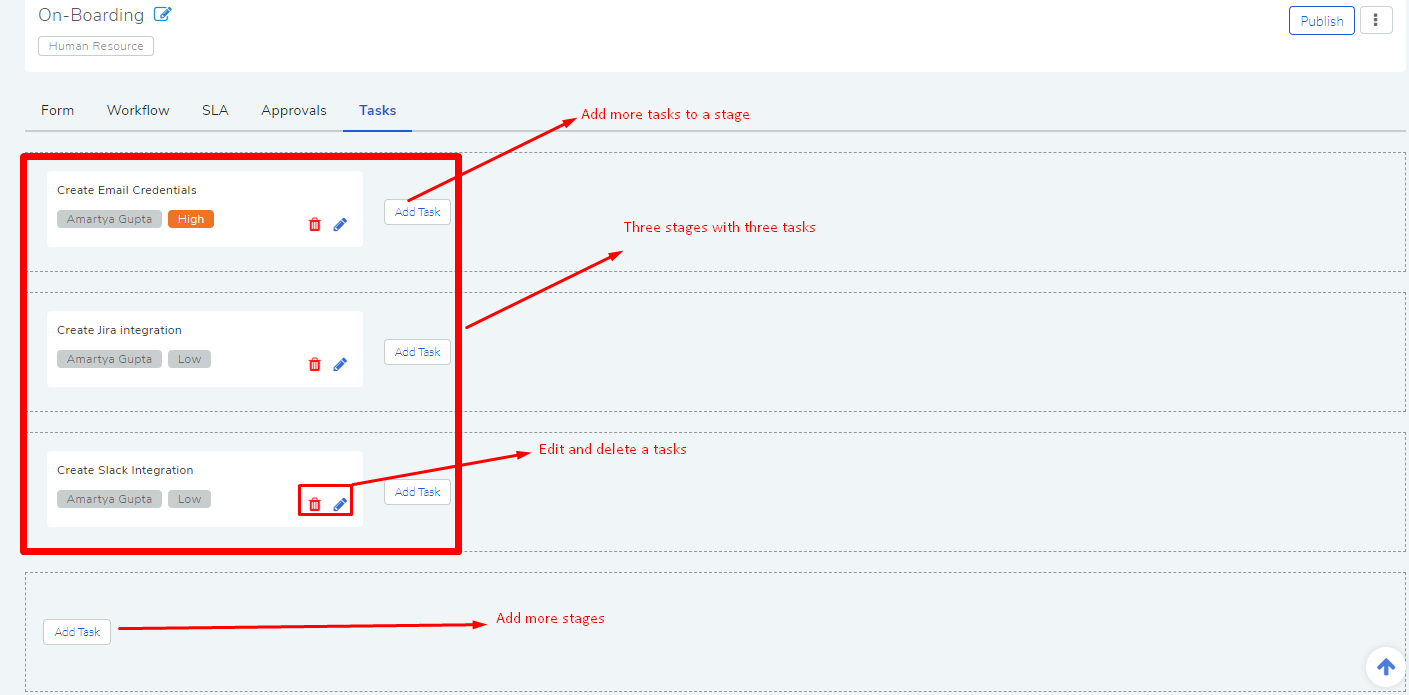
We create three stages (we define a stage by adding a task to it) with each having one task.
Things to Remember:
The Task thread created here will not be disturbed by a Task created manually in the Request.
Tasks of one stage is visible at a time.
6.4.1.6. Create a Scenario
We can create scenarios specifically for Requests created using the Template. A scenario is a set of actions ,when applied, that can modify a ticket. We can create n number of scenarios in a template each with its own set of conditions.
Under the Scenario tab, click on Create a Scenario.
Create a scenario in the new page. Learn how to create a scenario.
After creating the scenario, we can enforce the scenario on Request tickets created using the template. Learn more.
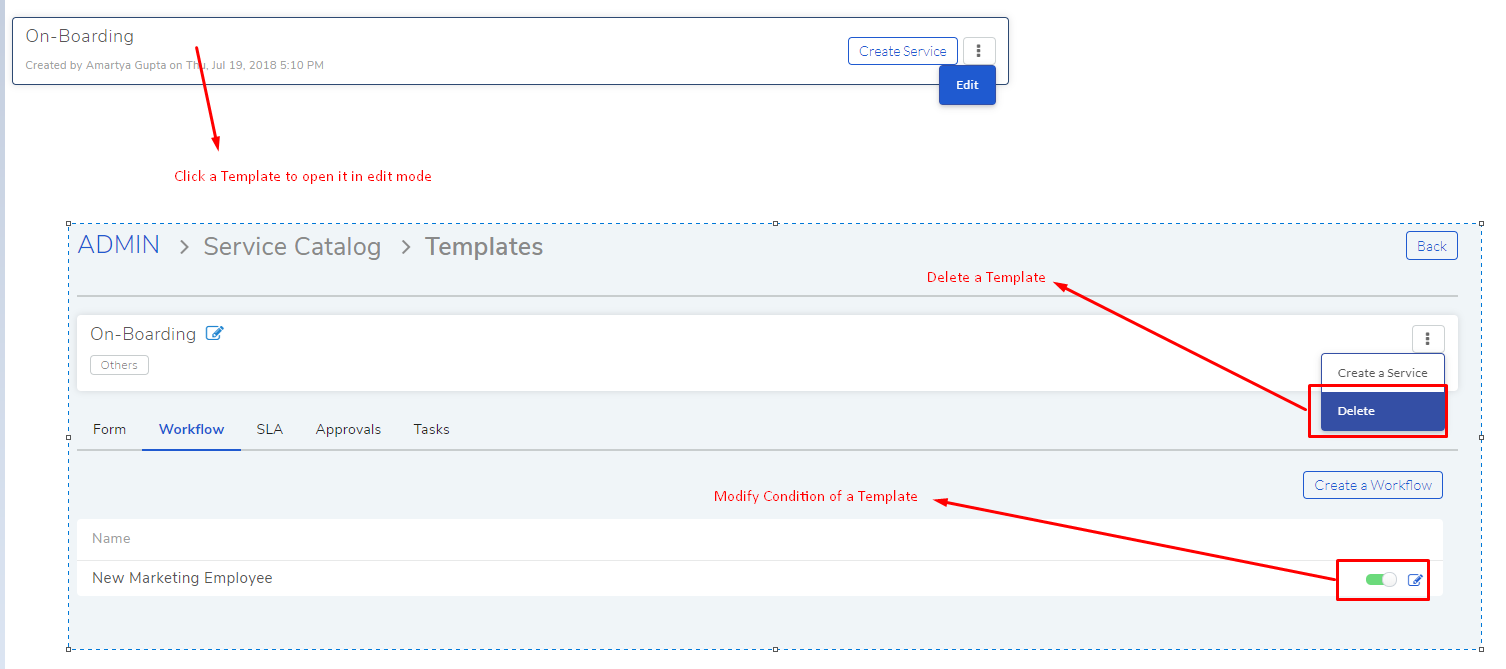
Now we are done with everything. We have two options now: either publish the Template or leave it as Draft. We publish the Template using the Publish button. The Template gets activated.

You can edit/delete the Template (along with its conditions) anytime later.