9.1. Motadata High Availability Server Setup
9.1.1. What is High Availability Setup?
High availability refers to the systems that are durable and likely to operate continuously without failure for a long time. HA aims to ensure an agreed level of operational performance, usually uptime, for a higher than normal period by ensuring service and data recovery during an unplanned disruption.
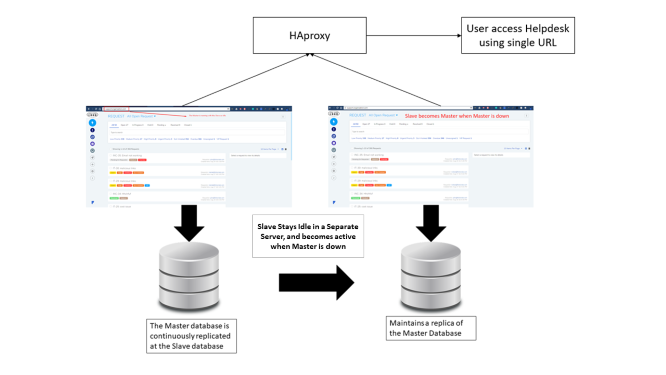
In a High Availability setup, there are mainly 3 servers such as, the main server which is called as ‘Master’, the secondary server which is called as Slave and the other is an HA-proxy Server.
Master is the main (IT Service Desk) server which is accessed by the users, and the Slave remains idle. The data of the Master’s database is continuously replicated in the Slave side’s database. During downtime, Slave becomes the Master with its synced Database same as the Master (Main Server).
Both Master and Slave are connected to the HA-proxy server. The proxy server acts as a load balancer that redirects traffic to the Slave when the Master is down.
For example, An organization maintaining an HA has to have two separate Servers, one for Master and other for Slave, this is to ensure that in an unforeseen event like a fire, natural calamity, etc. when the Master is down, the Slave can be kept alive from the last point of recovery.
High availability setup can be used for a planned outage of the Service Desk for the purpose of maintenance.
High Availability can be used in the event of a disaster recovery of data.
9.1.1.1. Minimum Hardware Requirements HA Observer and HA Proxy
You have to install the product build in two separate servers (with different environments), one as the Master and other as the Slave. Both the servers have to have separate IP addresses.
Minimum 4GB of System RAM.
Minimum Four Core Processor.
Minimum 100 GB of Hard disk space.
Download of Base OS:
You need Ubuntu-18.04 Server OS for this setup. Follow the link to download the OS: Download Link
9.1.1.2. Installation of Master and Slave
Copy release build installer (service_desk_master_CI) to target machine.
Open terminal and navigate to the directory where the build is.
Make Sure you have the permission to execute the file. If there’s no permission then you can change it using the following command:
sudo chmod 777 service_desk_master_CI
Run Installer by using the following command:
sudo ./service_desk_master_CI
Enter the password when prompted. The password will be the same as the system admin password.
Enter the file where the key needs to be saved. Here, just press enter and it will auto-add the key path.
After adding the ssh key, it will prompt to enter the username for the server ssh
9.1.2. Setting up HA Observer Server
Note
PLEASE DO NOT USE “sudo” TO INSTALL ‘INSTALLER PACKAGE’
PLEASE INSTALL ONLY AFTER TWO I.E MASTER AND SLAVE MACHINES ARE READY
PLEASE USE SAME USERNAME ON SSH MASTER AND SLAVE MACHINE
PLEASE USE COMMON PASSWORD ON SSH MASTER AND SLAVE MACHINE
Step 1: Download HA Observer build on HA machine: Download Link
Step 2: Assign Execute permission using below command:
chmod 777 service_desk_ha_CI
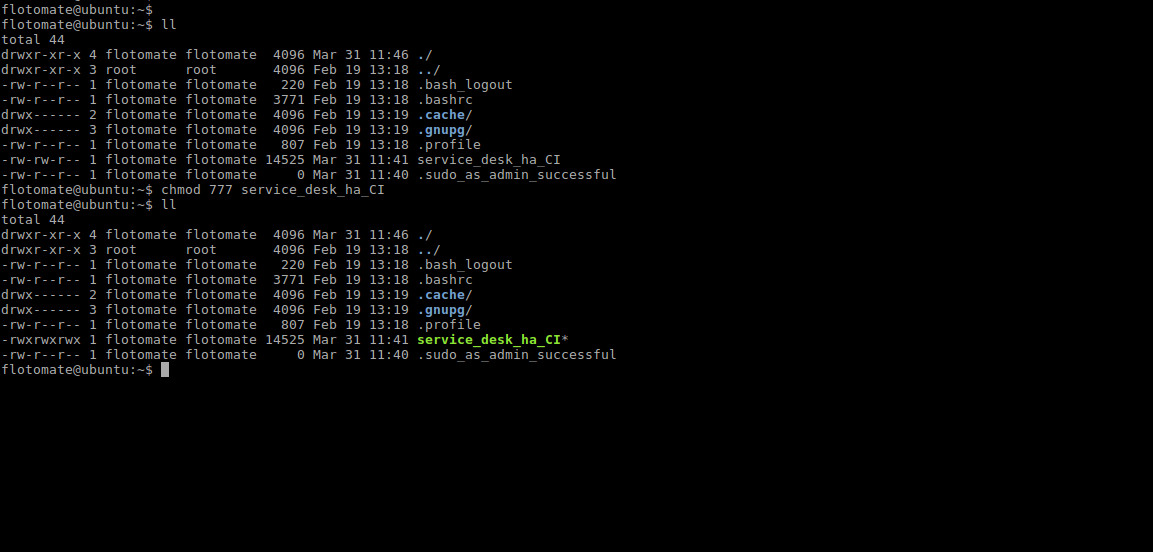
HA Observer
Step 3: Run HA observer build ./service_desk_ha_CI

Run Observer
Step 4: It will prompt for generation of the public key. Press Enter for generating the Key.
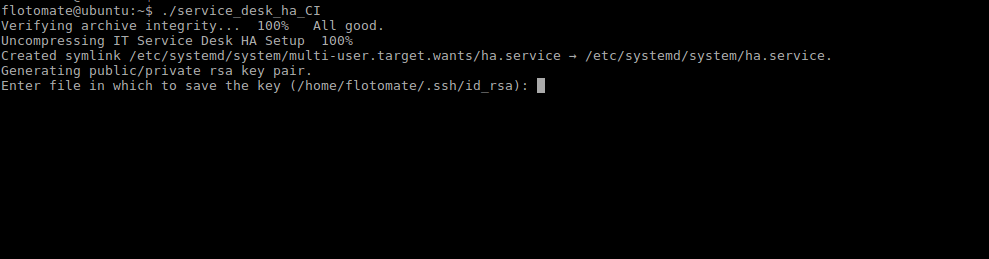
Run Observer
Step 5: After generating public key, it will prompt to enter the Passphrase twice. Press Enter for both prompts
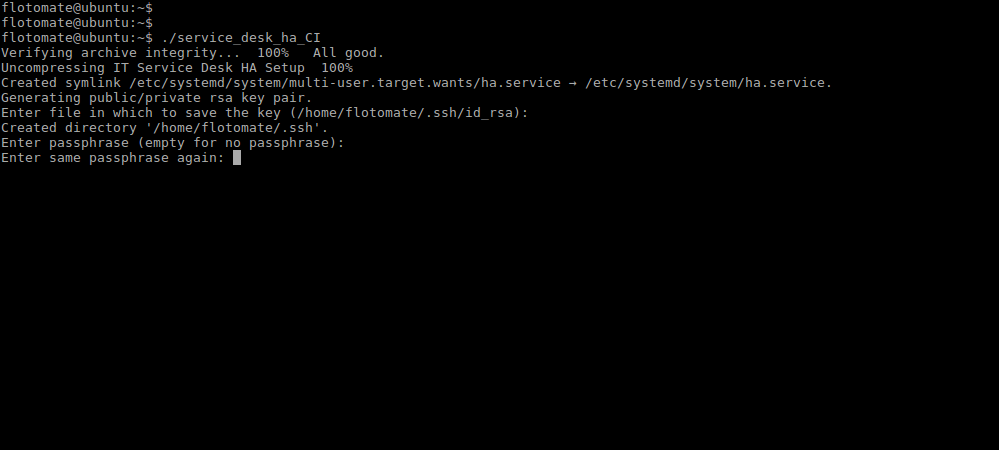
Run Observer
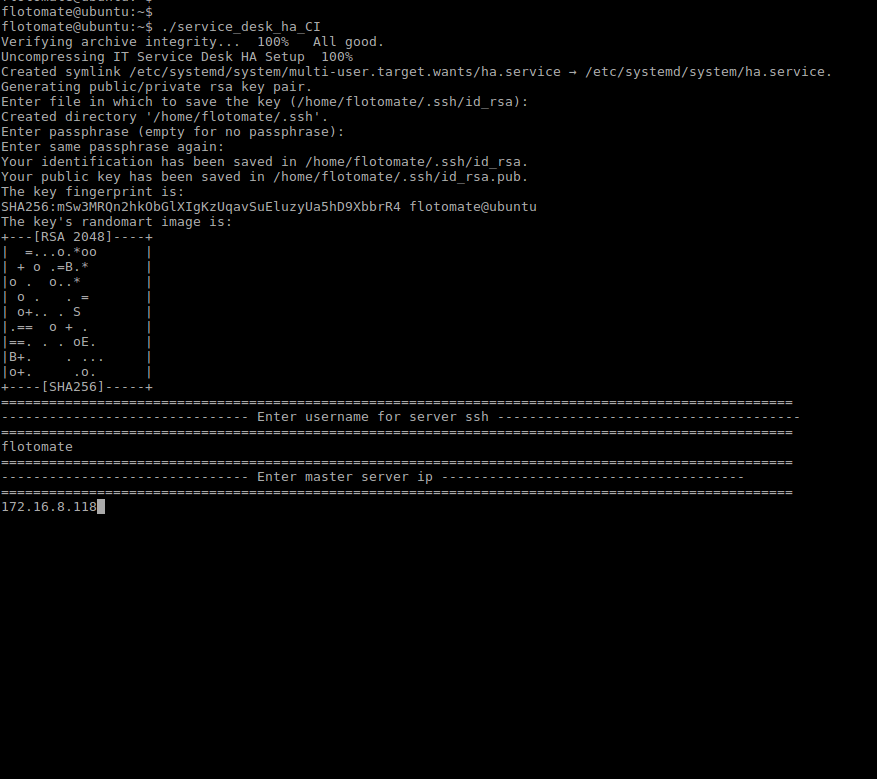
Step 6: It will prompt to “Enter username for server ssh”. This Username will be Common for both machines i.e Master and Slave
Note: Here *flotomate* is entered just for example. User needs to enter respective Machines Username
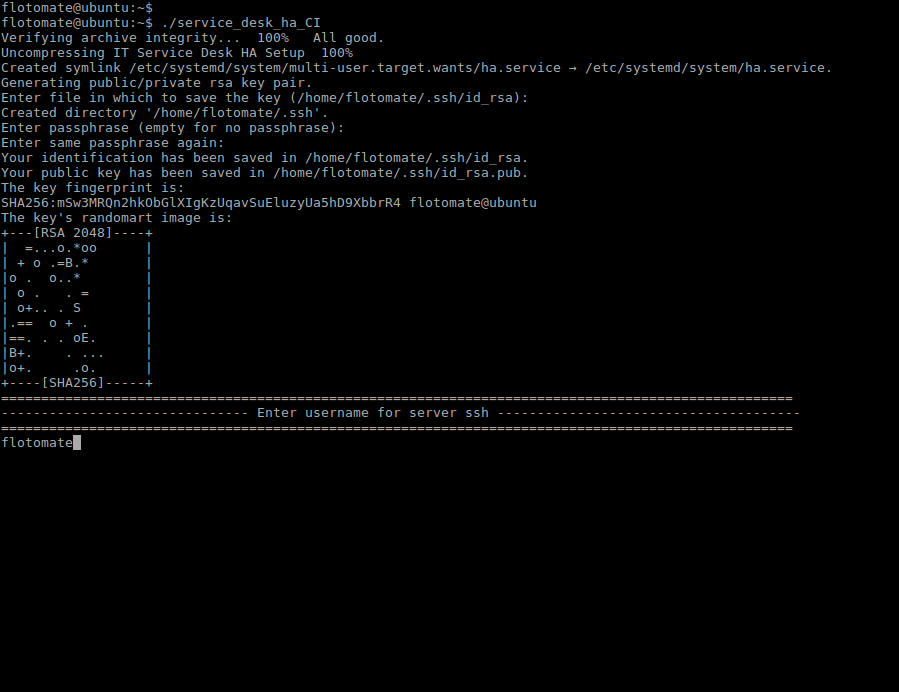
Run Observer
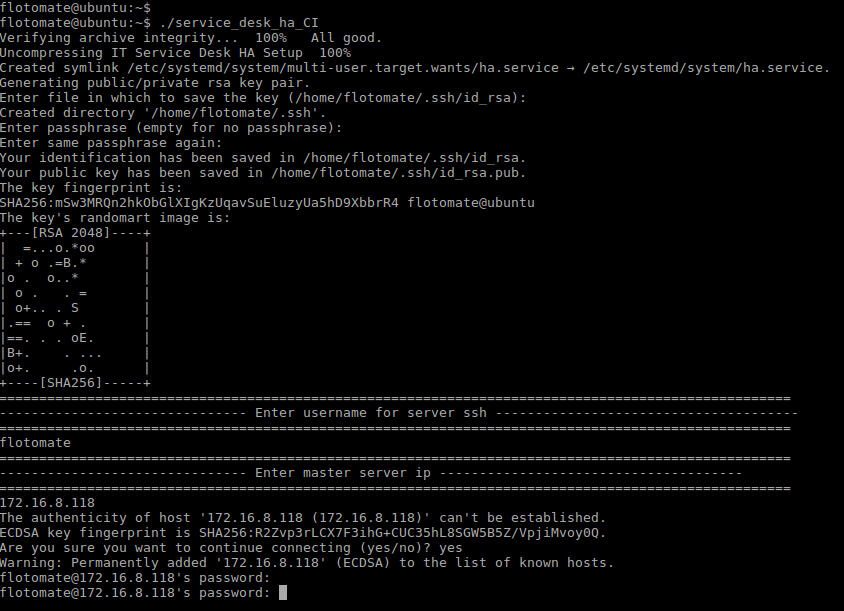
Step 7: Enter the “Master server IP Address”
Note: Here entered IP is just for example. User needs to enter respective Master’s IP
Run Observer
Step 8: After entering the IP Address, it will prompt for Password twice. Here, the password will be respective machines password.
Run Observer
Step 9: It will then prompt to Enter Slave’s Server IP and password.
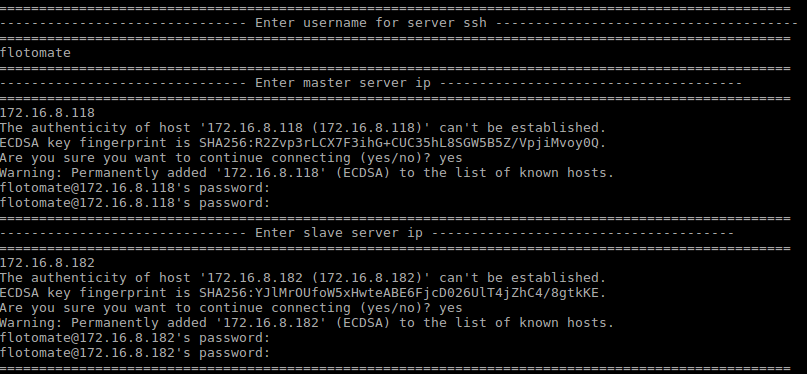
Run Observer
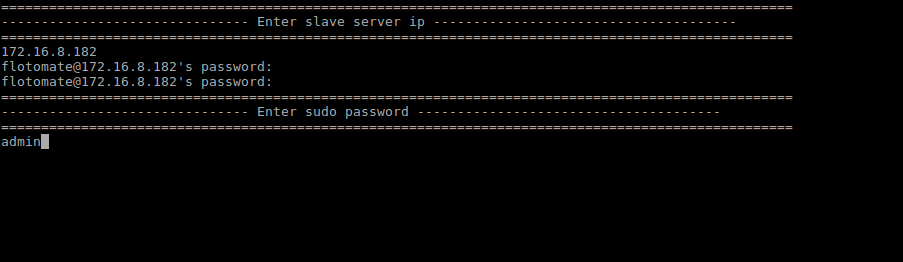
Step 10: It will then prompt to “Enter sudo password” . This password will be the same as the common password entered in Step 8.
Note: Because this will be Root i.e. Sudo Login, the password will be visible.
Run Observer
Step 11: After entering the sudo password, it will automatically start configuration of Slave and will show message as “Enter slave config started”
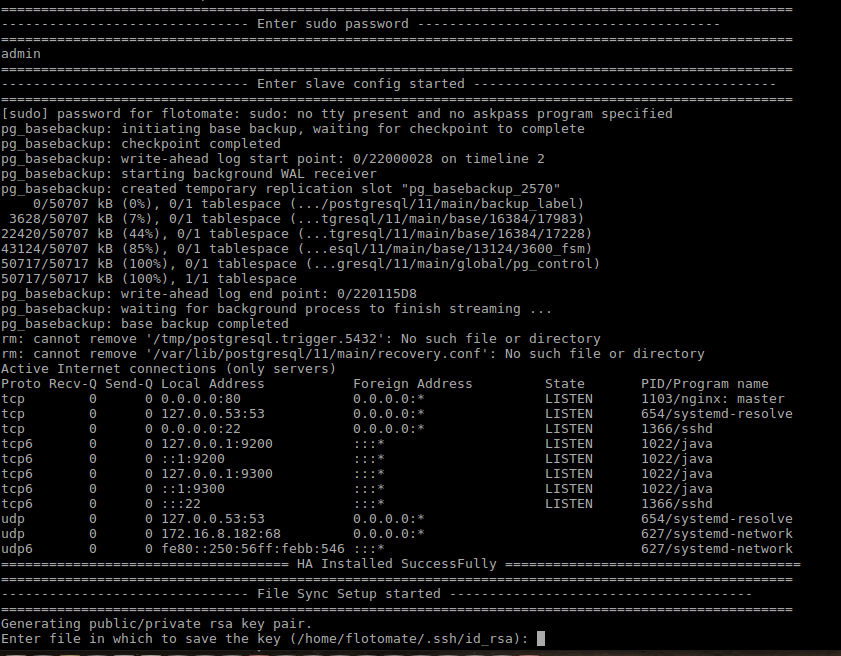
Run Observer
Step 12: After finishing the above step it will show message “HA Installed SuccessFully”. It will then automatically start the mechanism of file sync showing message “File Sync Setup Started”

Run Observer
Step 13: After the File Sync Setup started, it will prompt for “Entering Key” for generating public/private rsa key pair. Press Enter in response.
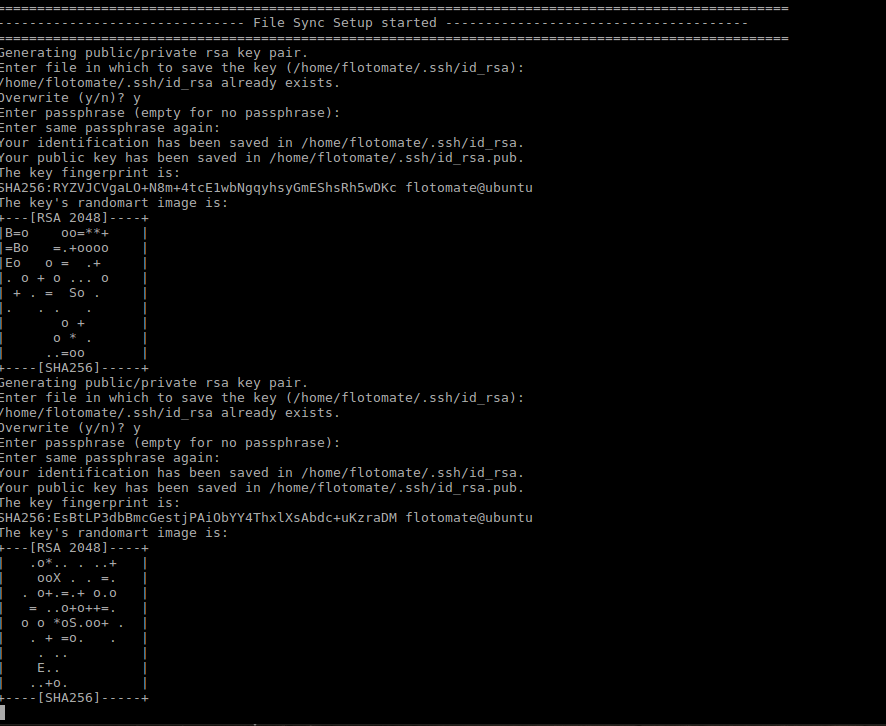
Run Observer
Step 14: After entering the Key, File Sync Installation Setup finishes. With this HA Observer Installation also finishes.

Run Observer
9.1.3. Setting Up HA-Proxy Server
High Availability
Note: HA-Proxy is a popular open source load balancer. You can use any other load balancer.
A HA-Proxy (also known as a Load Balancer) is a solution to distribute a web application across multiple servers. In the HA setup, a HA-Proxy routes the traffic to the Slave server (after becoming a Master) when the Master is down.
Note: HA-proxy requires a separate IP. HA-Proxy is a separate server from the Master and Slave
We will be using HAProxy stable version for HA setup. Your server needs to have an internet connection. Run the below commands from the terminal:

HA Proxy
Step 1: Log into the HAproxy server and open a terminal as root.
Step 2: Now you need to configure the Configuration file of HAproxy using the following command.
sudo nano /etc/haproxy/haproxy.cfg
Step 3: Copy paste the following at the end of the file and save it.
defaults
        log     global
        mode    http
        option  httplog
        option  dontlognull

        timeout connect 5000
        timeout client  50000
        timeout server  50000

        errorfile 400 /etc/haproxy/errors/400.http
        errorfile 403 /etc/haproxy/errors/403.http
        errorfile 408 /etc/haproxy/errors/408.http
        errorfile 500 /etc/haproxy/errors/500.http
        errorfile 502 /etc/haproxy/errors/502.http
        errorfile 503 /etc/haproxy/errors/503.http
        errorfile 504 /etc/haproxy/errors/504.http

frontend http_front
 bind 10.120.0.113:80 //haproxy ip address
 stats uri /haproxy?stats
 default_backend http_back

backend http_back
 balance roundrobin
 mode http
 server ubuntu 10.120.0.109:80 check // active server ip address
 server ubuntu 10.120.0.114:80 check backup // passive server ip address
Now you need to restart the HA proxy using the below command:

Restart Server
Important
The passive server takes approx 5-8 minutes to come up when the active server goes down.